Creating the app
Create the Customer Management app from scratch and get to know the workspace where everything else is going to happen.
Everything in Keplin lives inside an app: the data model, the screens, the APIs, the scripts, the theme, the users. The first step of the guide is therefore to create the Customer Management app — it takes less than a minute — and to understand the workspace that opens next, because that is where you are going to spend the rest of the guide.
Creating the Customer Management app
- In the platform sidebar, click New app.
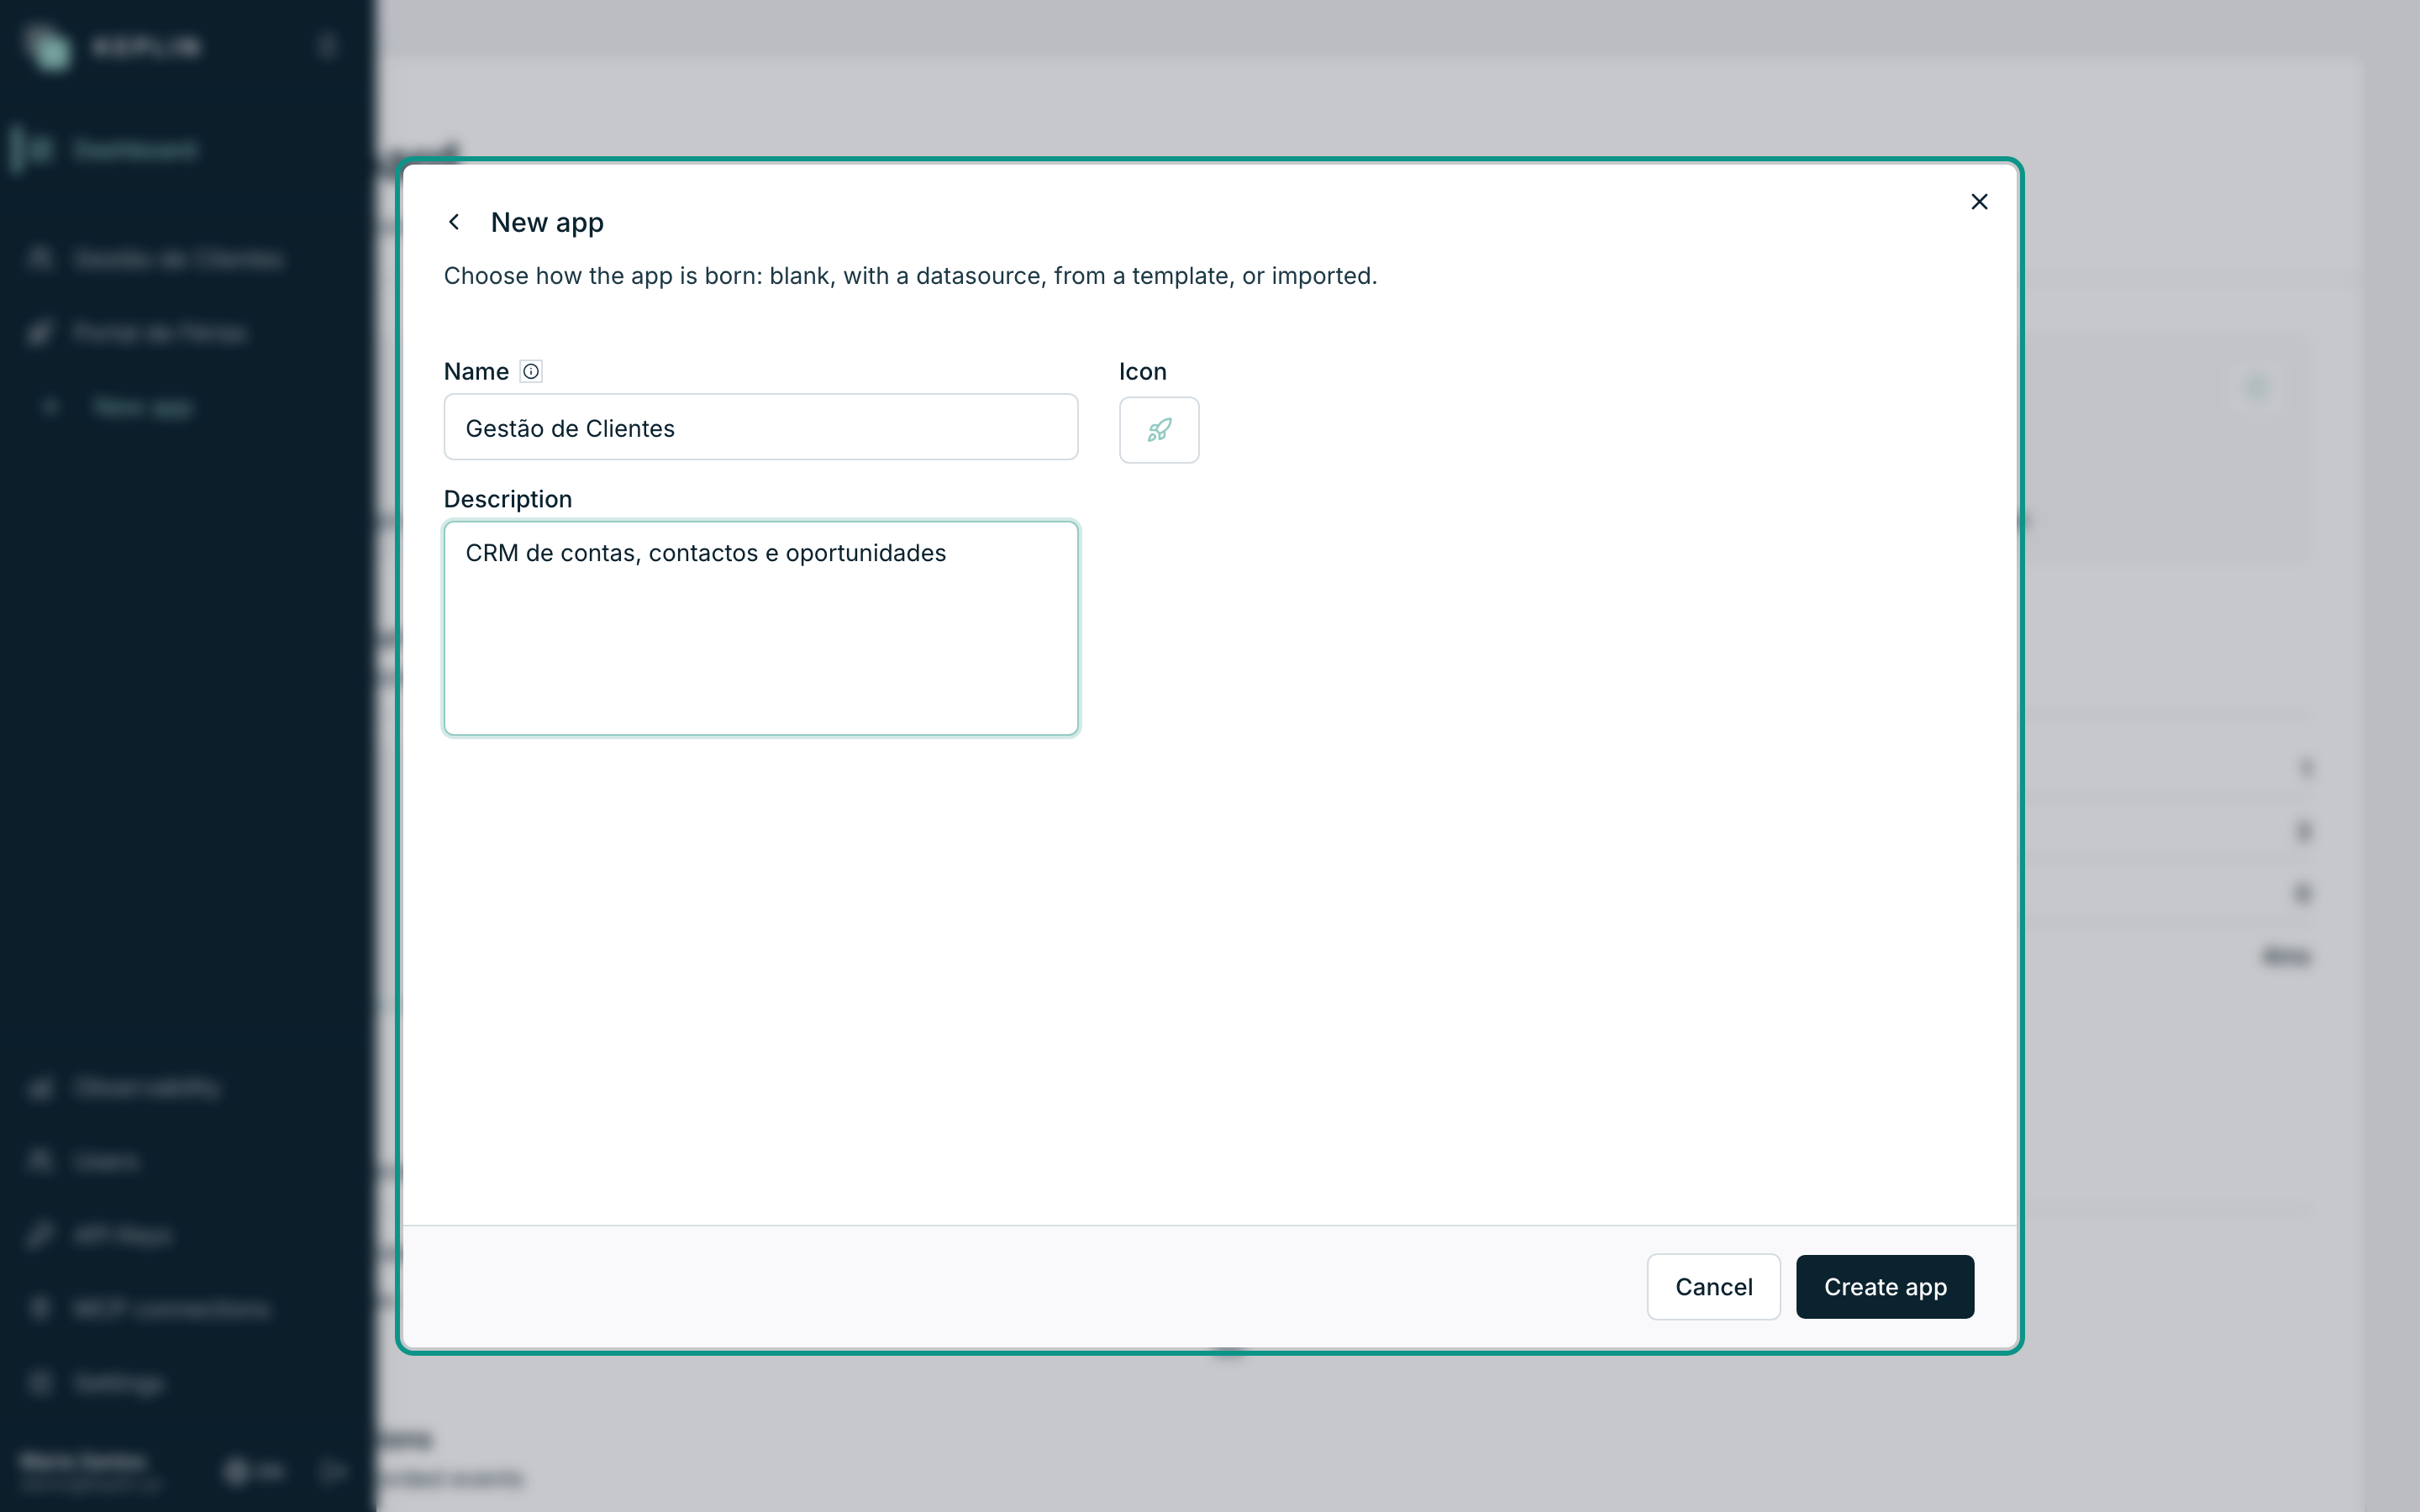
- The New app dialog opens, with two tabs: Create from scratch and Import package. Stay on Create from scratch — importing is for installing an app that somebody exported, and that is not our case.
- In the Name field, type
Gestão de Clientes. - Notice the note next to the name: the slug is derived automatically from the
name. The slug is the app's identifier in the addresses — for this name it
becomes
gestao-clientes, and it is through it that the app will answer at/app/gestao-clientesfurther along the guide. - In Description, write something like
CRM de contas, contactos e oportunidades. It is optional, but it appears in the list of apps and in the sidebar — six months from now you will be grateful. - In Icon, pick an icon to your taste — it is the app's symbol in the list and in the platform menus.
- Click Create app.
The app is created and opens immediately in its workspace, with the Overview tab in front.
Note
Only platform administrators and developers create apps. If you do not see the New app button, ask an administrator to give you the right profile in Users.
The workspace of an app
The workspace is where an app is built: a tree on the left with everything the app has, and an area of tabs on the right where each thing opens and is edited. It is worth looking at the pieces before moving on:
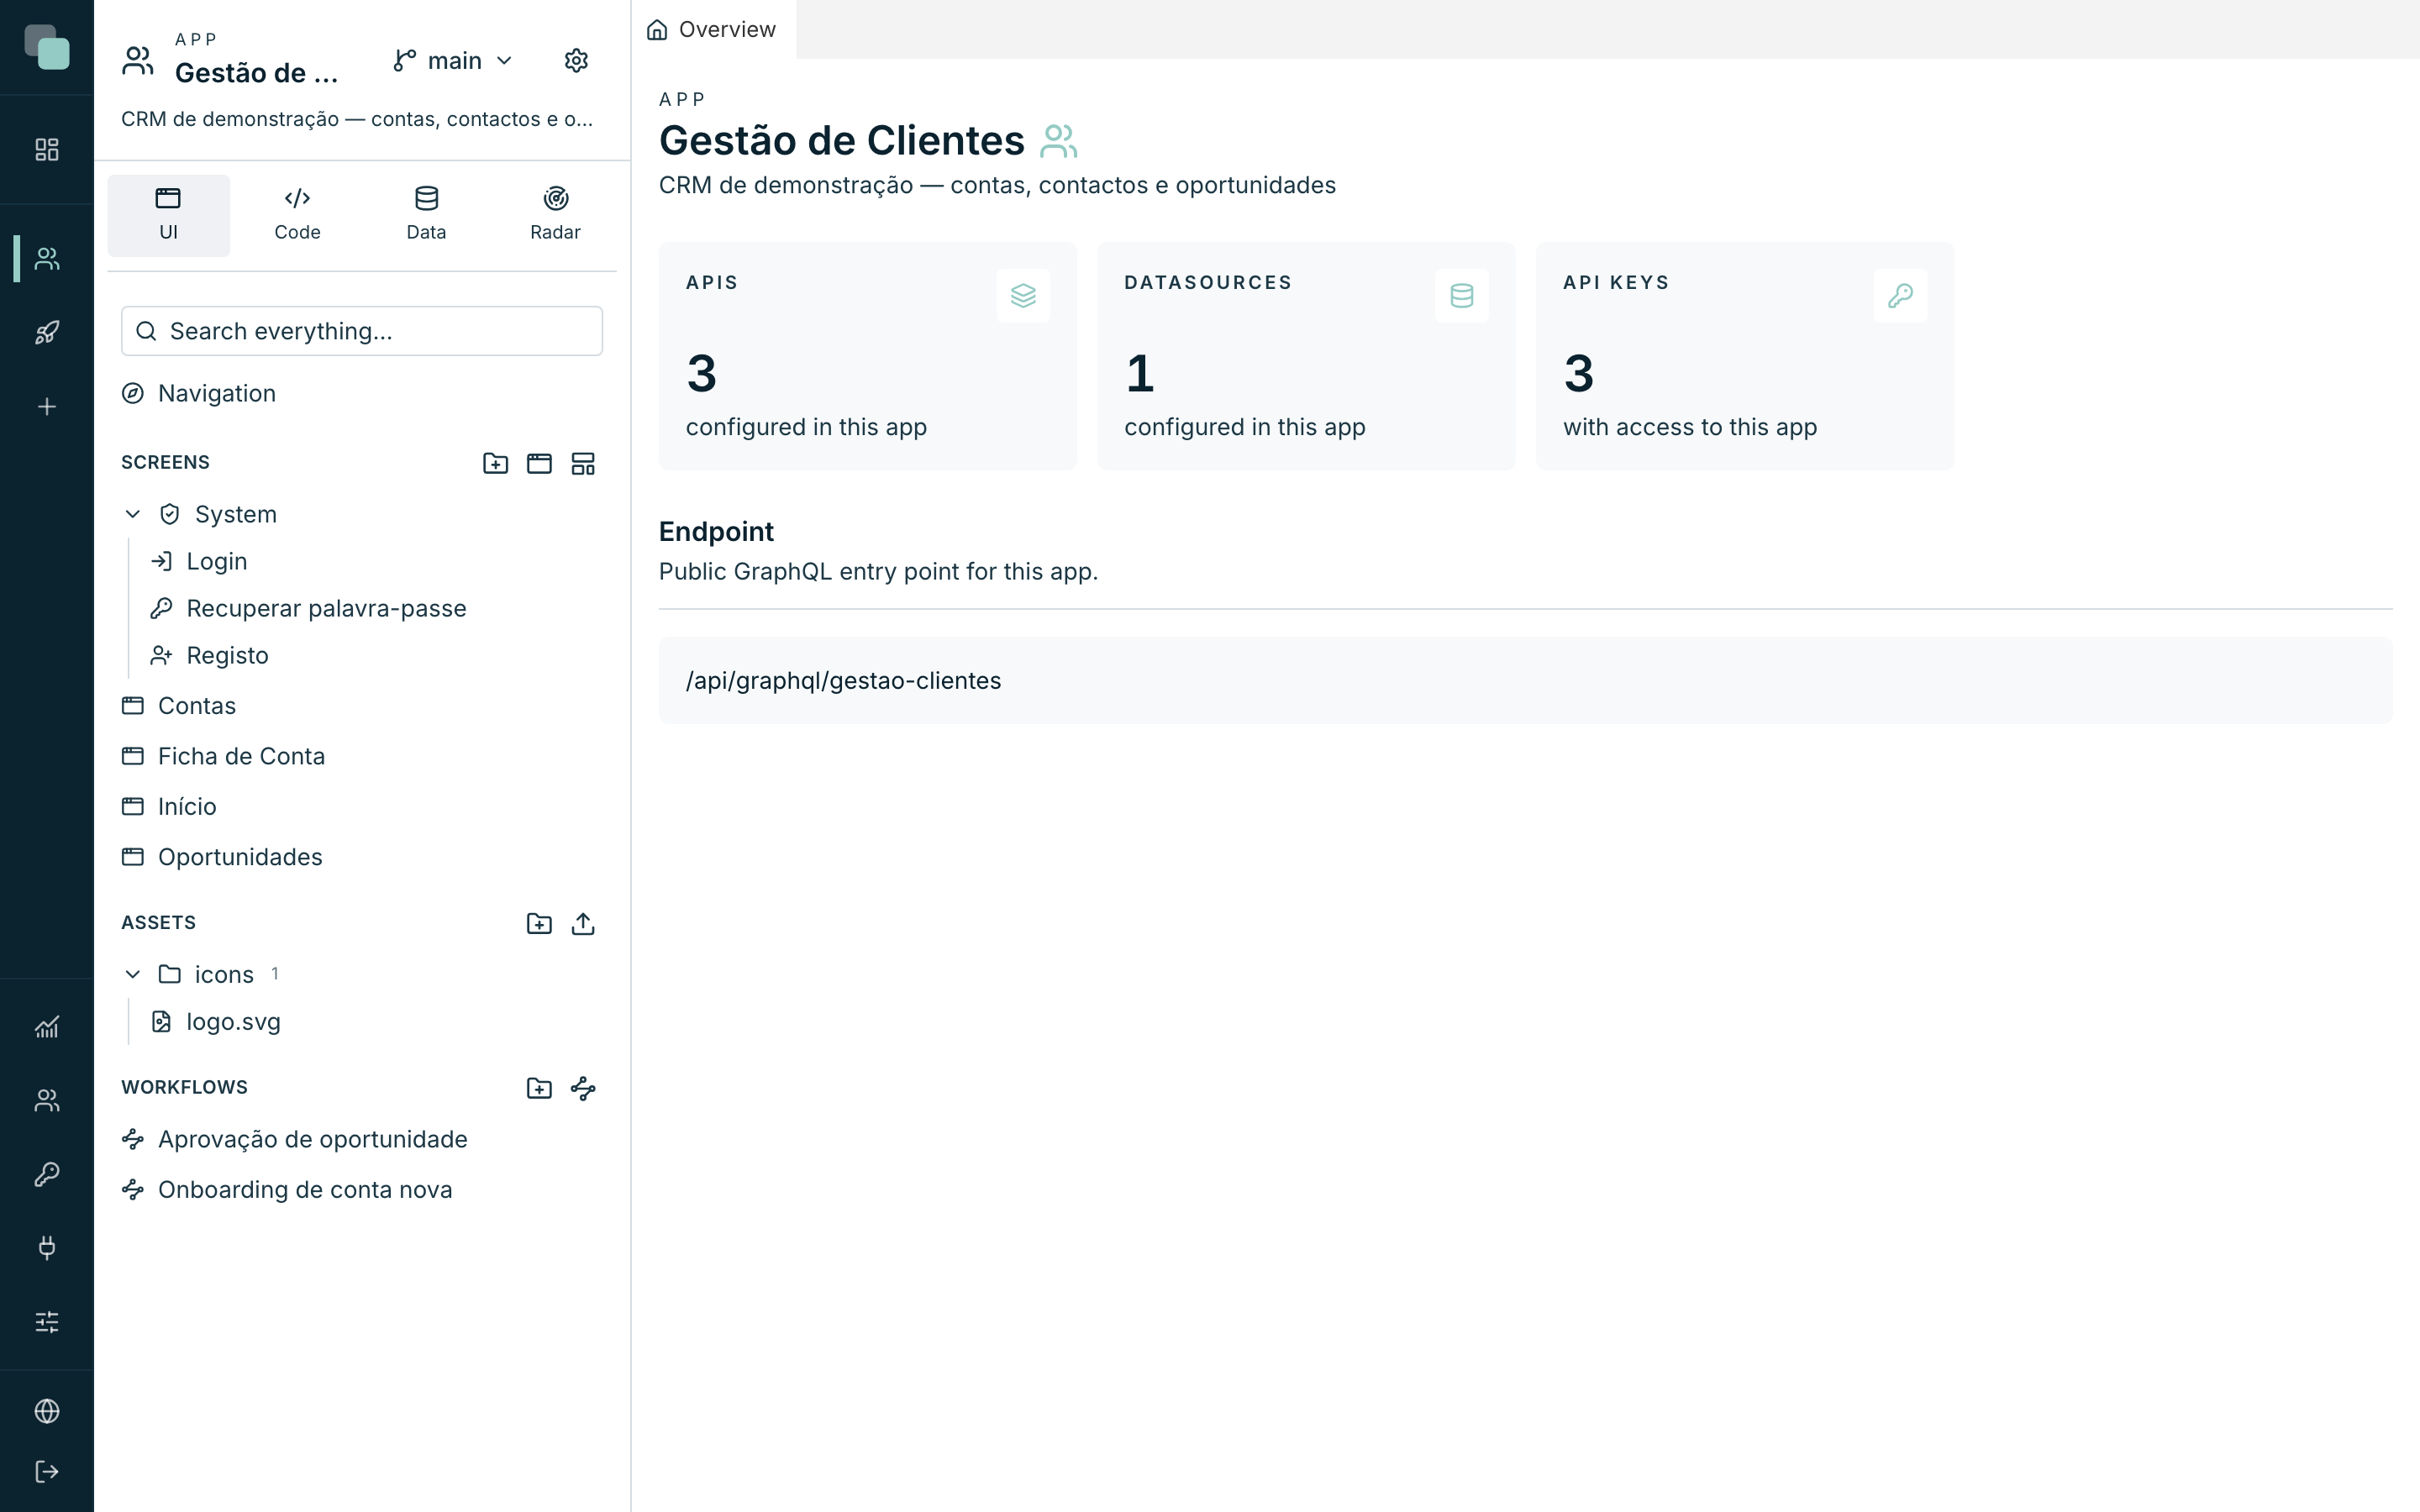
| Zone | What it does |
|---|---|
| App sidebar | The content tree of the app. It changes according to the panel chosen at the bottom. |
| UI, Code, Data, Radar panels | The four panels of the tree: screens and navigation (UI); APIs, scripts and schedules (Code); datasources and model (Data); activity and errors (Radar). |
| App settings | The gear icon next to the panels — it opens the settings (general, theme, app users, permissions…). |
| Tab area | Every table, screen, API or script opens here in a tab of its own. You can have several open side by side. |
| Search | The Search everything… field at the top of the tree finds any element of the app by name. |
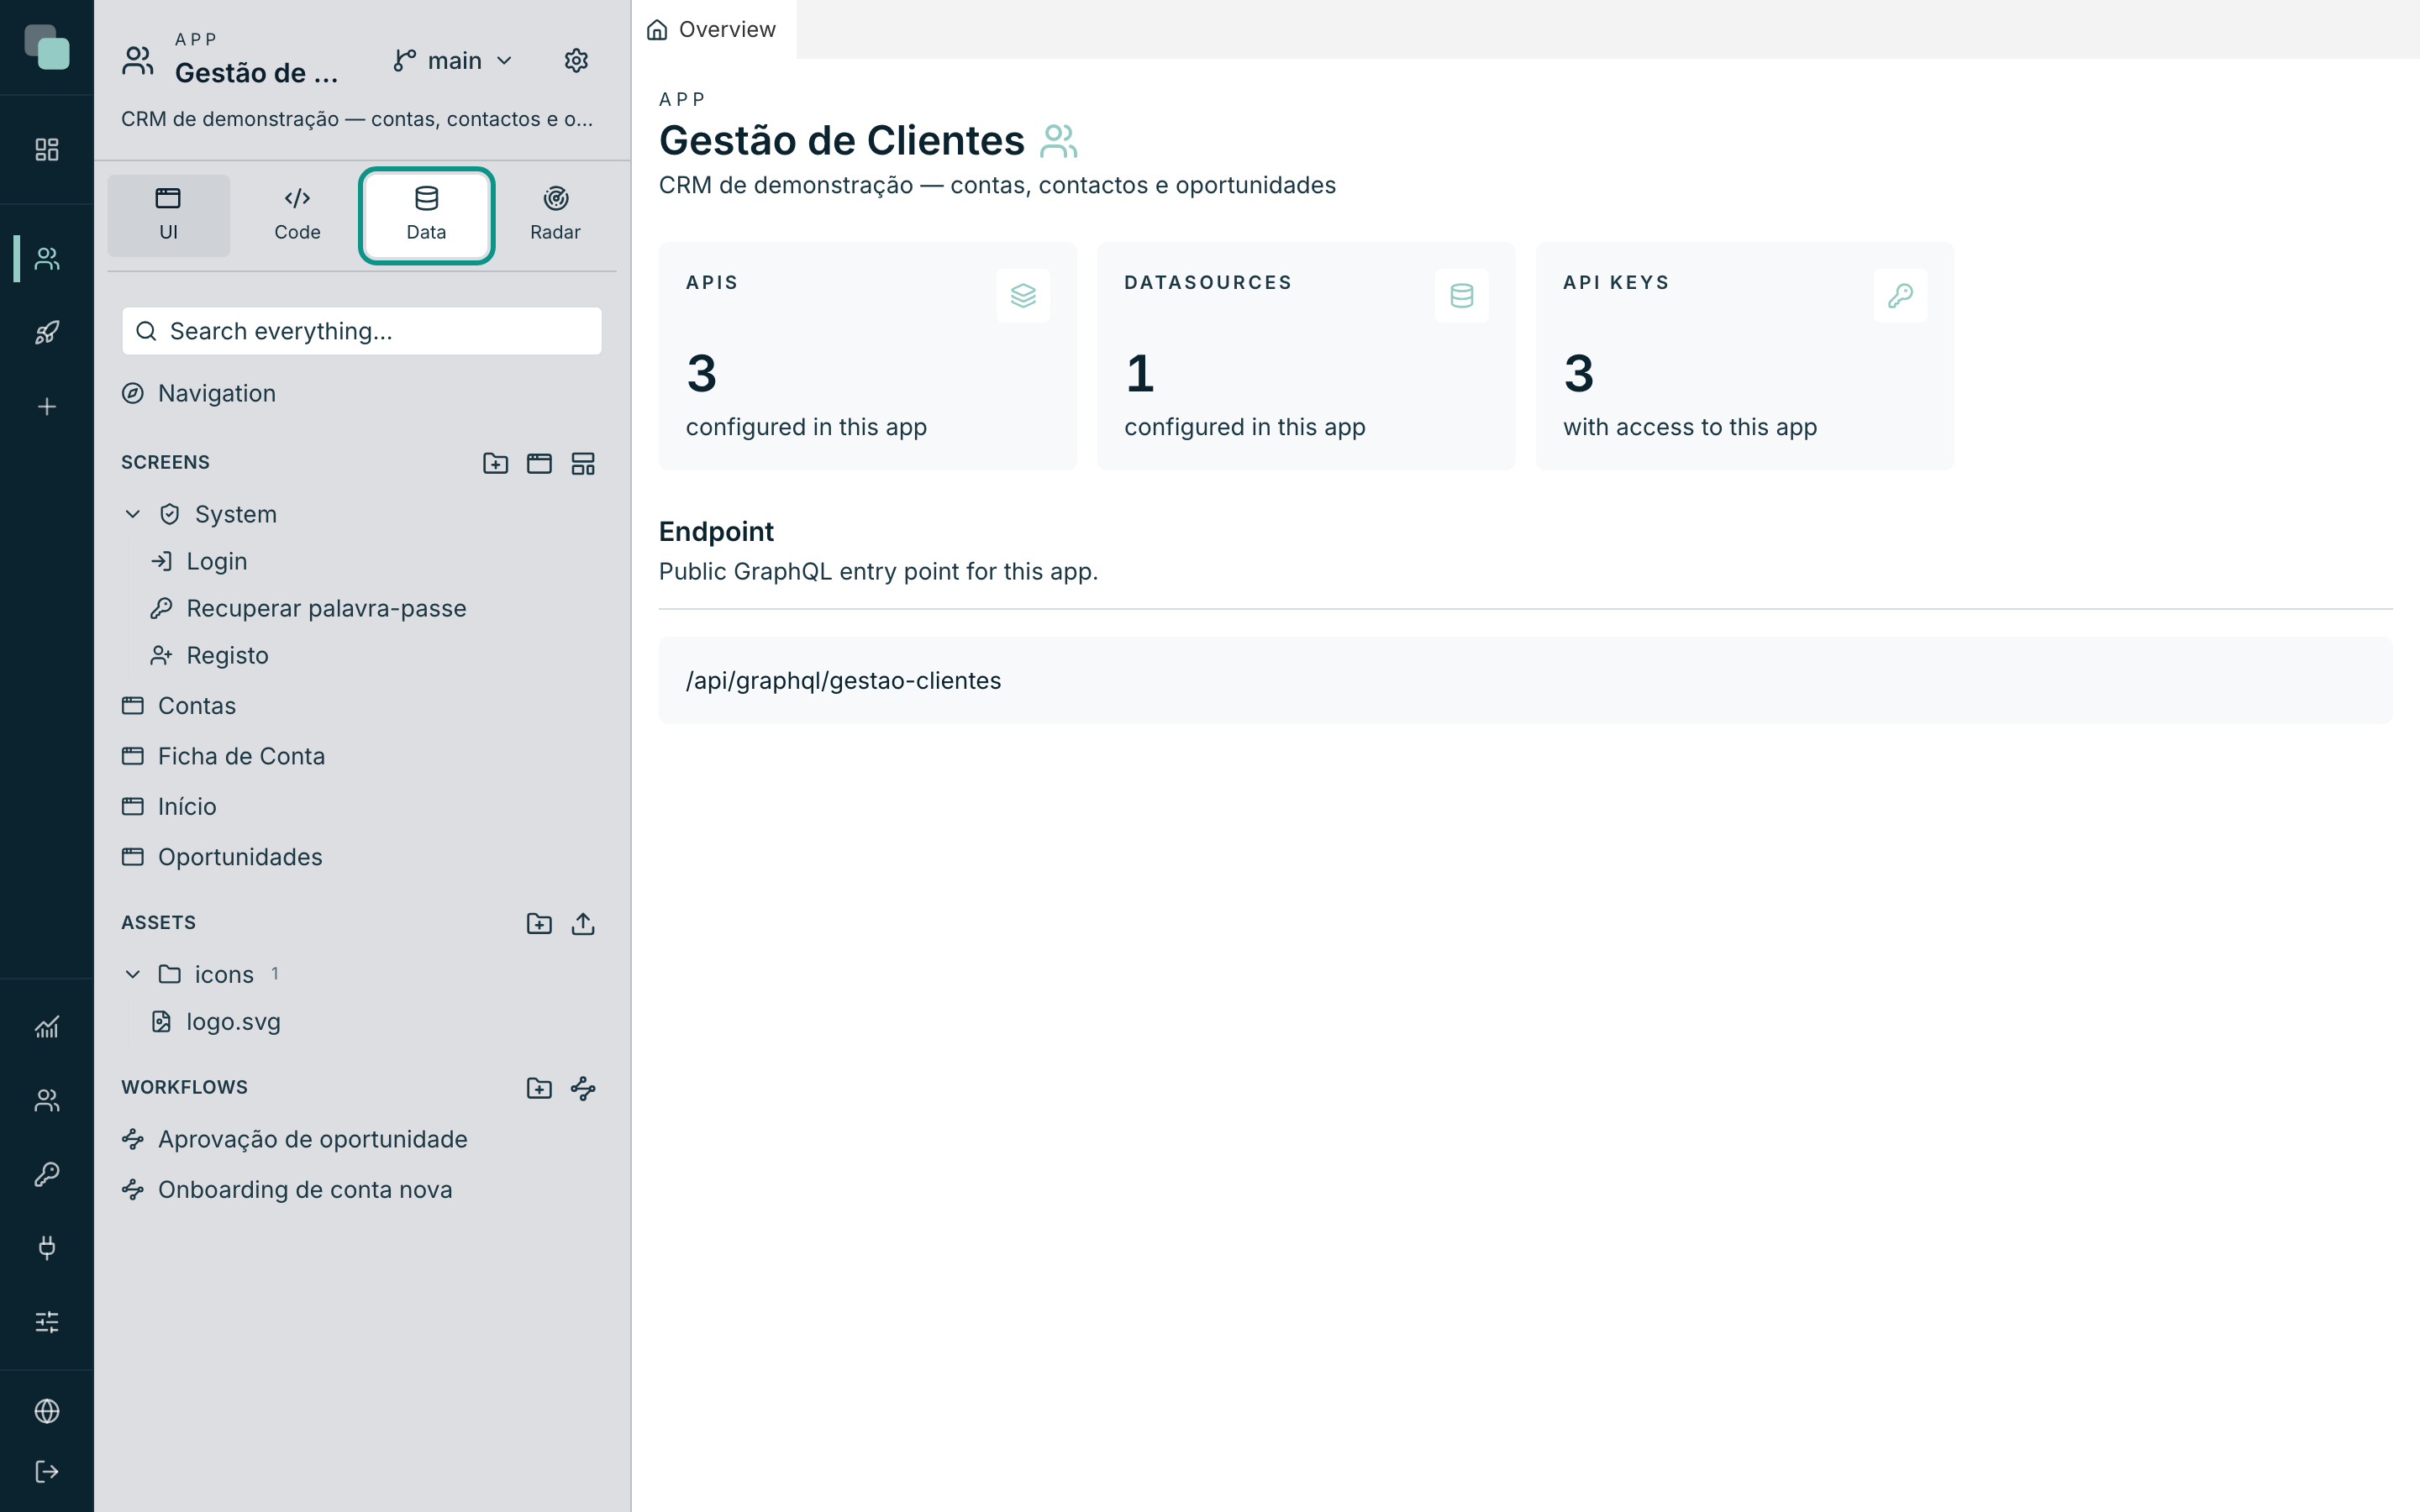
The Overview tab summarizes the state of the app: its public GraphQL Endpoint, and the counts of APIs, Datasources and API Keys. In a freshly created app everything is at zero — that is our starting point.
Two behaviors of the workspace that are worth knowing right away:
- Nothing is lost by closing tabs. If a tab has unsaved changes, the platform warns you (Unsaved changes) and asks before closing.
- Everything you save goes into the history. Every save is recorded and reversible — the Versioning chapter explains how to go back.
Where to find the app afterwards
The app stays in the list of apps in the platform sidebar. Click it at any time to reopen the workspace, exactly as you left it — the open tabs are remembered per app.
Tip
Along the guide you will jump many times between the Data, Code and UI panels. Get used to the gesture: panel at the bottom, element in the tree, tab on the right. That is always the path.
The app exists, but it is empty. Next stage: giving it the data model.