Publish and use
Freezing a version, publishing the app at an address, deciding who can do what and creating the accounts of the people who will use it.
The app is built. The last stage is left — and it is the one that changes the nature of what you made: up to here the Customer Management app was a project inside the platform; from here on it is an application with its own address, its own accounts and users who have never heard of Keplin.
Four steps: version, address, who can do what, accounts.
Versions — what gets published
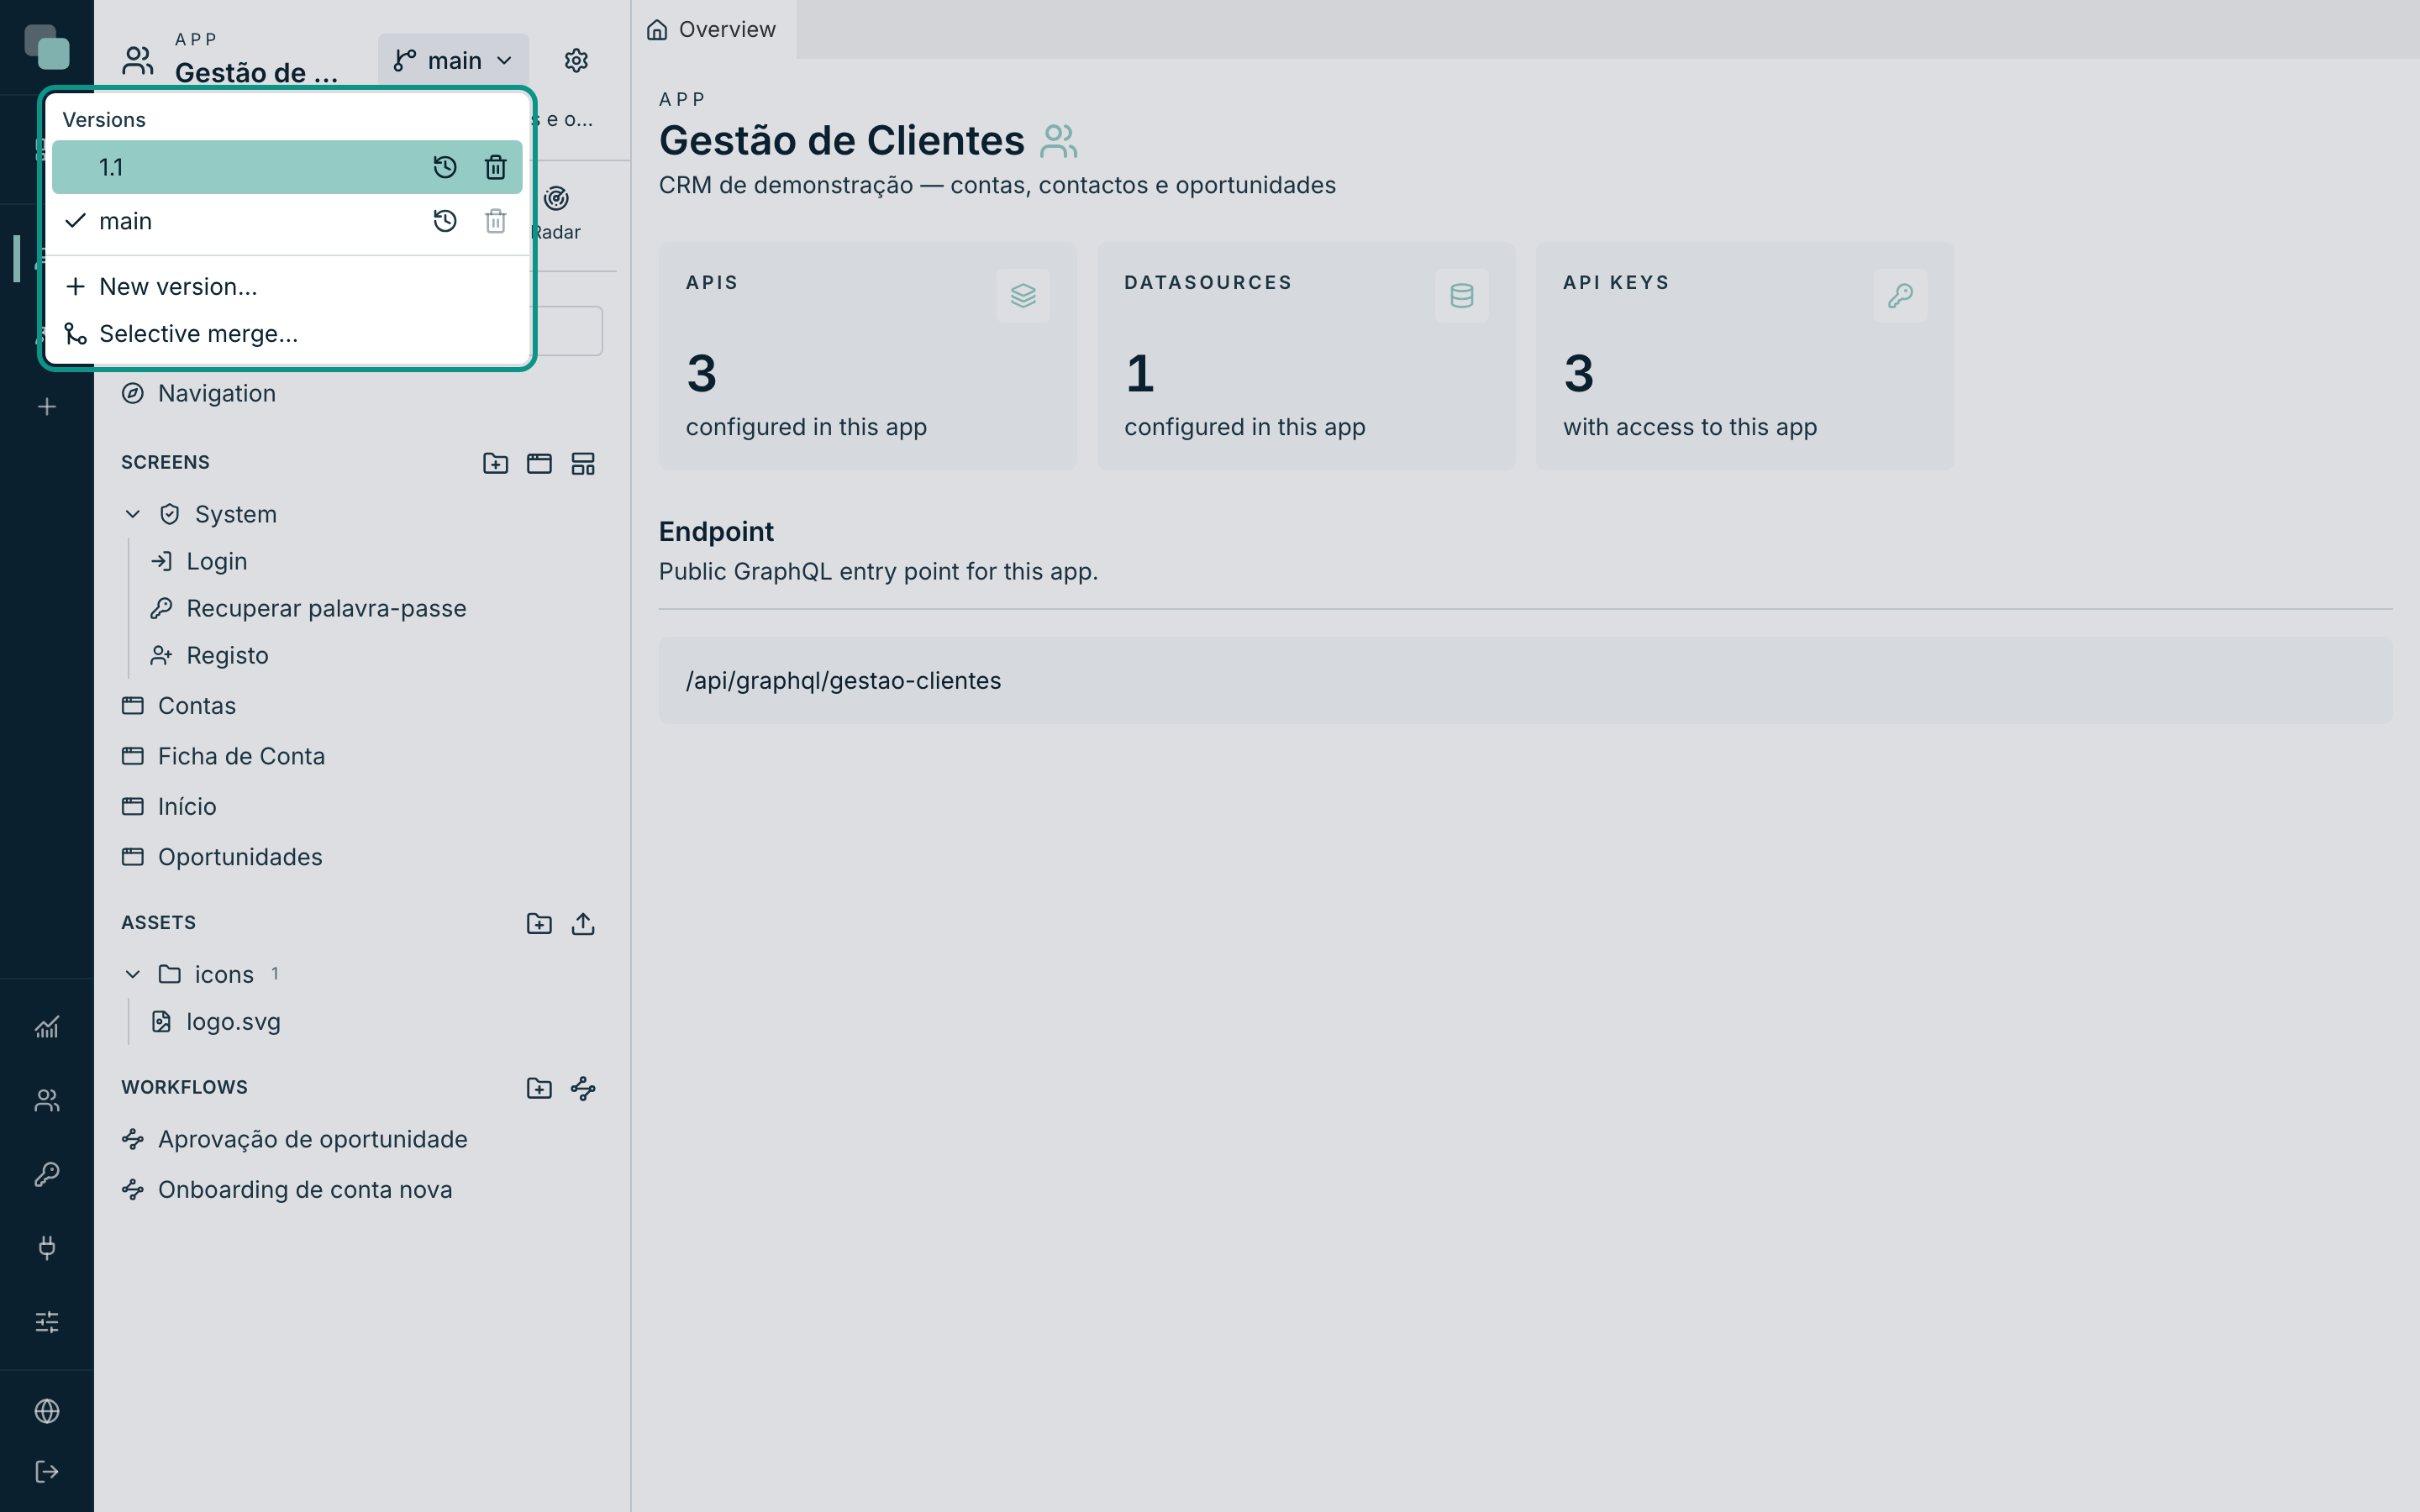
While you build, you always work on a working version. A version is a complete portrait of the app: screens, model, APIs, scripts, theme — and its data.
- At the top of the app's bar, click the Versions selector.
- Click New version….
- Give it a name —
1.0, for example — and choose in From the version of origin. - Confirm. "Version “1.0” created — you are now working on it."
Warning
Versions do not share data. A new version is born with a copy of the origin's data and follows its own life. This is exactly what you want in order to experiment without fear — and exactly what catches you out if you publish a version expecting to find the other one's records in it.
With versions, the working pattern becomes clear: main is where you
develop, 1.0 is what is live, and the Selective merge brings into the
published version only the changes that are already ready.
Publishing at an address
- Open the App settings (the gear icon at the top of the bar).
- In the Application group, choose General.
- Scroll down to the Publishing section.
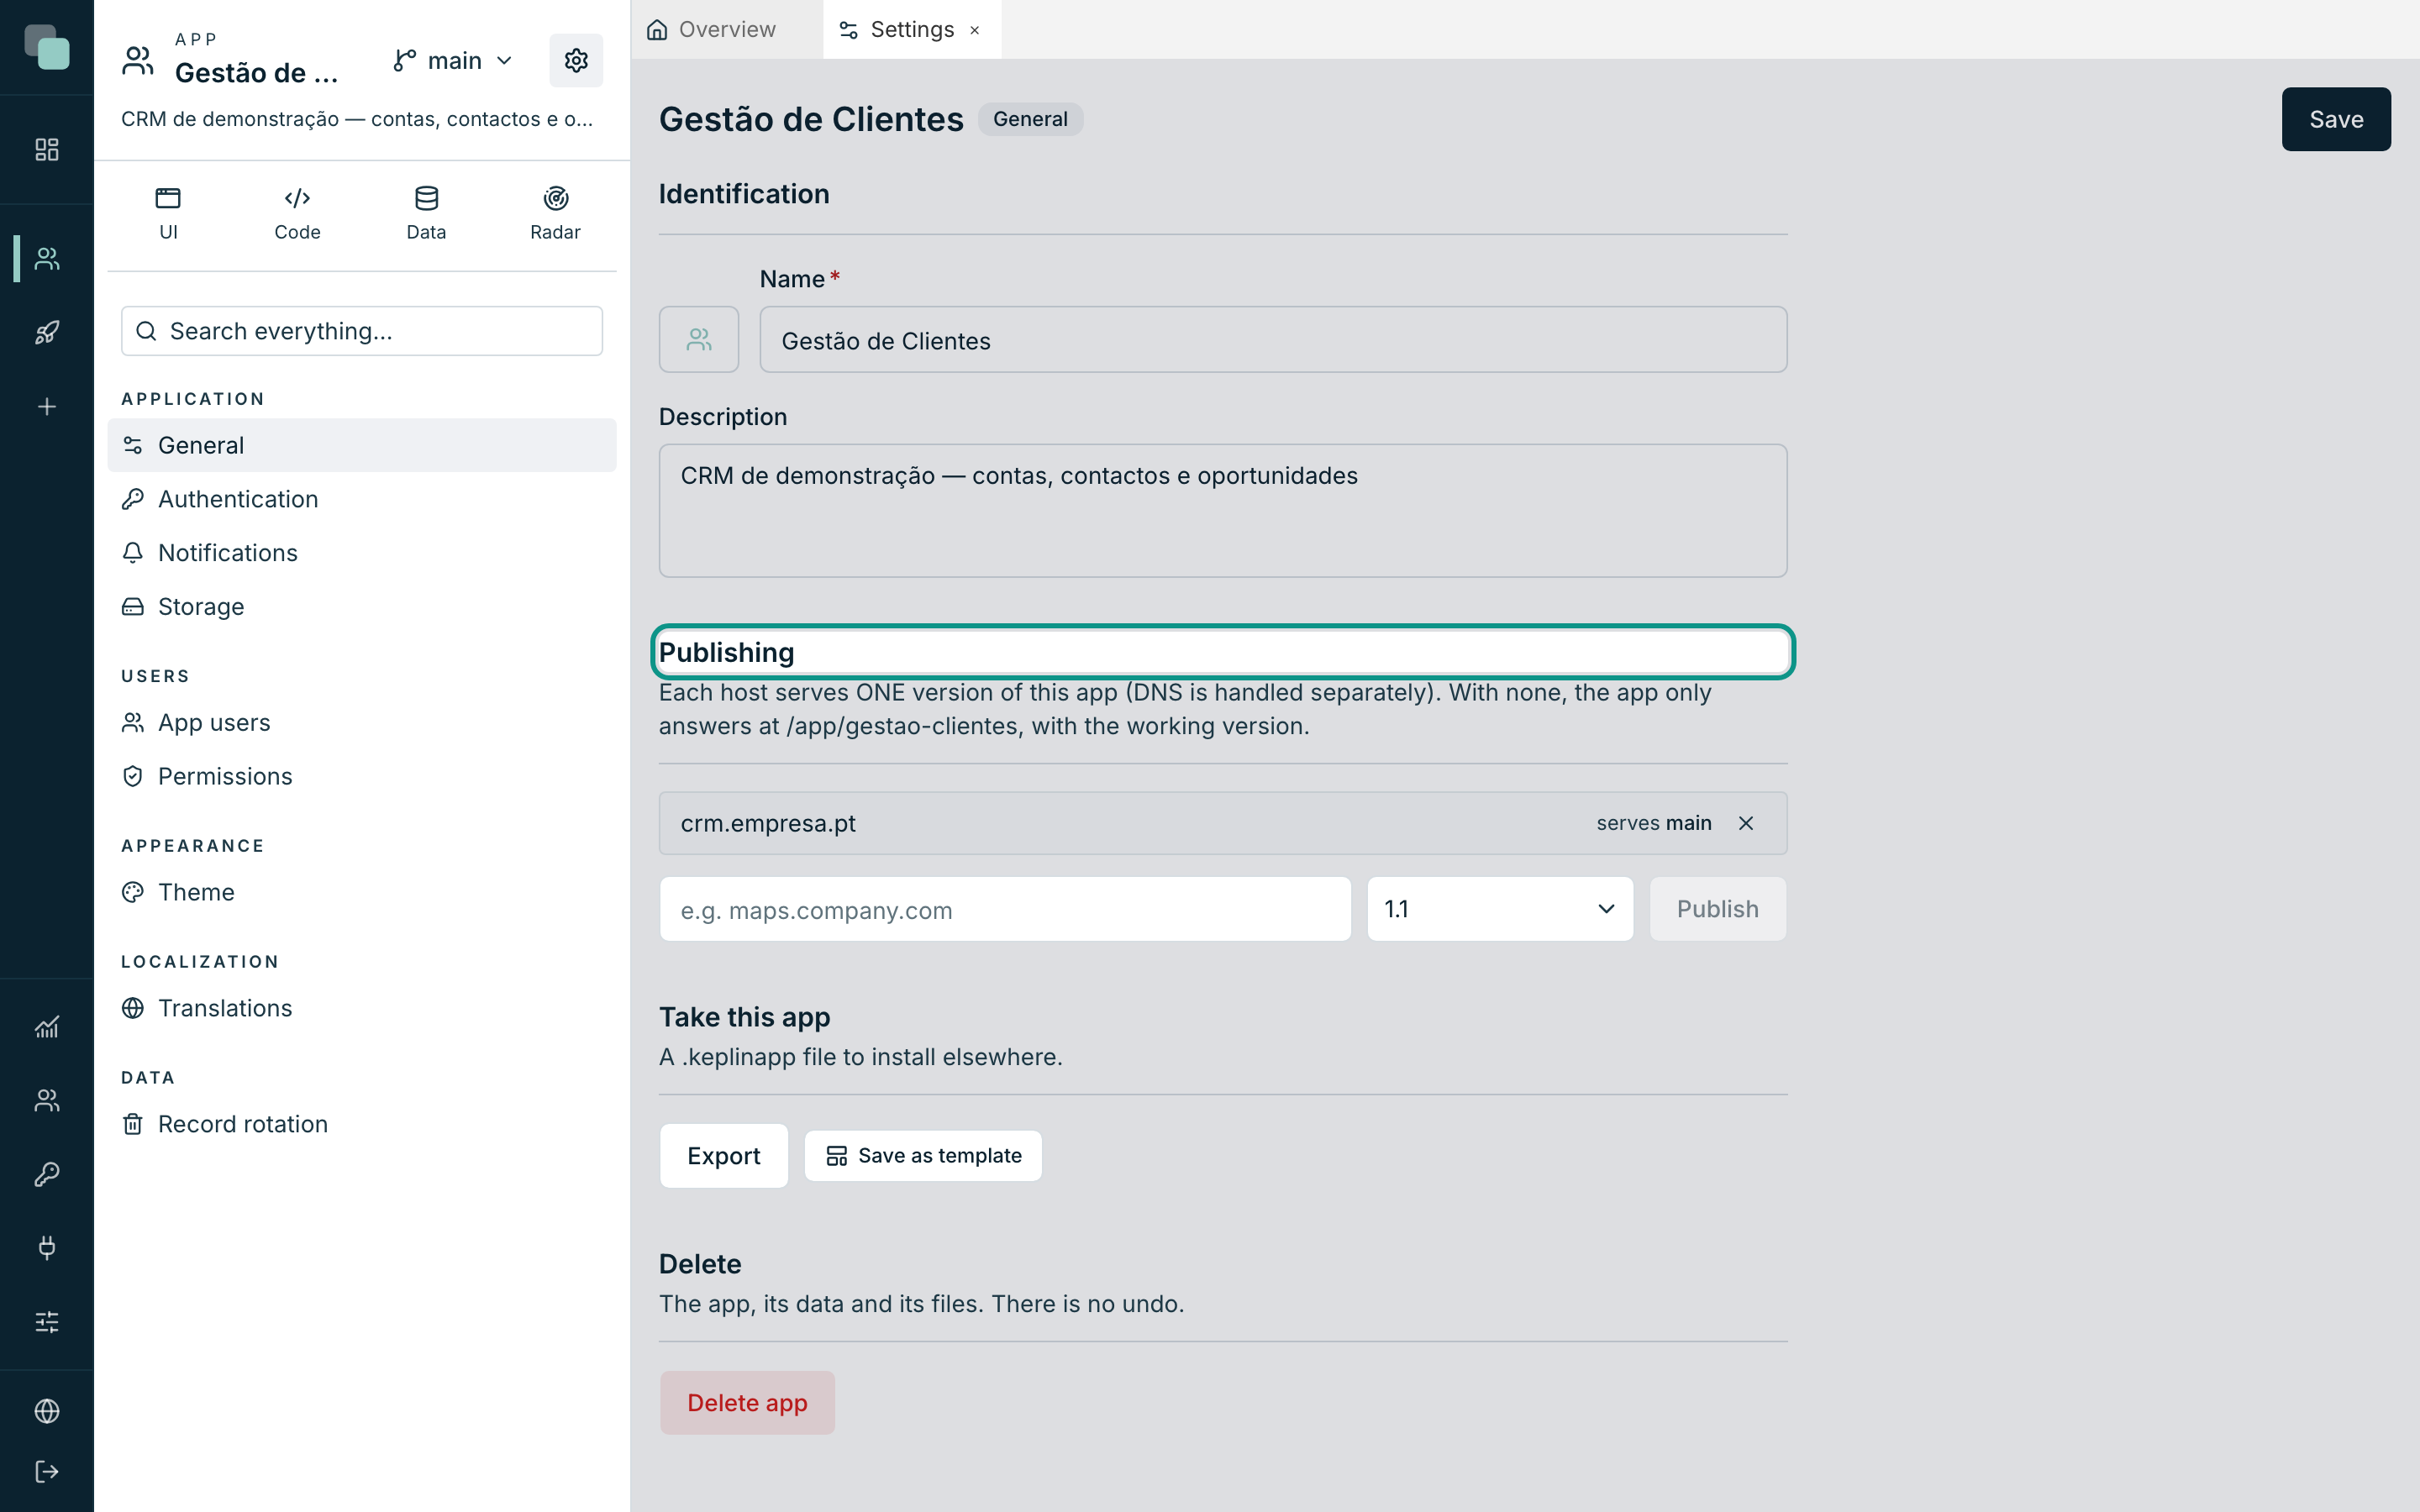
The rule is written right there: "Each host serves ONE version of this app
(DNS is handled separately). With none, the app only answers at
/app/gestao-clientes, with the working version."
- In the host field, type the address — for example
crm.aminhaempresa.pt. - In the selector next to it, choose the version that address is going to serve.
- Click Publish. "Host published."
What this means, in practice:
| Situation | Where the app answers | Which version it serves |
|---|---|---|
| No hosts published | /app/gestao-clientes |
The working version |
| With one host | That address | The version you tied to it |
| With two hosts | Both | Each its own — that is how you have a stable crm.empresa.pt and a crm-testes.empresa.pt with the next version |
Note
The platform ties the address to the app and the version; pointing that
address's DNS at the server is network work, done outside of here.
While the DNS is not done, /app/gestao-clientes goes on serving the
app just the same.
To take an address out of service, Unpublish.
Who can do what — the roles
Before creating accounts, decide what each kind of person can do. That is done in roles, and not person by person.
- In the App settings, Users group, choose Permissions.
- Click New role and give it a name. For our CRM, three are enough.
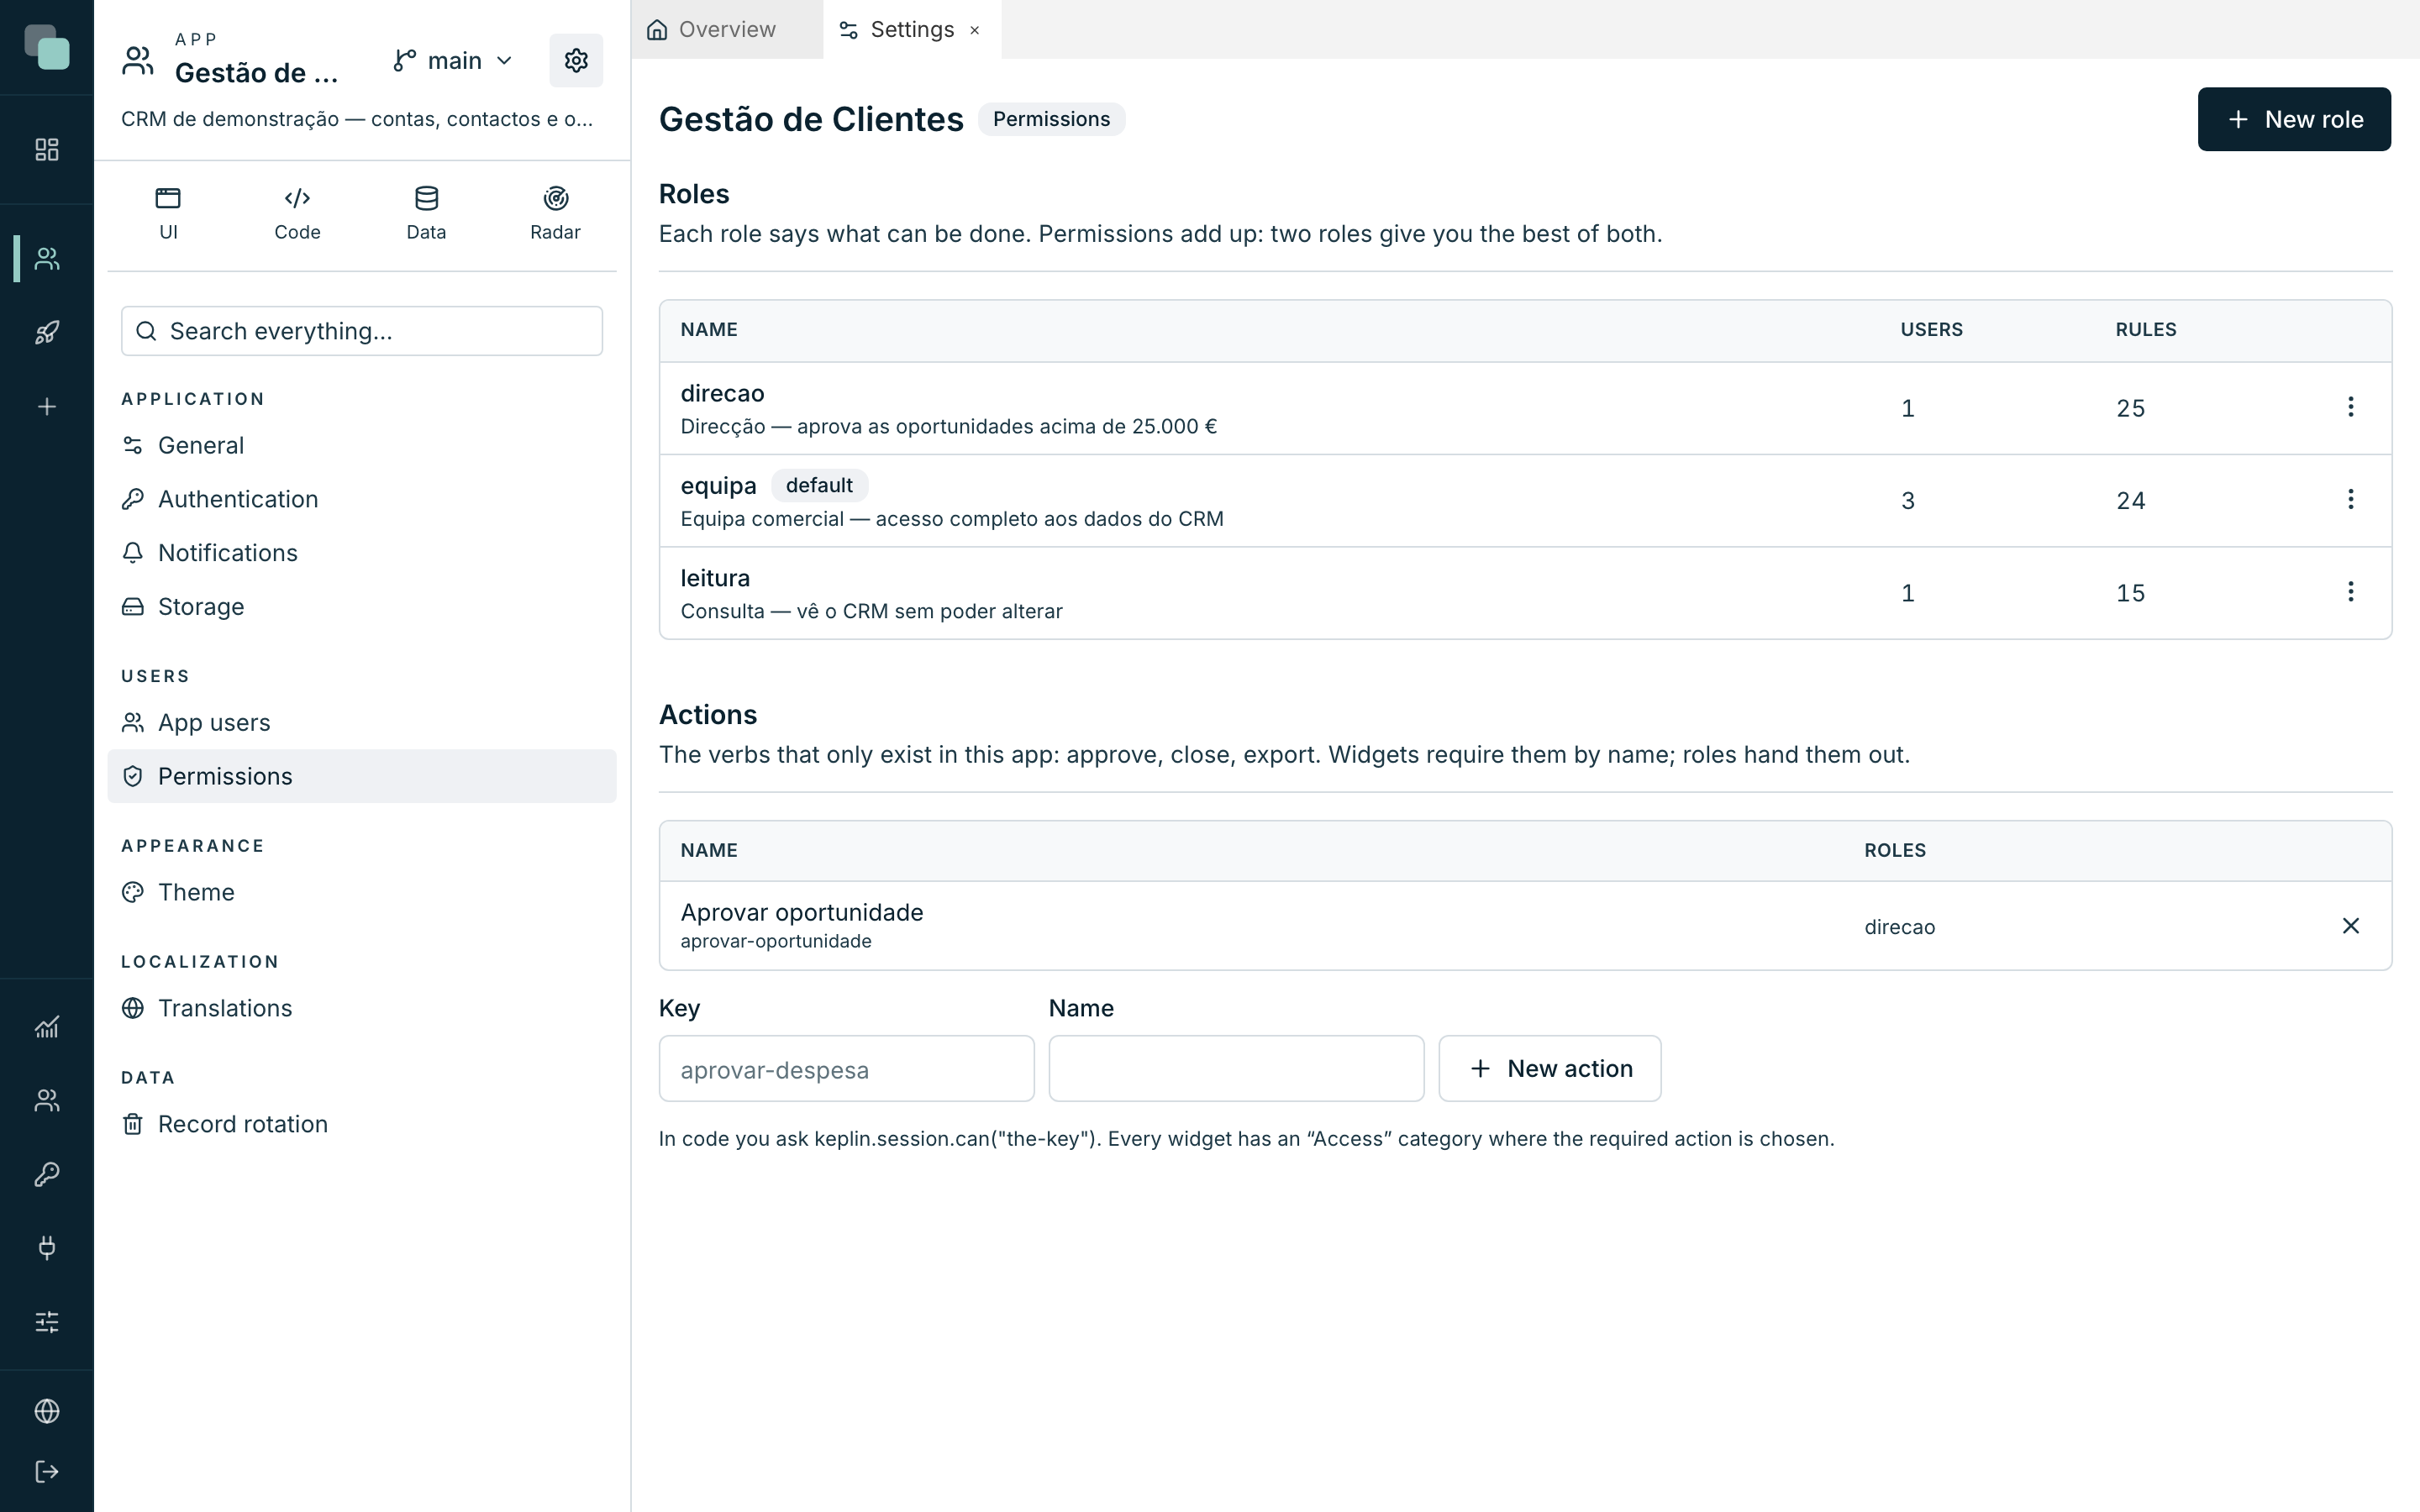
| Role | Description | For whom |
|---|---|---|
equipa |
Sales team — full access to the CRM's data | Whoever works the accounts every day. It is the role given by default. |
direcao |
Management — approves the opportunities above €25,000 | Whoever decides. |
leitura |
Read-only — sees the CRM without being able to change it | Whoever only needs to look. |
Inside a role, the work is split across five tabs:
| Tab | What it decides |
|---|---|
| General | Name, description, Full access and Given by default (assigned to whoever is newly created). |
| Data | For each table API, what is allowed — View, Create, Change, Delete — and the Scope: All records, Only mine or With condition…. |
| Screens | Per screen and per device: Hidden, View (read-only) or Edit. |
| Menus | What gets hidden from the navigation. Unlike screens, a menu is visible by default. |
| Actions | The verbs that only exist in this app — aprovar-oportunidade, for example. They are declared here and demanded on the widgets. |
For the equipa role, the minimum that makes the CRM work:
- On the Data tab, check View, Create, Change and
Delete on the three APIs (
contas,contactos,oportunidades), with the scope All records. - On the Screens tab, set the four screens to Edit, on all three devices.
- On the General tab, turn on Given by default.
- Save — "Permissions saved."
For the leitura role, the same with one difference: only View on the
data, and the screens at View (read-only).
Warning
"With no rule at all, this role sees nothing from this API." A new role starts empty — and a user with only that role enters the app and sees no data at all. If the app looks empty to someone, this is almost always where the answer is.
The accounts of the people who use the app
Here comes the part that separates Keplin's two populations. These accounts are not platform accounts:
- In the App settings, Users group, choose App users. The notice at the top says it all: "These users belong to the built app — they log in to the app at runtime and have no access whatsoever to the KEPLIN platform."
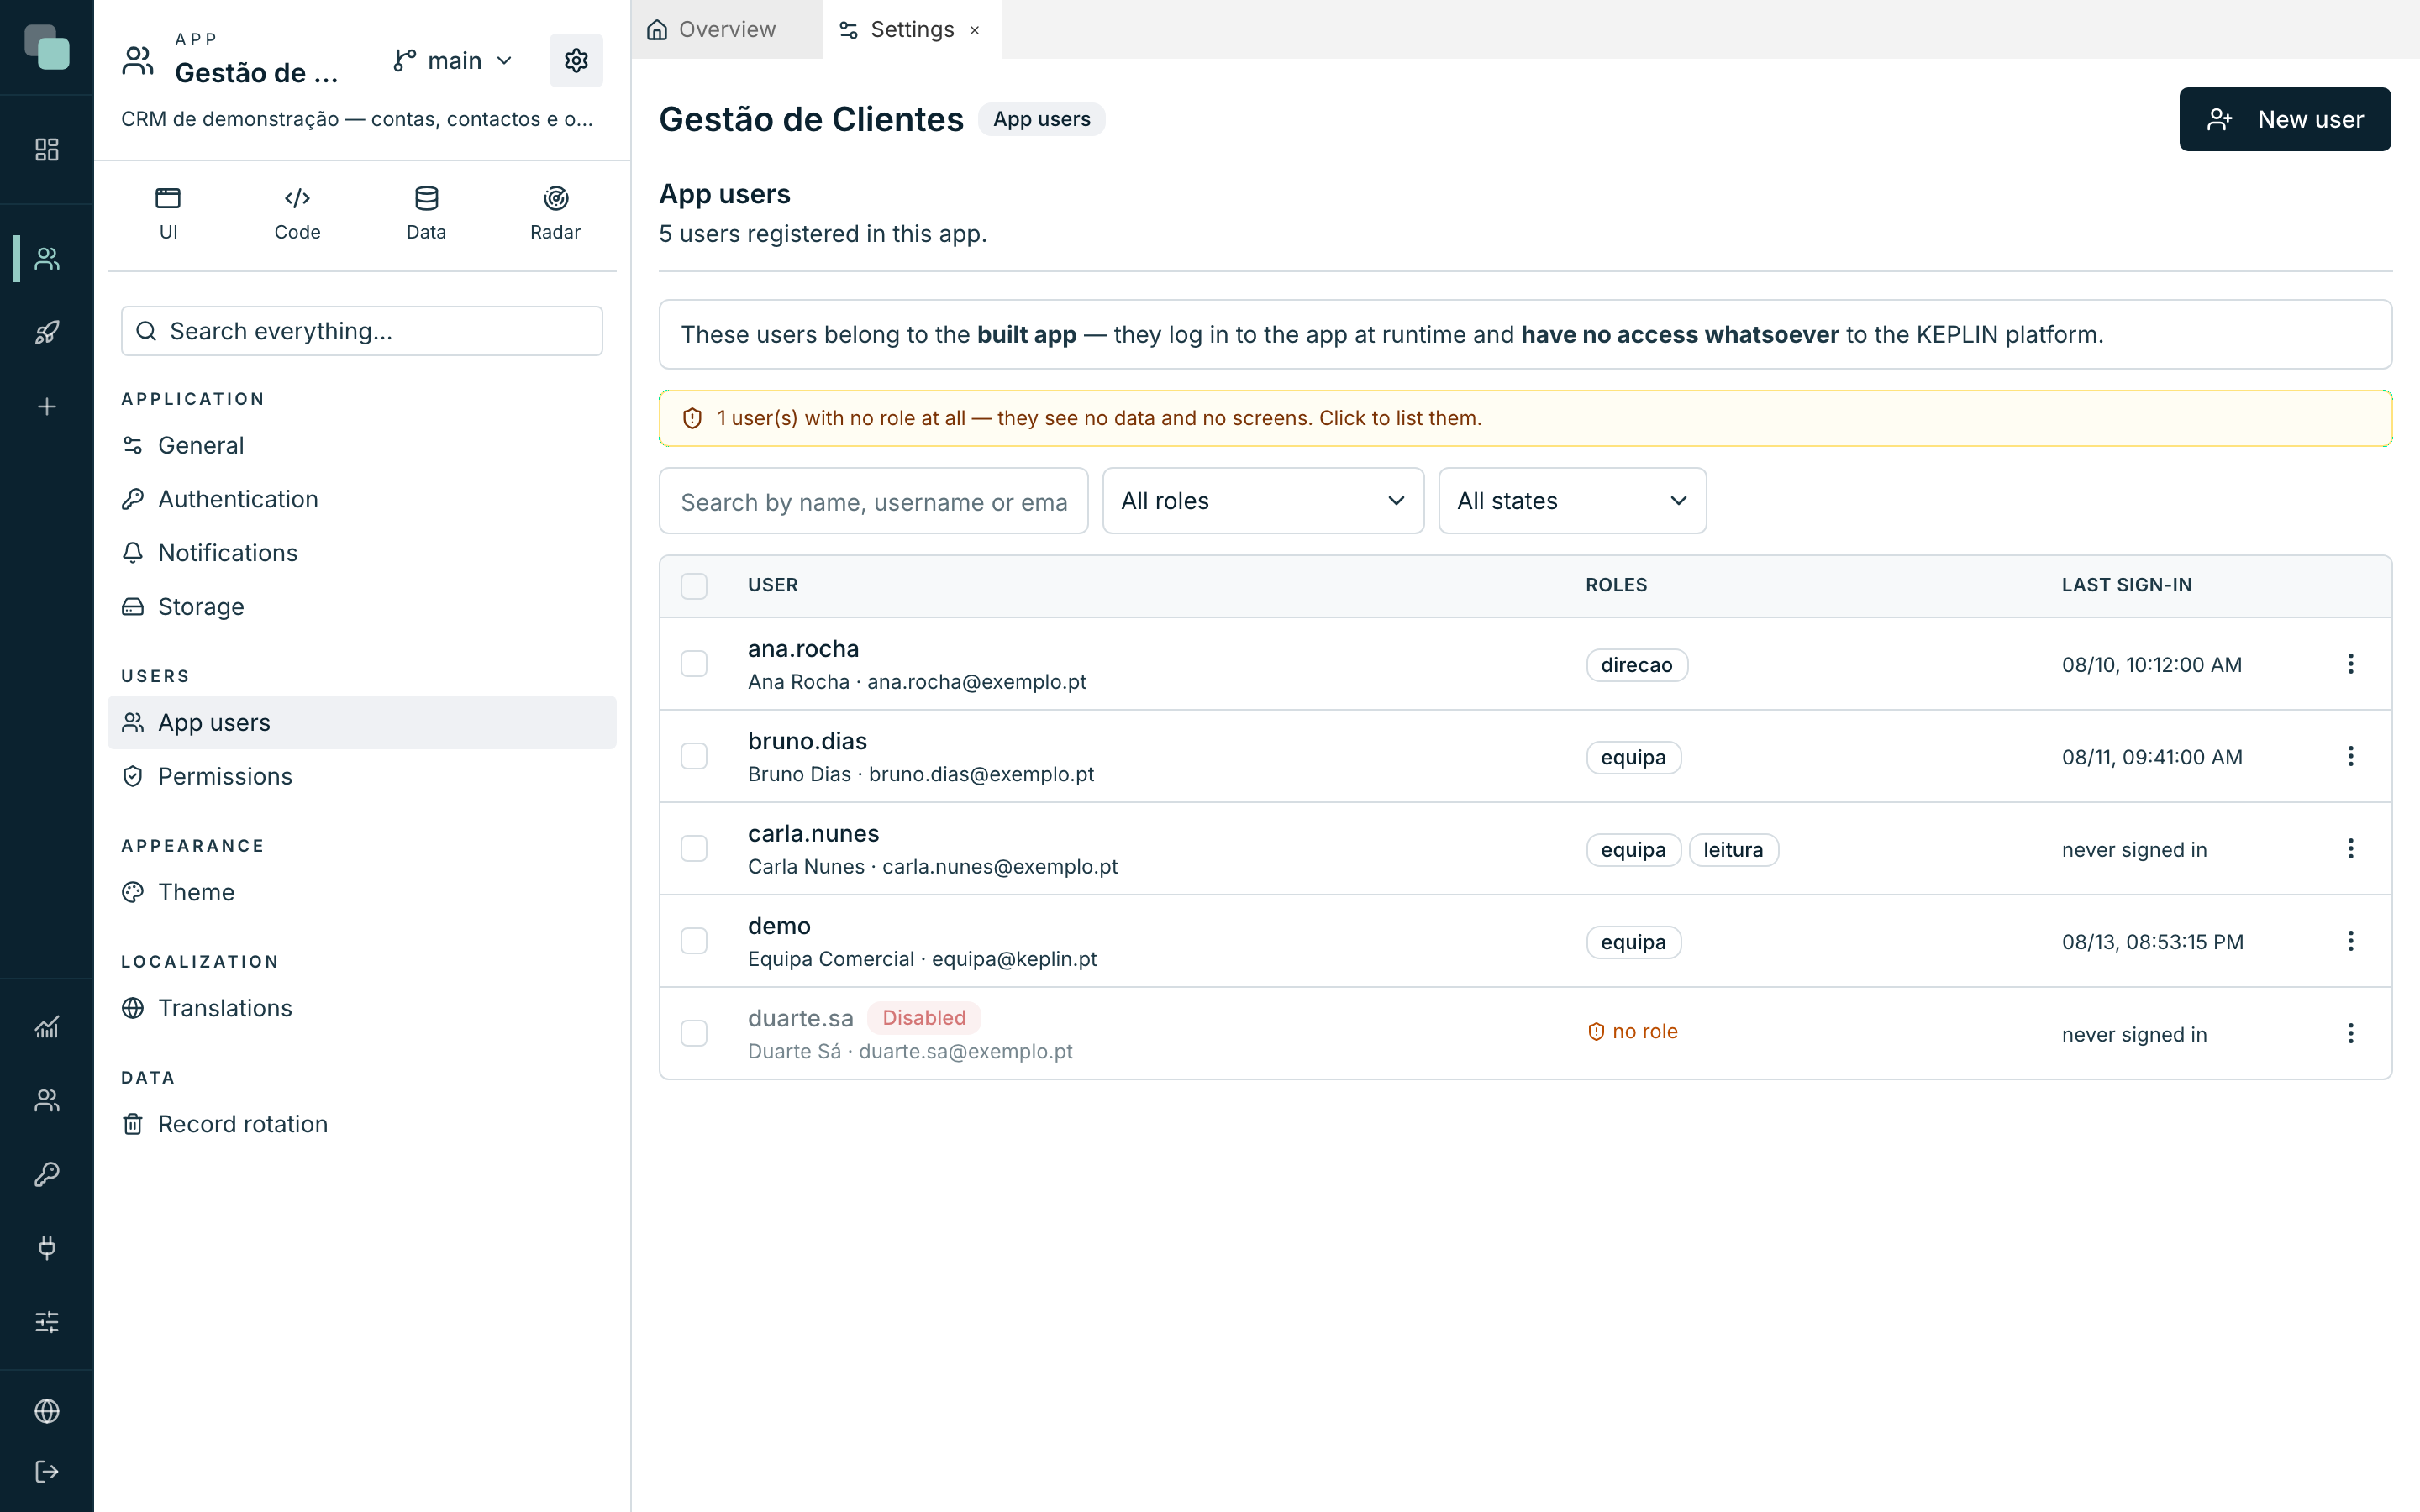
- Click New user. The form opens as a page.
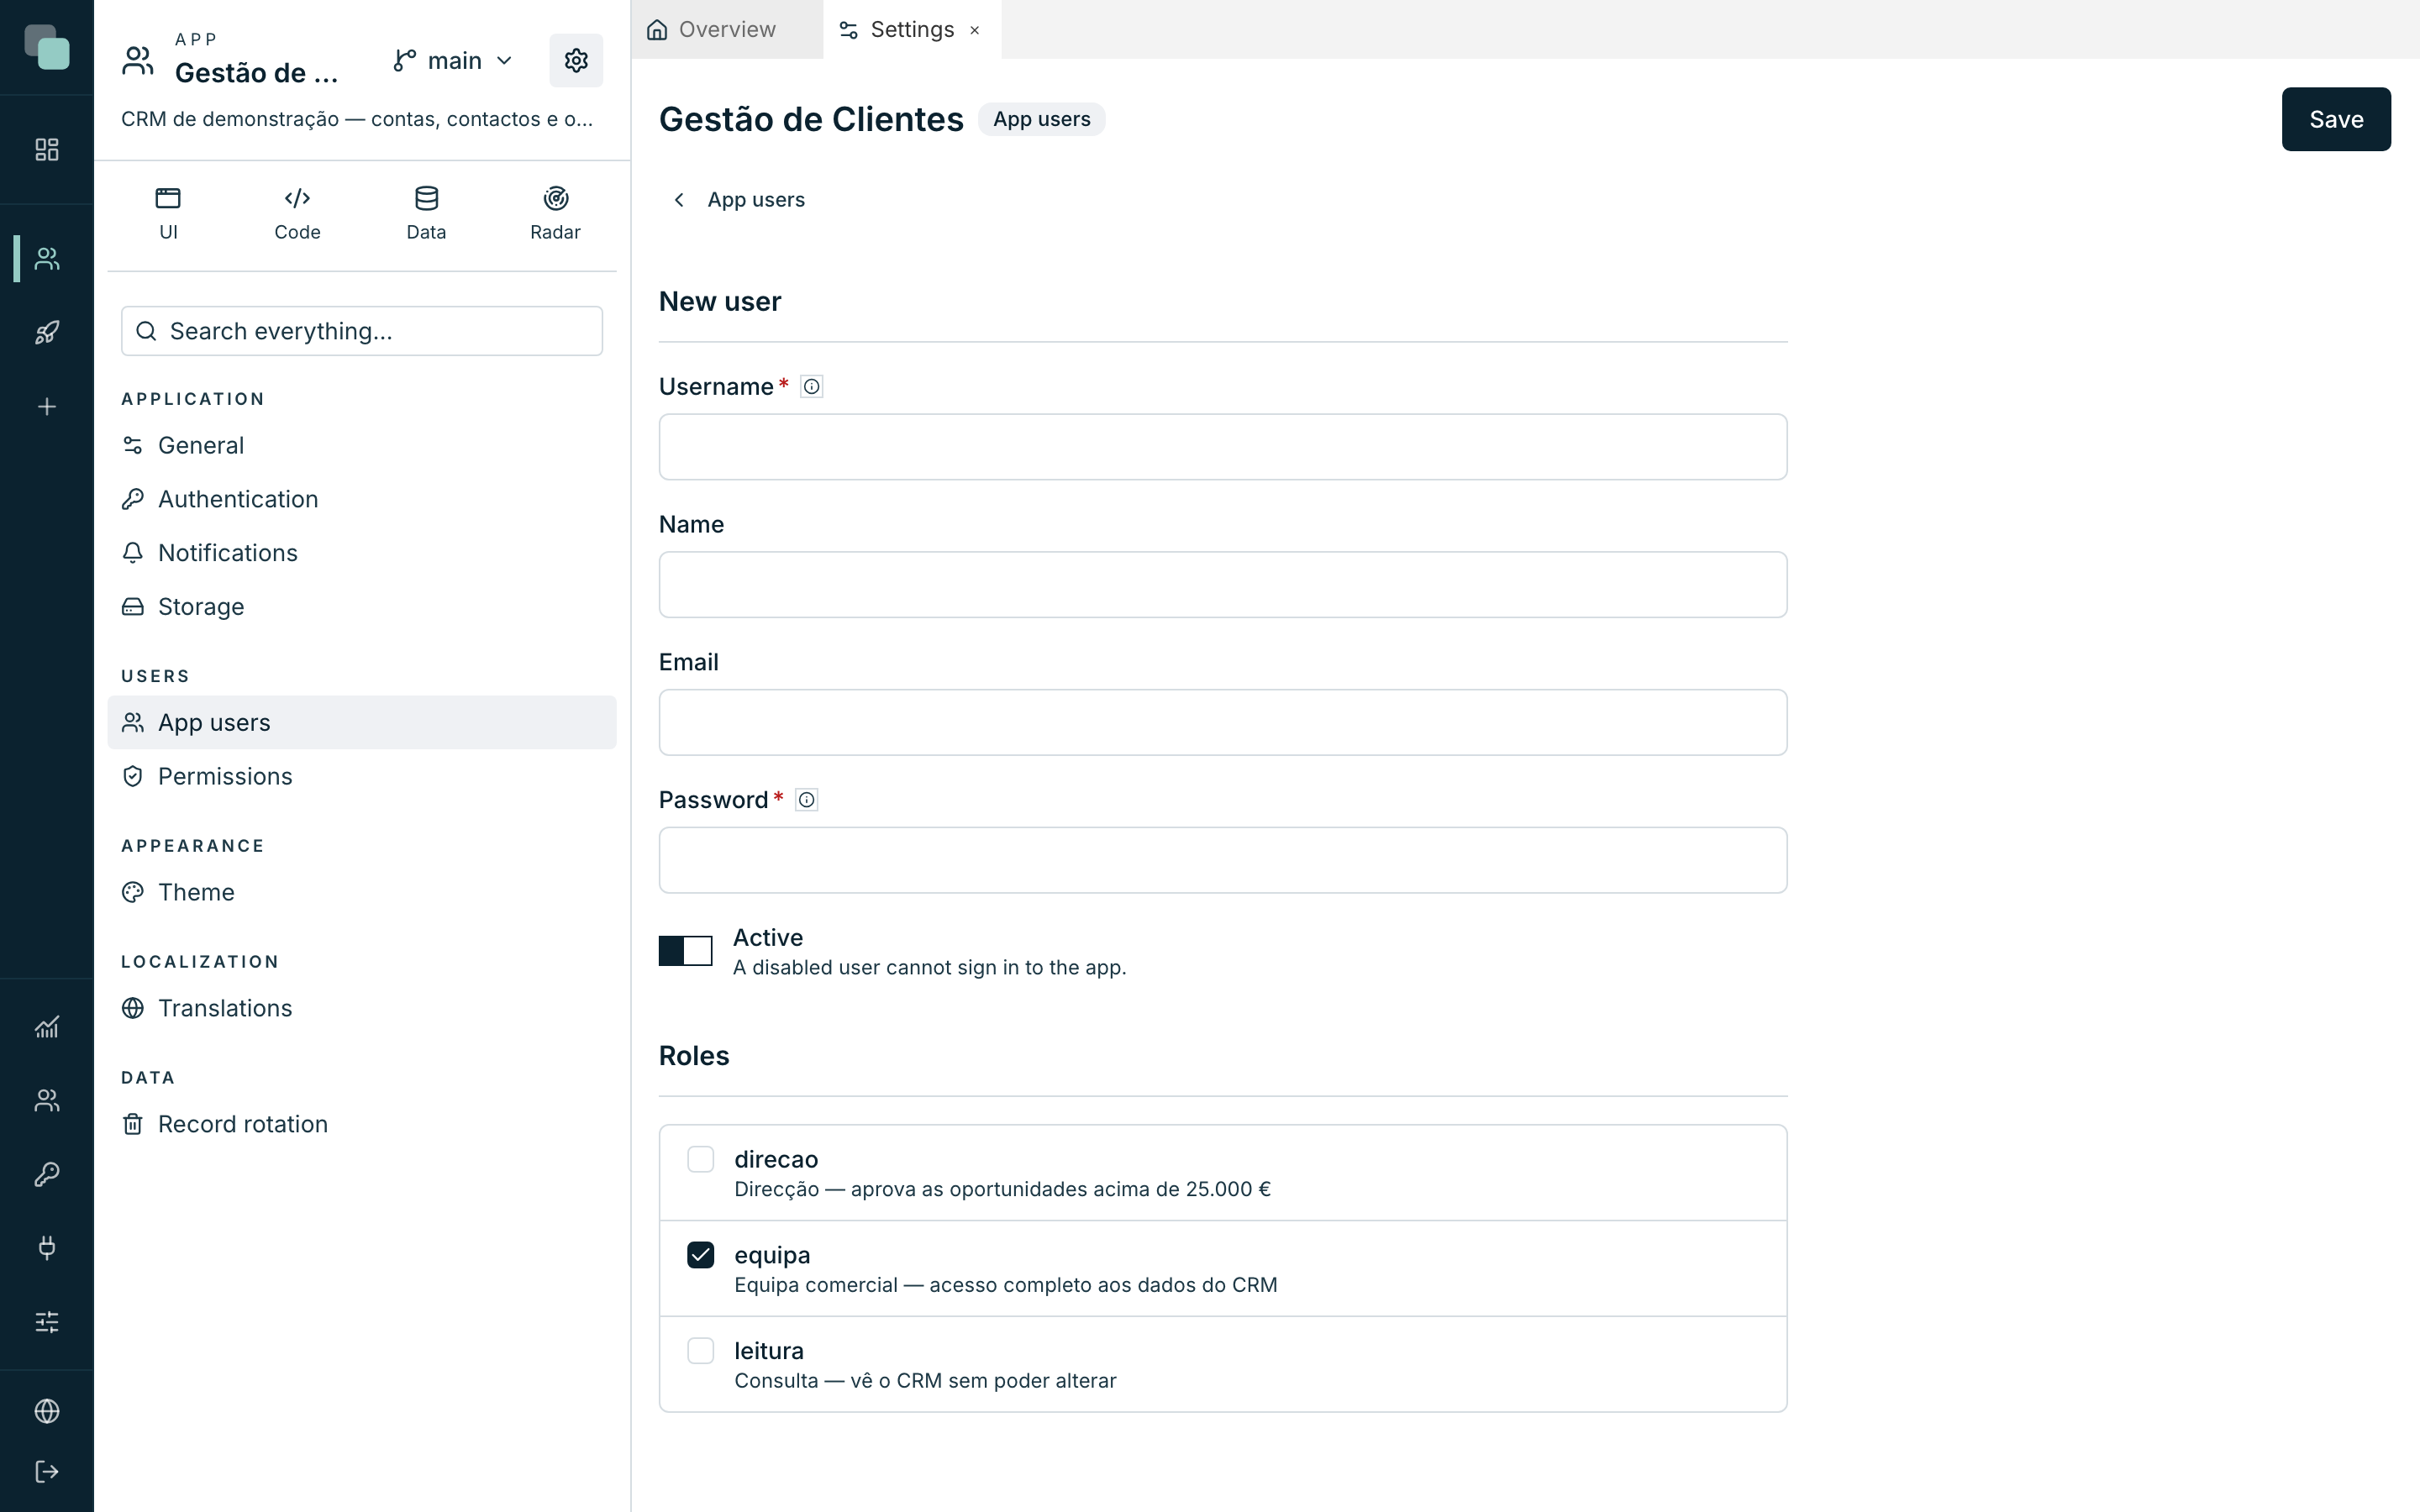
- Fill in:
| Field | What to put |
|---|---|
| Username | Required — letters, numbers, dot, hyphen, _ and @. E.g. bruno.dias. |
| Name | The person's name; it is what appears in the user menu inside the app. |
| Optional, but needed for password recovery. | |
| Password | The initial password — "the user can change it in the app". |
| Active | On. Off, the account exists but cannot get in. |
| Roles | The person's roles. A new account comes with the roles that are given by default pre-checked. |
- Save — "User created."
Repeat for the whole team. When there are many people, the list works for you: select several accounts and use Grant role, Revoke role, Enable or Disable in one go.
Tip
The amber warning "… user(s) with no role at all — they see no data and no screens" is clickable and filters those accounts right away. It is worth looking at whenever someone says that "the app shows nothing".
Entering the app
Everything is in place. Open the published address — or
/app/gestao-clientes, if you have not published any host yet — in a
normal browser window.
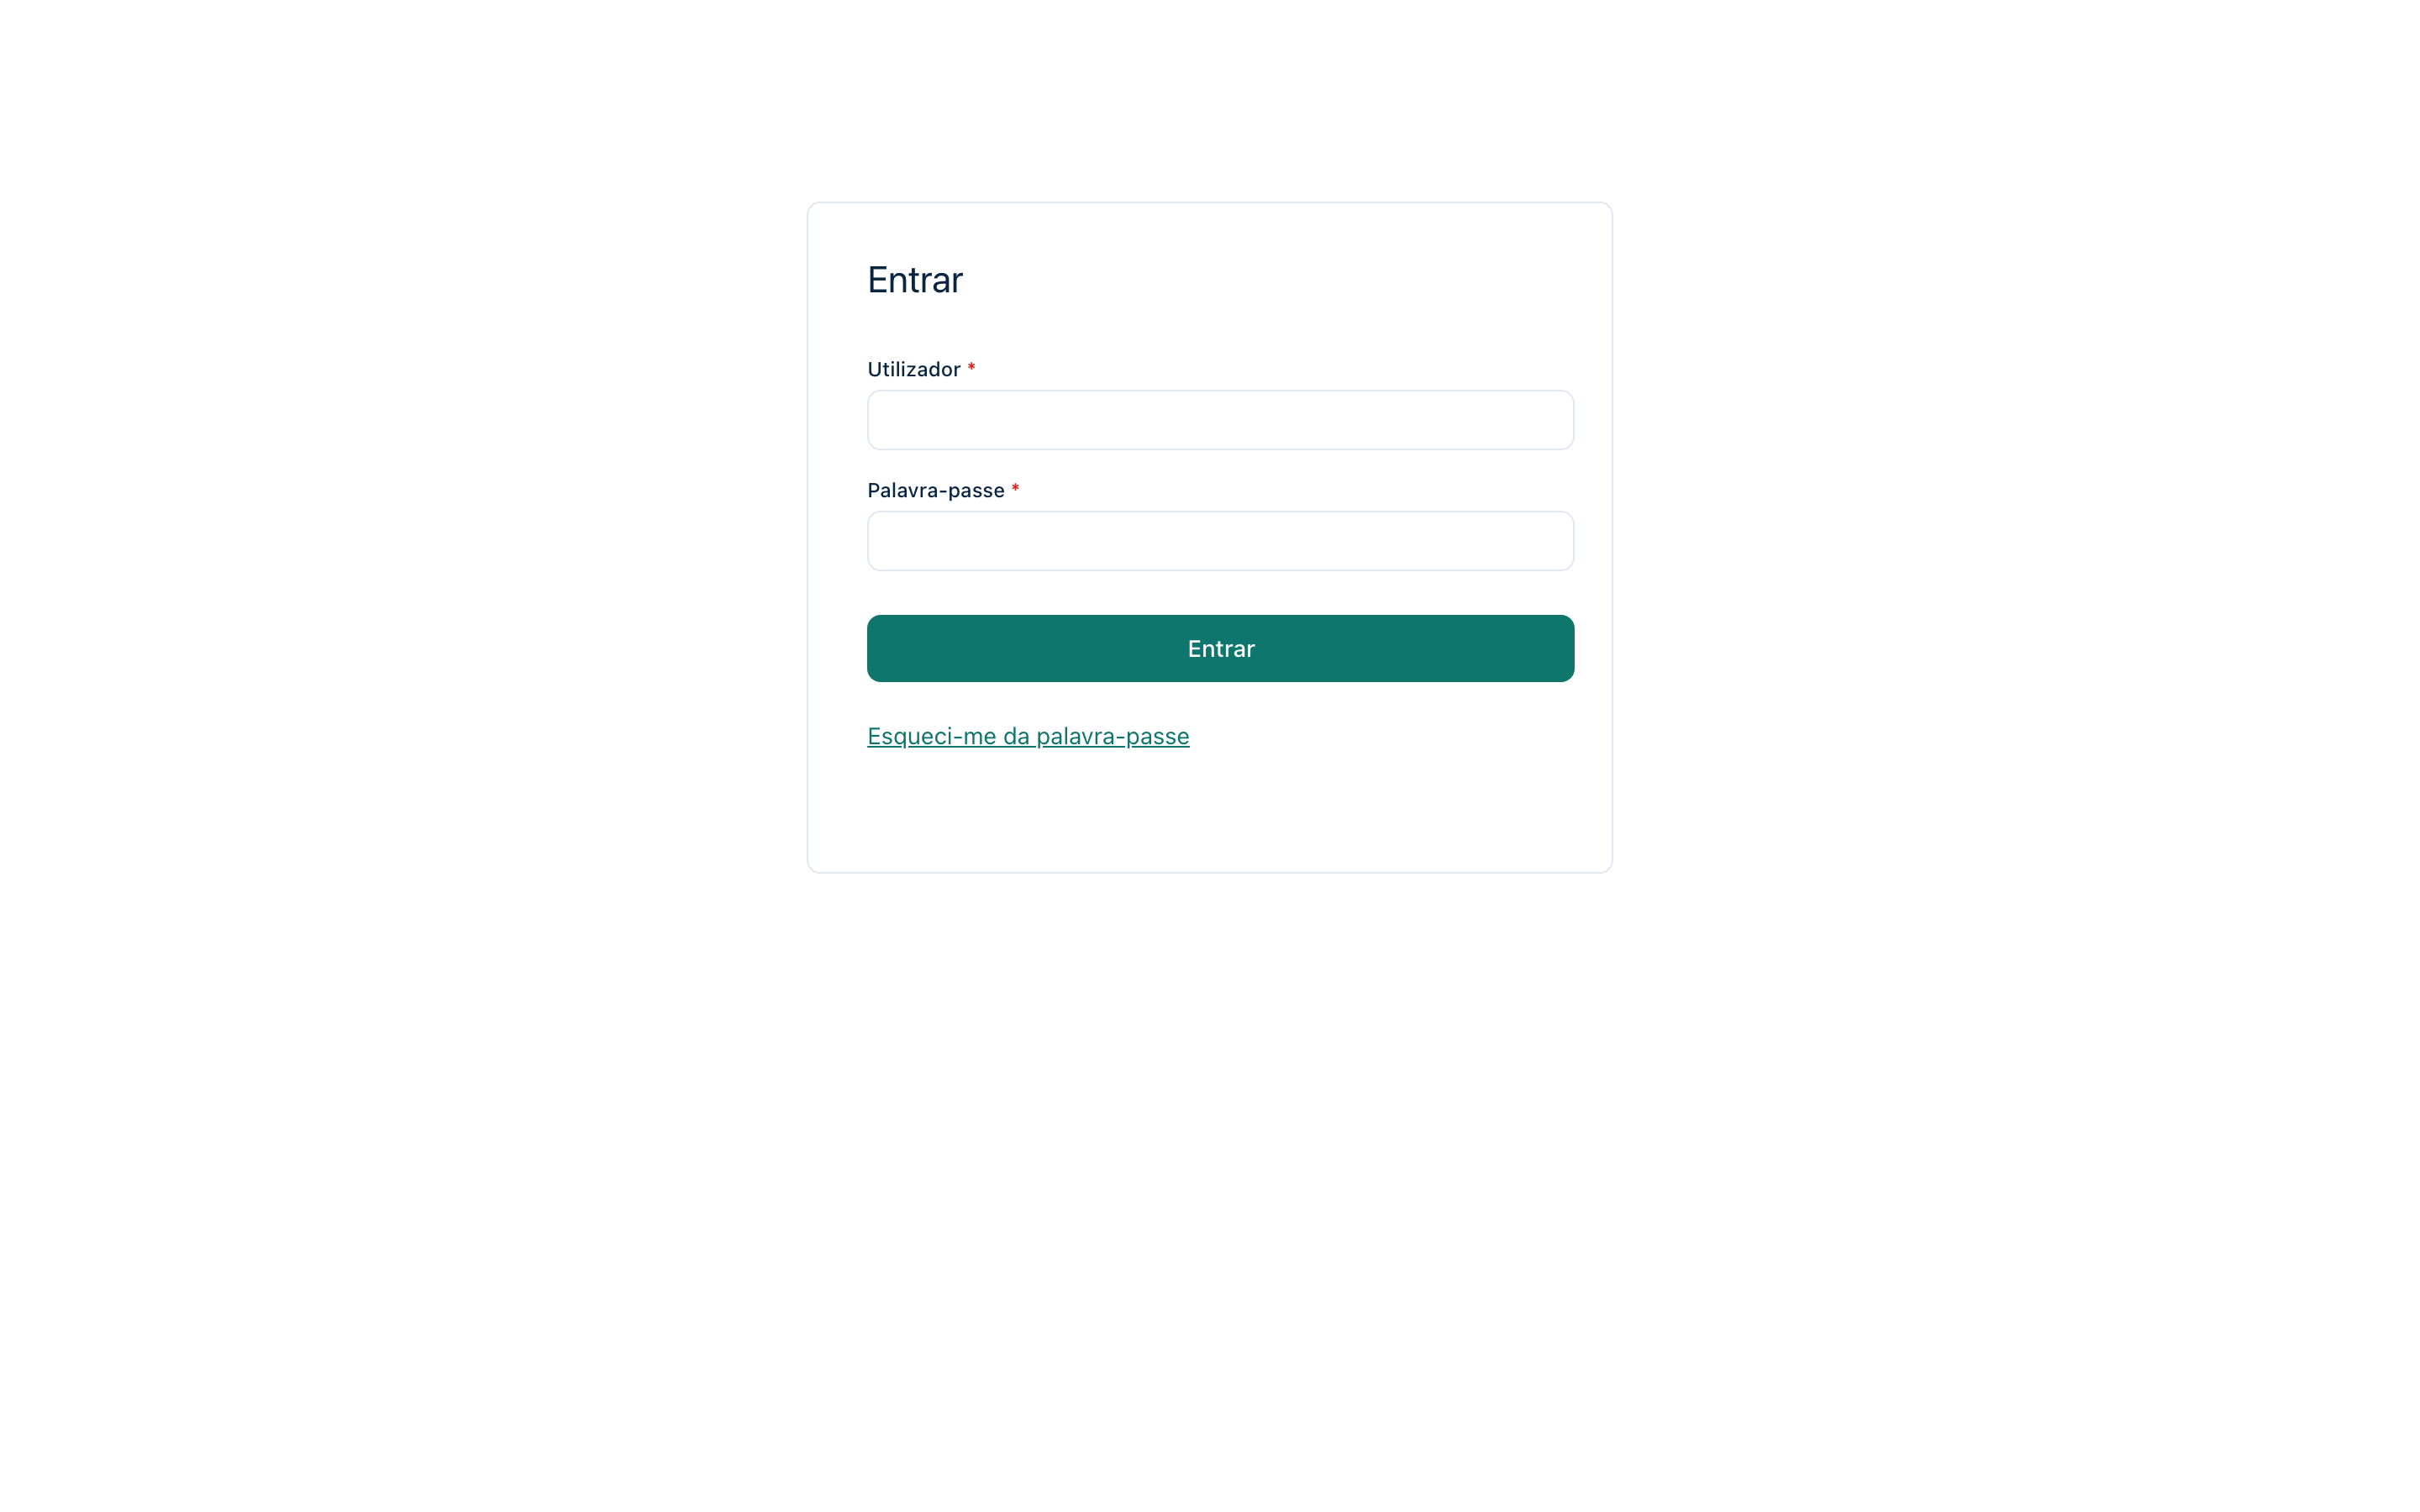
What appears is the Login screen: the Username and Password fields, the Sign in button and the Forgot my password link. It is one of the app's System screens — it comes ready-made and painted with the theme you chose in the previous stage.
Sign in with one of the accounts you created. The app opens on the Initial menu you defined: the dashboard, with the indicators computed over the real data, the menu with your logo and your brand's colors.
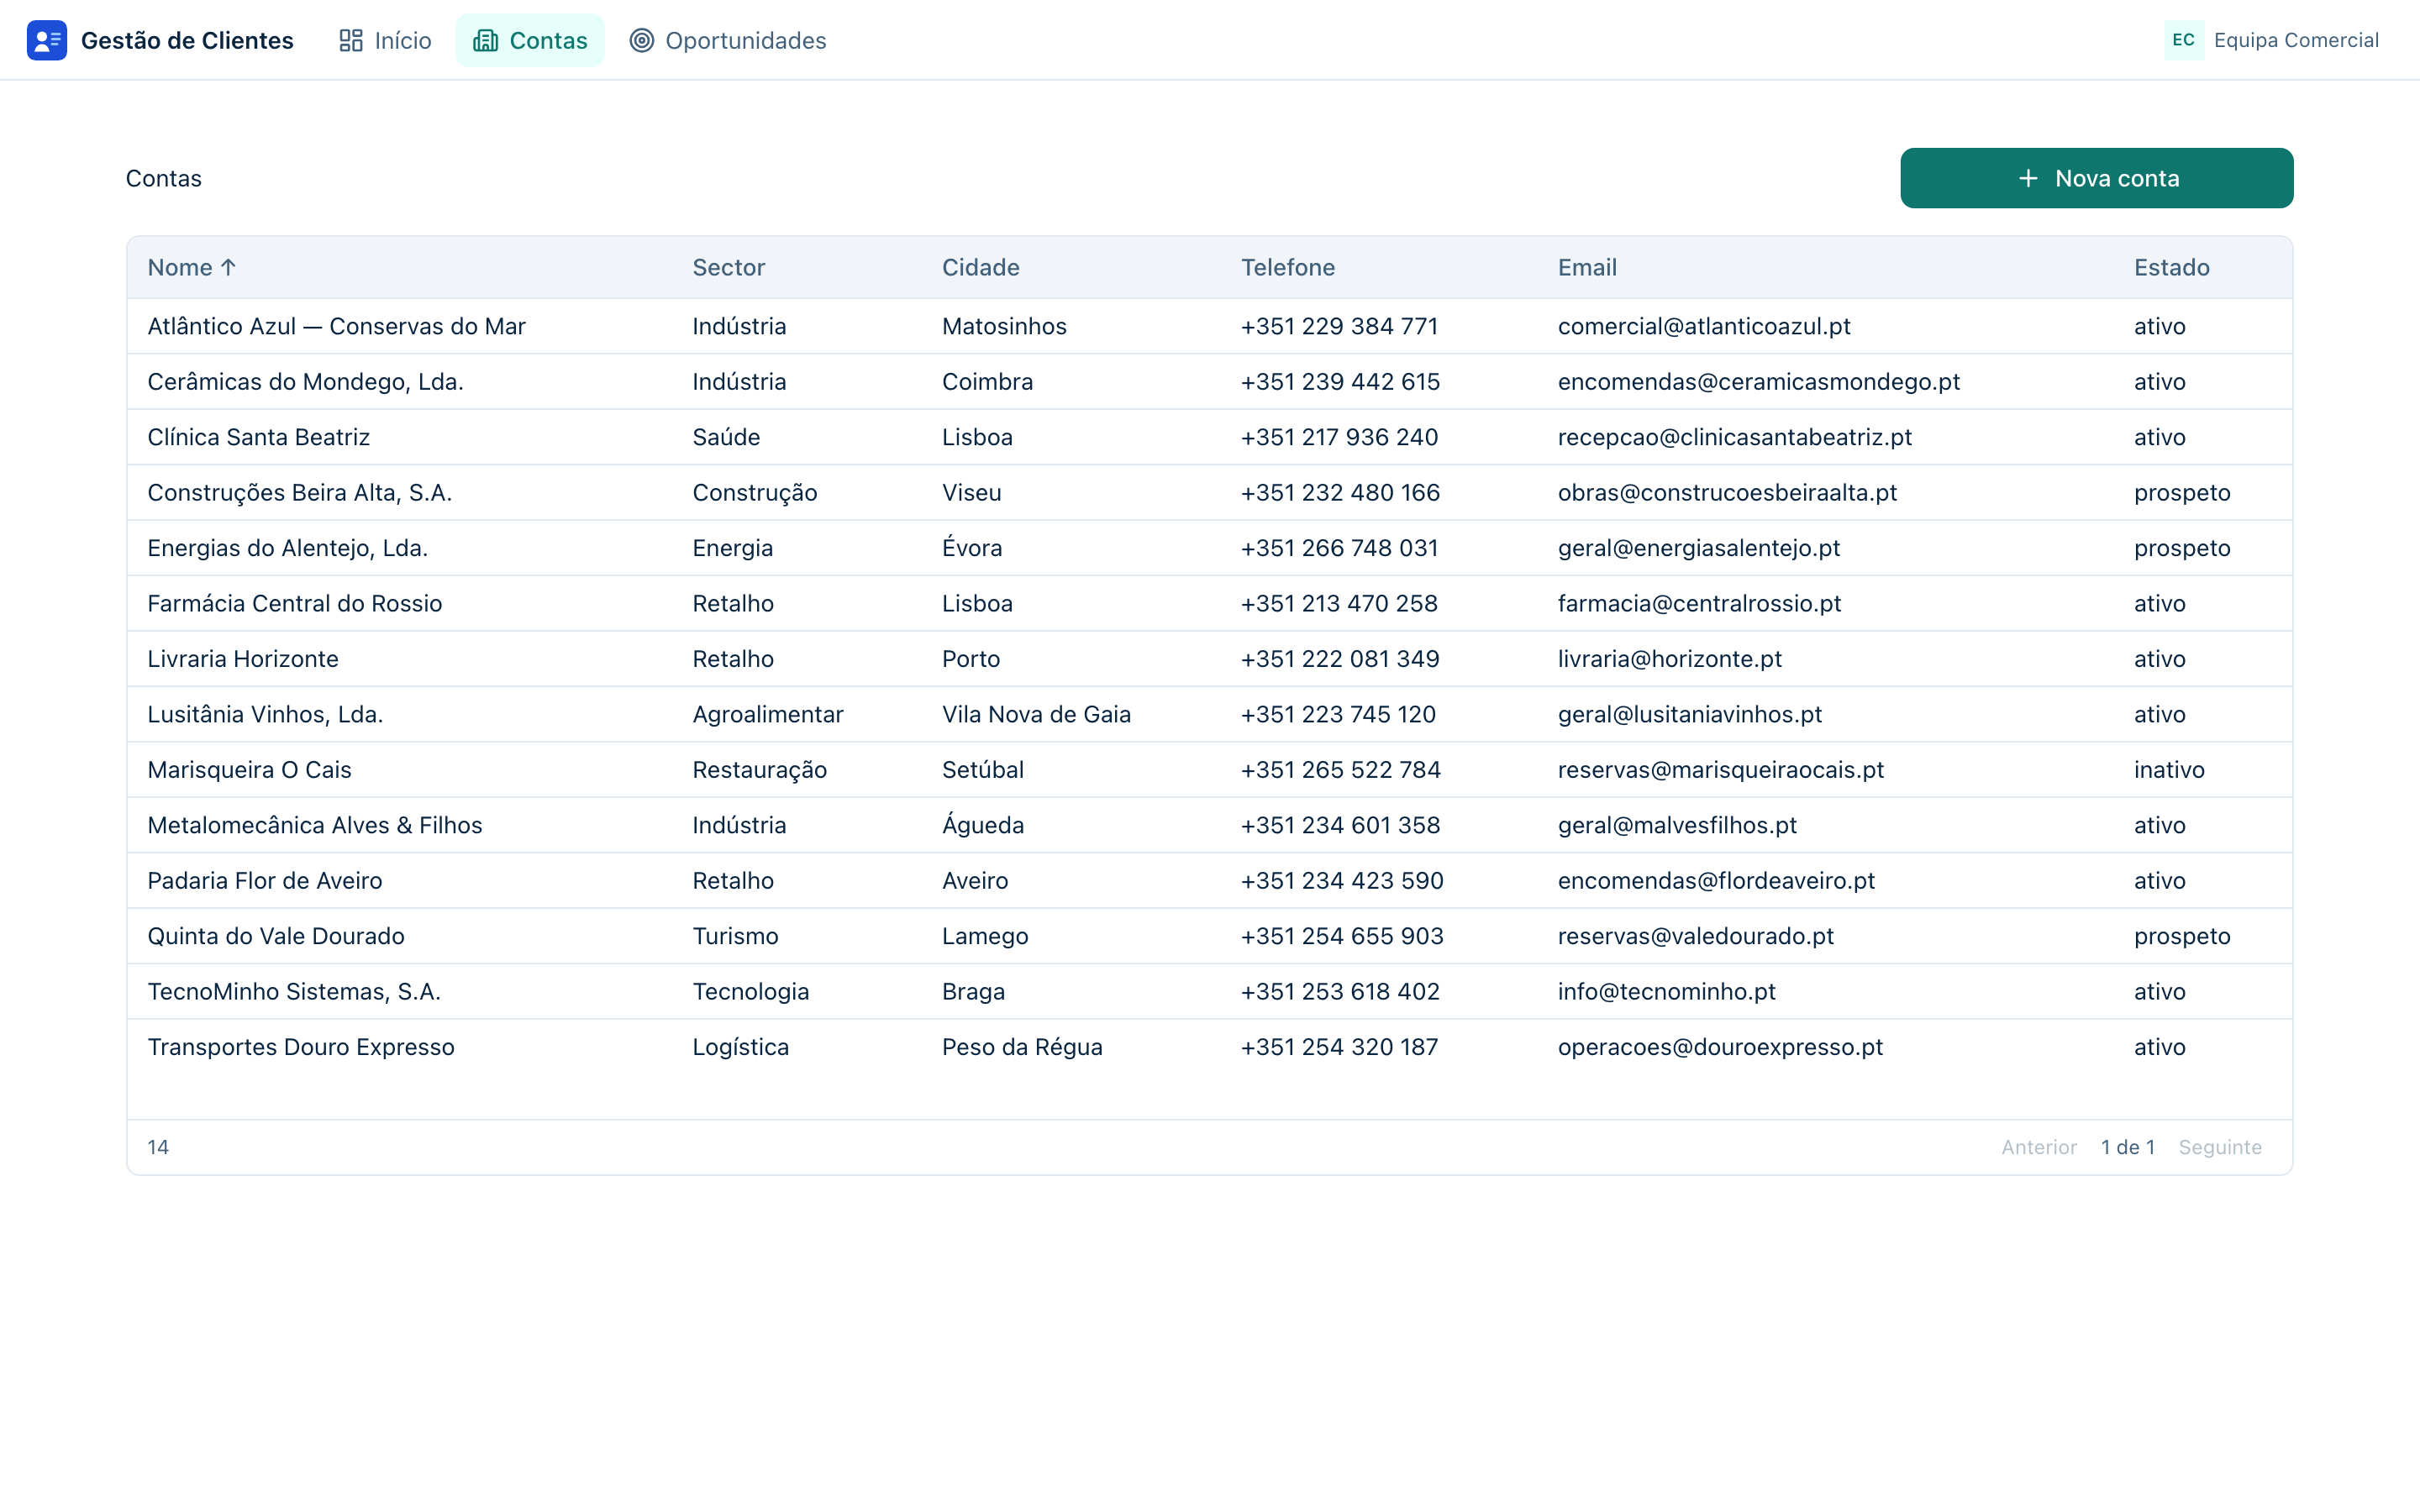
Walk through what you built, from the point of view of whoever is going to use this every day:
- Início — the four indicators, the pipeline chart and the upcoming closes table.
- Contas — the list; click a row and you land on that account's form, with its contacts alongside.
- Change a field and click Save — the notice appears and you return to the list, with the change already in it.
- Click Nova conta — the same form, now blank. Fill it in and save: the record is created.
- Oportunidades — drag a card from Proposta to Negociação. The stage is saved on the spot; go back to Início and the chart has already changed.
The guide is over. Now what?
You have a working business application, built end to end. From here, each piece has a chapter that goes far deeper than this guide could:
| If you want… | Go to |
|---|---|
| Richer screens — more widgets, events, layouts per device | Screen builder |
| Connecting the app to databases that already exist | Datasources |
| Exposing the data to outside systems | APIs & GraphQL and API keys |
| More automation — dependencies, files, the full SDK | Scripts |
| Fine-tuning everything that is the app's — notifications, storage, retention | App settings |
| Taking this app to another installation | Import and export |
Why doesn't…?
- Why doesn't my address open the app? The host is registered on the
platform, but that address's DNS has to point at the server. Until
that is done, use
/app/gestao-clientes. - Why does the address serve the wrong version? Each host serves ONE version, chosen at the moment of publishing. Unpublish and publish again with the right version.
- Why does the user sign in and see nothing? They have no role, or their role has no Data rules. Confirm on the list of users (the amber warning) and then on the role's Data tab.
- Why does the user see the menu but the screen says they have no access? The screen is Hidden for their role, on the Screens tab — and per device: it can be open on web and hidden on the phone.
- Why don't the data I created while testing appear on the published version? Because versions do not share data. You created them on the working version; the host is serving another.
- Why won't my platform account sign in to the app? Because they are different populations. To enter the app you need an App users account, even if you are the one who built it.