The screens
The table APIs that serve the data and the app's four screens — dashboard, list of accounts, account form and opportunities board.
This is the longest stage of the guide, and the one that gives the app its face. By the end you have four screens designed and working on top of the model's real data: an Início with indicators and a chart, a list of Contas, a Ficha de Conta that saves, and an Oportunidades board with draggable cards.
Before the screens, though, there is a short step that makes them possible.
First the table APIs
A screen does not talk to the database. It talks to datastores — each screen's data containers — and the datastores read and write through the app's table APIs. A table API points at an entity of the model and generates, on its own, the read and write operations.
Let's create three, one per entity:
- Choose the Code panel in the sidebar.
- On the APIs row, click the + (New API).
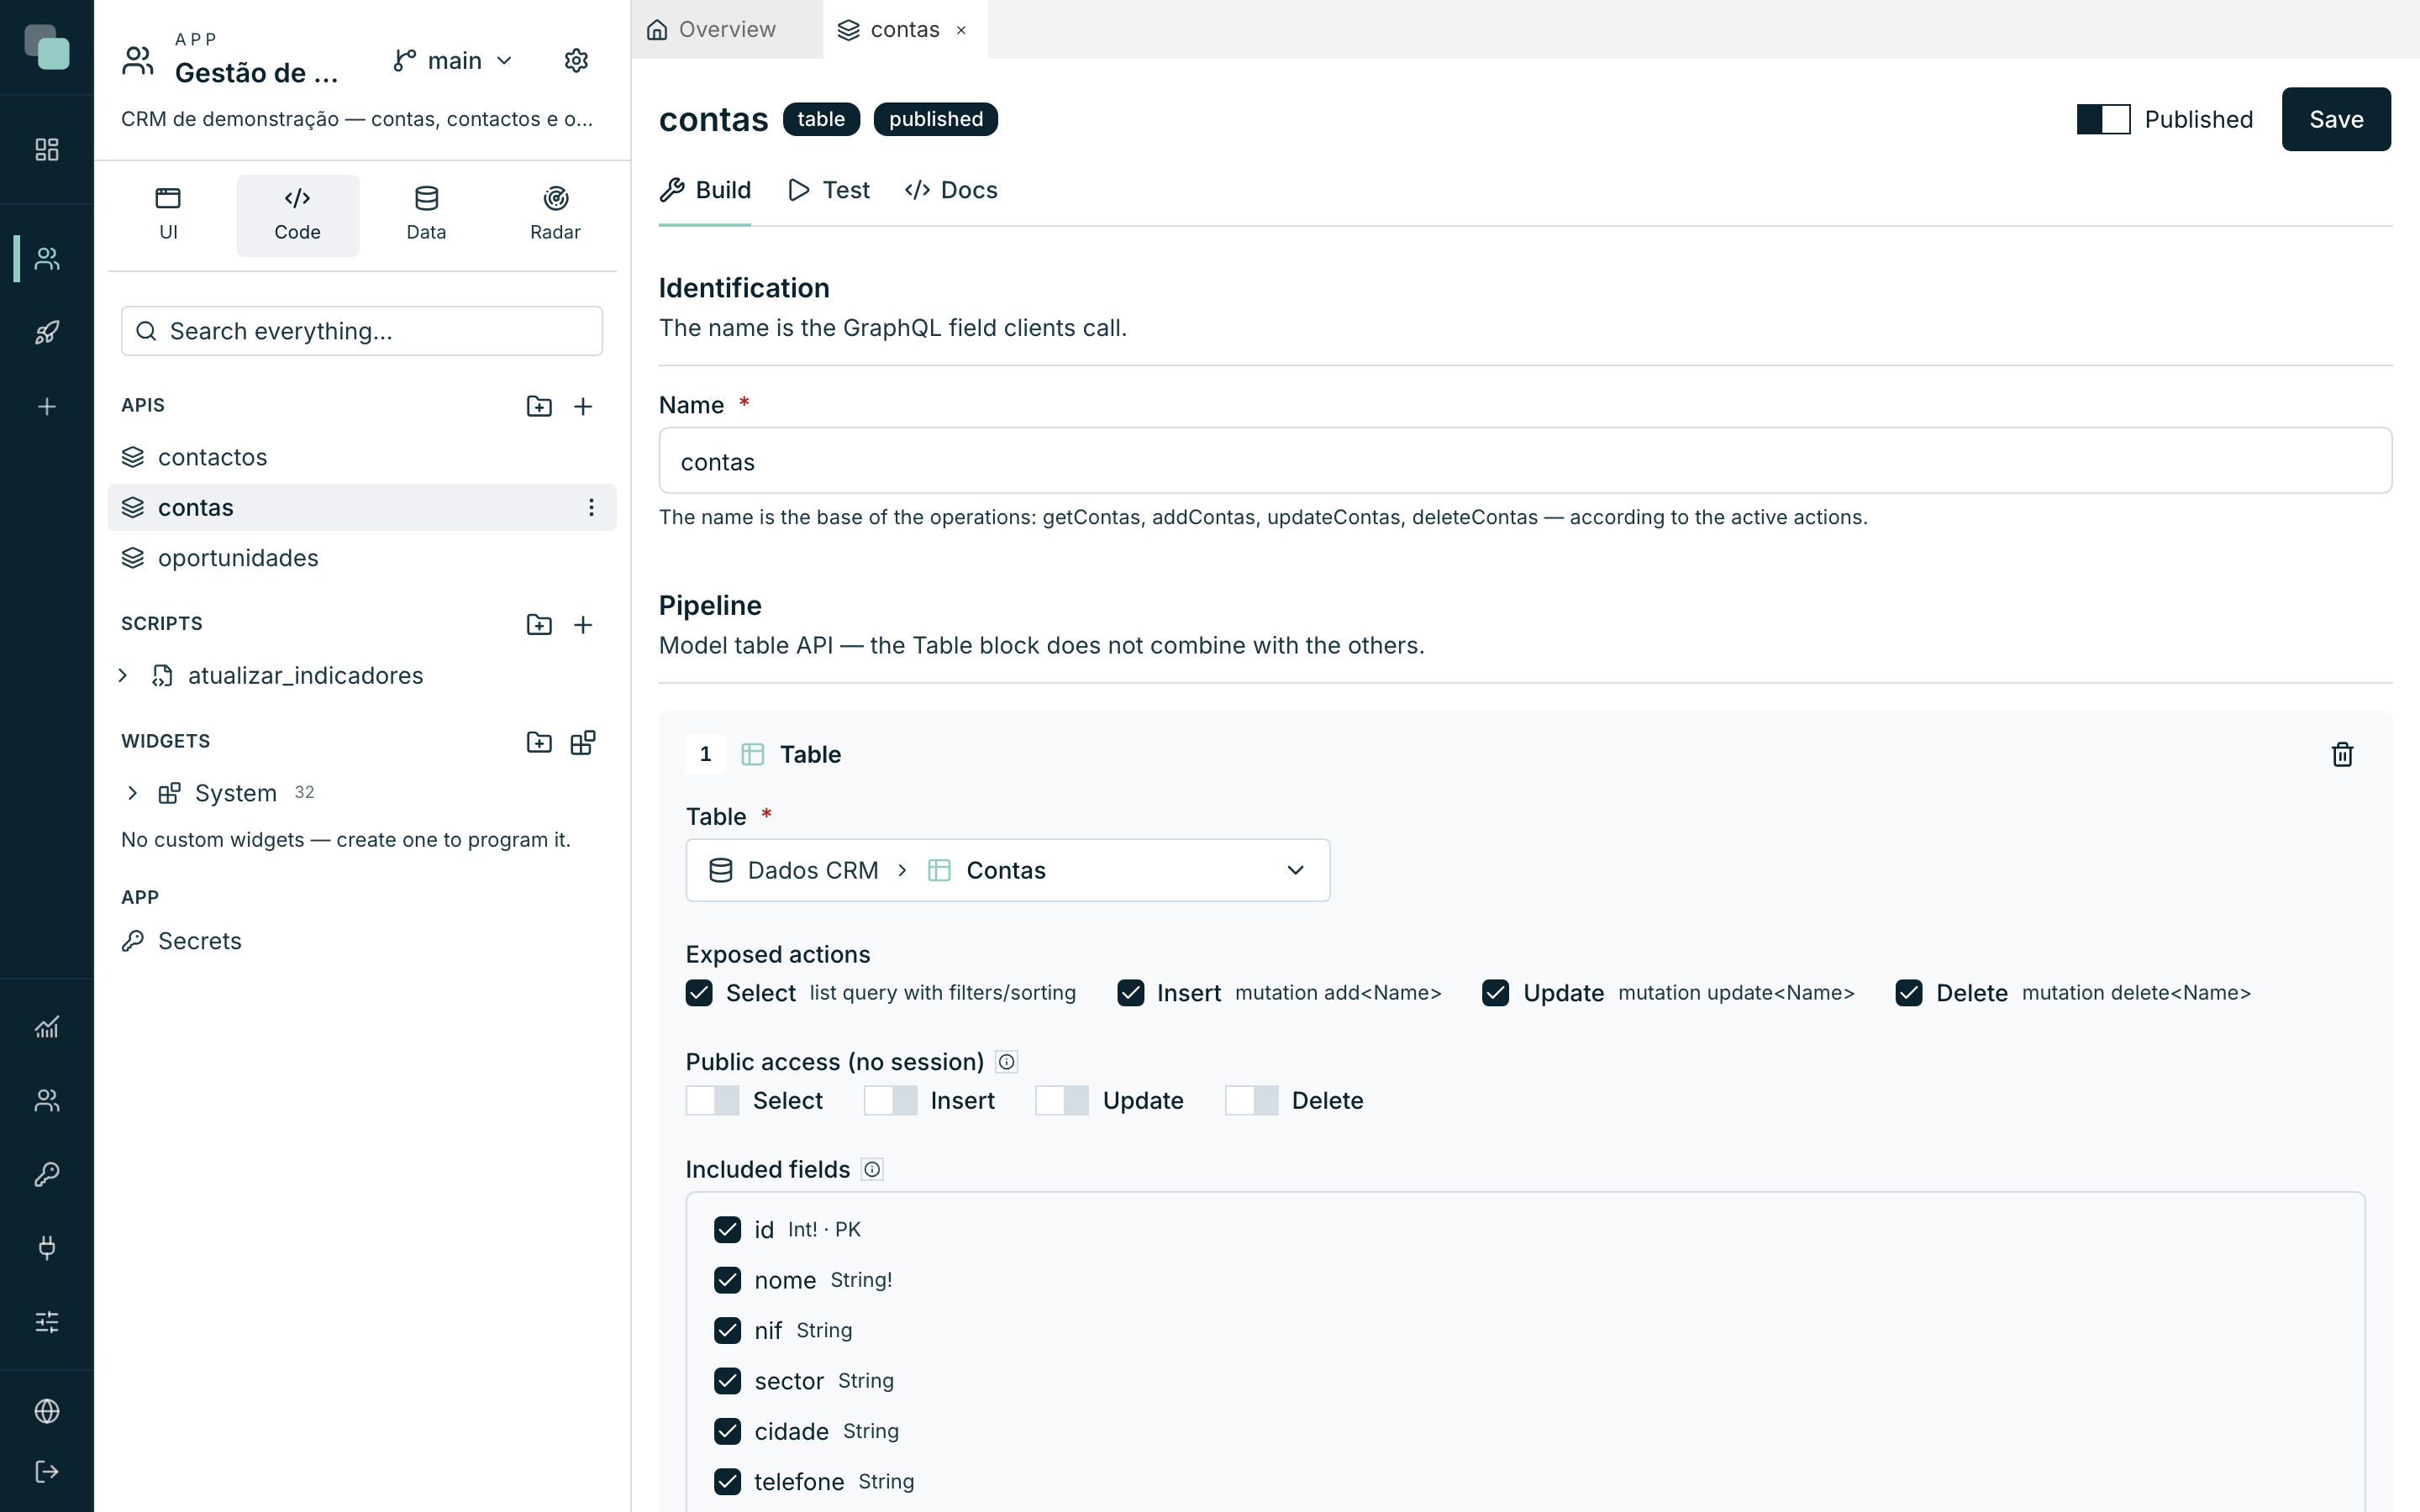
- In Name, type
contas. The name is the base of the operations (getContas,addContas,updateContas,deleteContas) — so do not give it prefixes likegetorlistar. - Click Create API. The builder opens on the Build tab.
- In the Pipeline section, choose the Table block.
- In the Table field, choose
Dados CRM ▸ Contas. - In Exposed actions, leave Select, Insert, Update and Delete checked — the CRM needs all four.
- Leave Public access (no session) entirely off: this app is for people who are signed in.
- In Included fields, confirm that the fields the screens will use are checked. For the accounts, that is all of them.
- Turn on the Published switch and click Save.
Repeat for the other two:
| API | Entity | Actions | Notes |
|---|---|---|---|
contas |
Contas | Select, Insert, Update, Delete | All the fields. |
contactos |
Contactos | Select, Insert, Update, Delete | Includes the conta navigator (only the nome field). |
oportunidades |
Oportunidades | Select, Insert, Update, Delete | Includes the conta navigator (only the nome field). |
The navigators are what lets you show the account's name next to an
opportunity without writing a line of SQL: check them in the list of
included fields, and the conta.nome field becomes available in the
screens.
Note
A draft API is only visible to whoever is building. If you forget to publish it, the screens' datastores cannot find it — it is the number one cause of "the screen loads nothing". The chapter The API builder covers APIs in depth.
Creating the four screens
The screens live in the UI panel, in the Screens section.
- Choose the UI panel in the sidebar.
- On the Screens row, click the New screen button.
- Type the name and confirm with Create. The screen opens right away in the workspace.
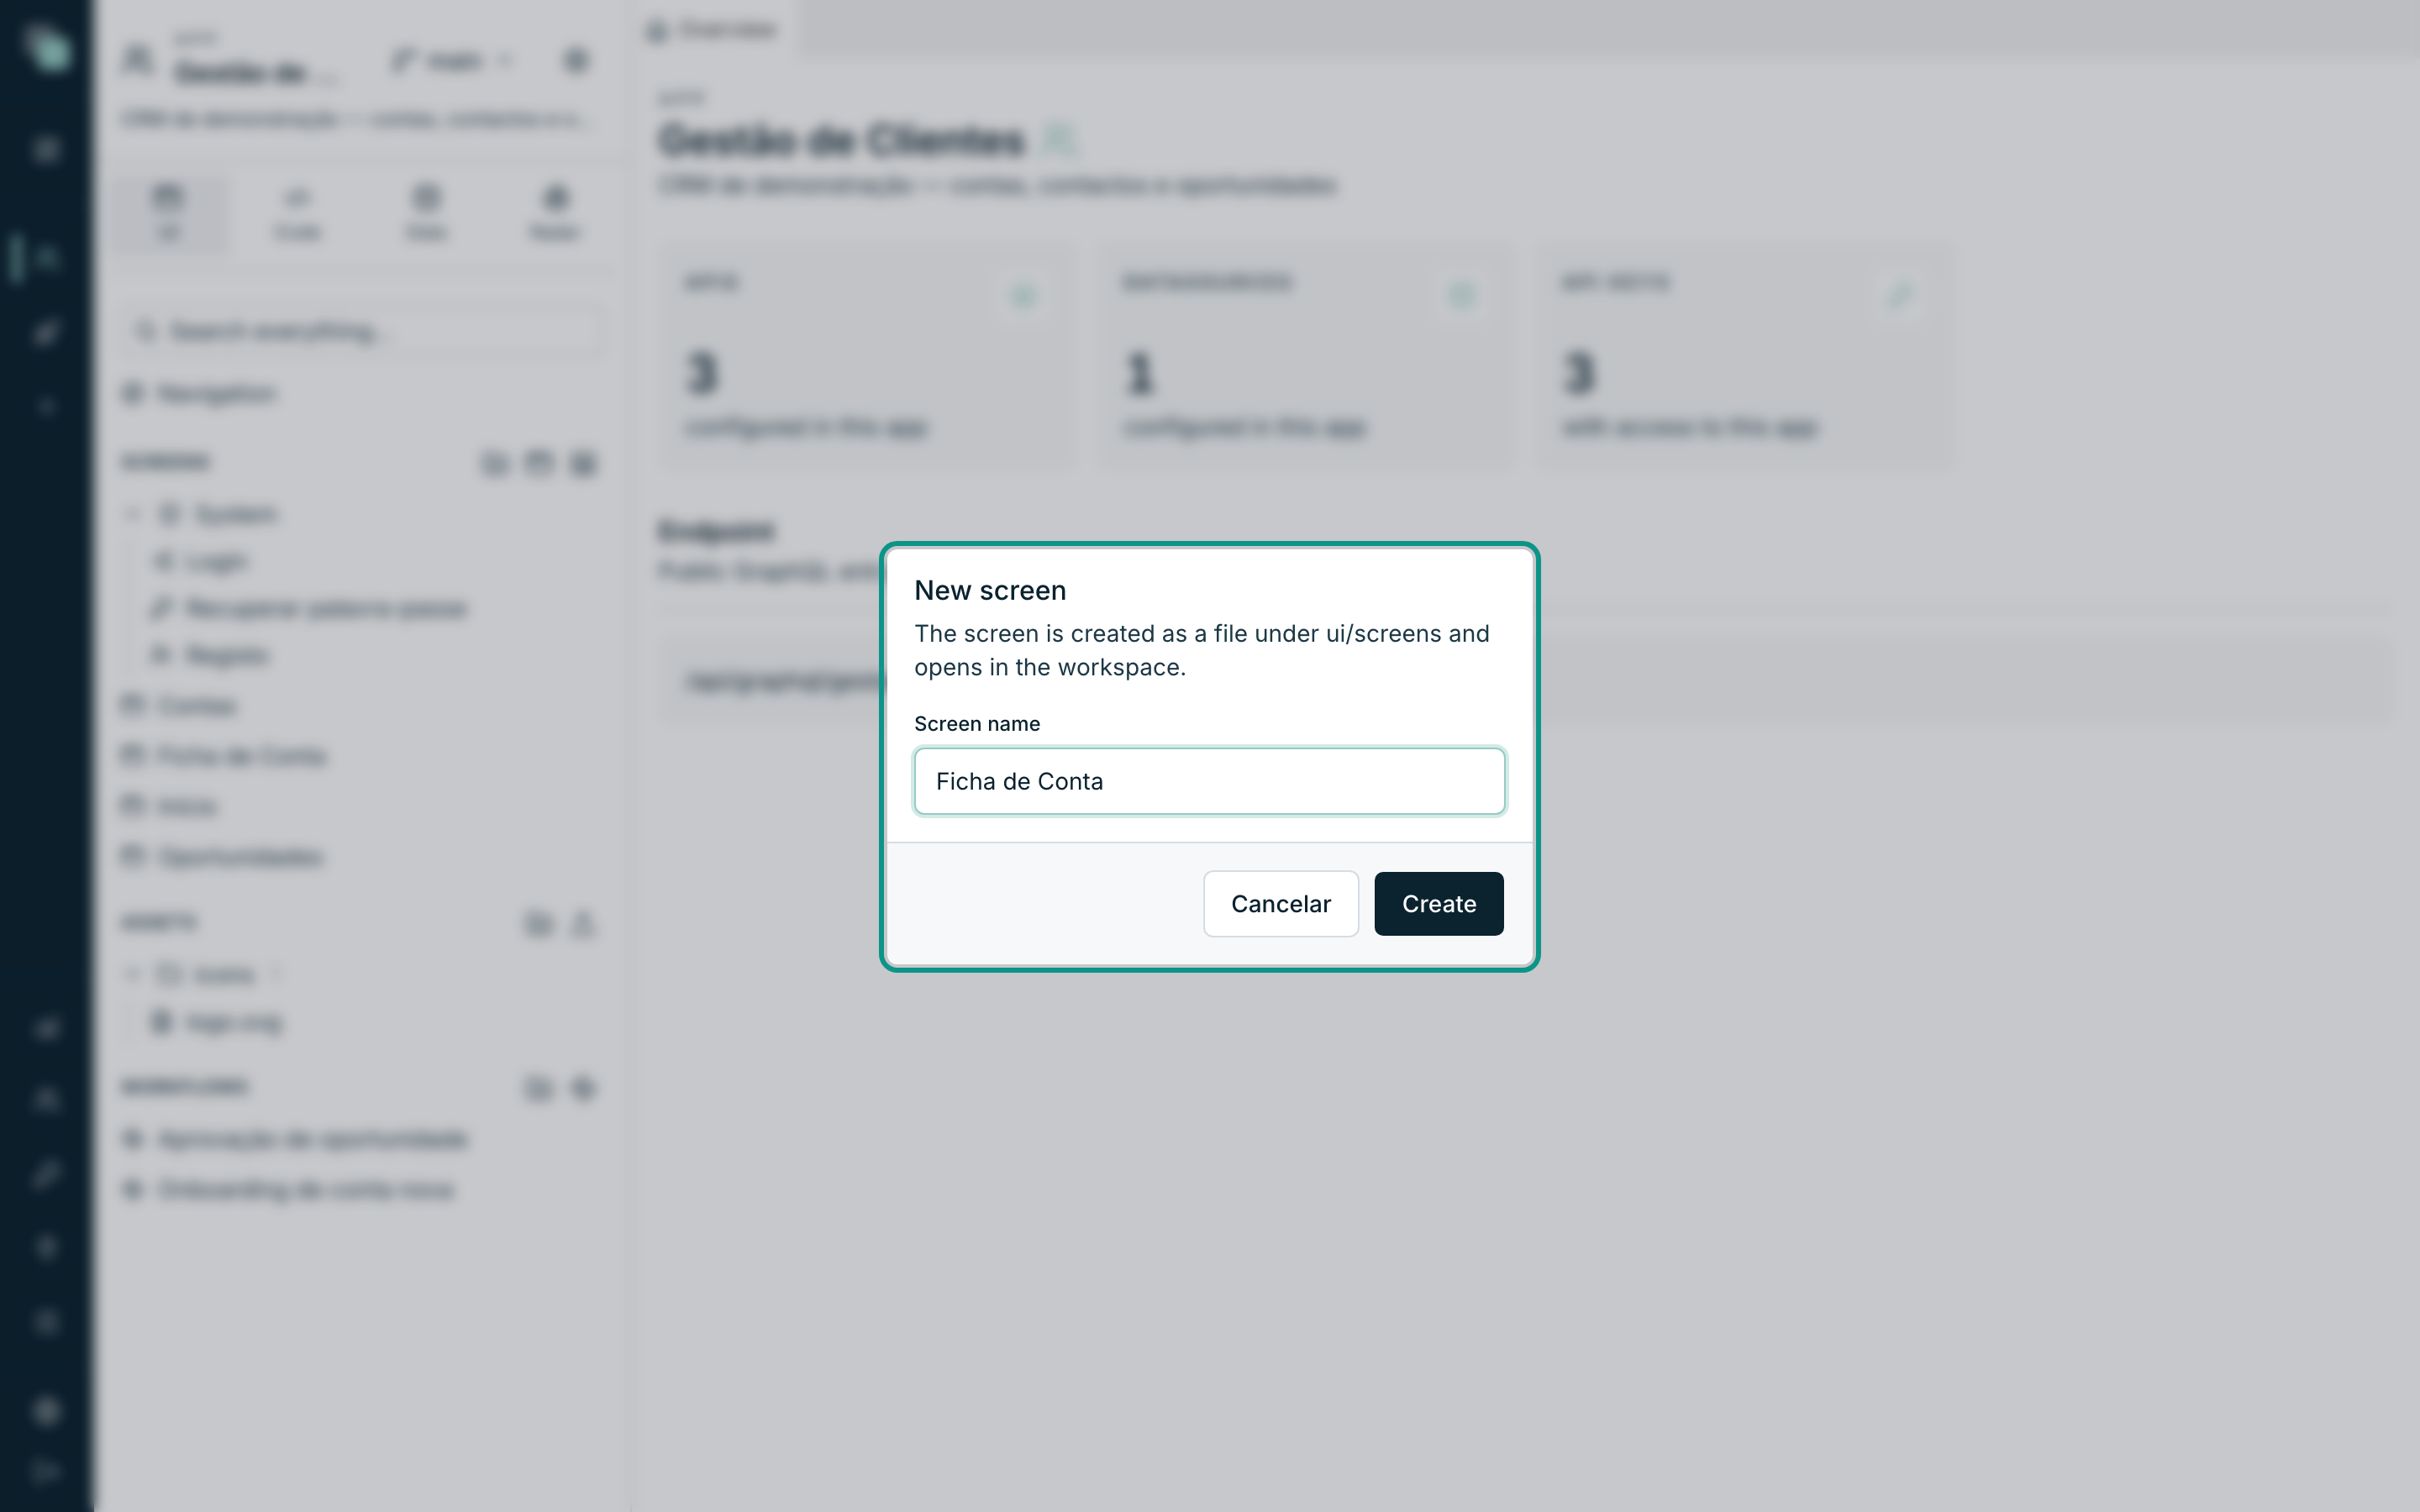
Create all four at once, in this order:
| Screen name | Route | What it is going to be |
|---|---|---|
Início |
/inicio |
The sales dashboard, with indicators and chart. |
Contas |
/contas |
The list of accounts. |
Ficha de Conta |
/ficha-de-conta |
The form of one account. |
Oportunidades |
/oportunidades |
The kanban board. |
The Route is derived from the name and is seen (and edited) in the inspector, when no widget is selected. Leave them as they are — the guide refers to them further along.
Tip
Always work on the Web (1280px) device throughout this guide. The other two — Tablet and Mobile — have a design of their own, independent; they are dealt with later, once the web design is stable.
The Início screen — the sales dashboard
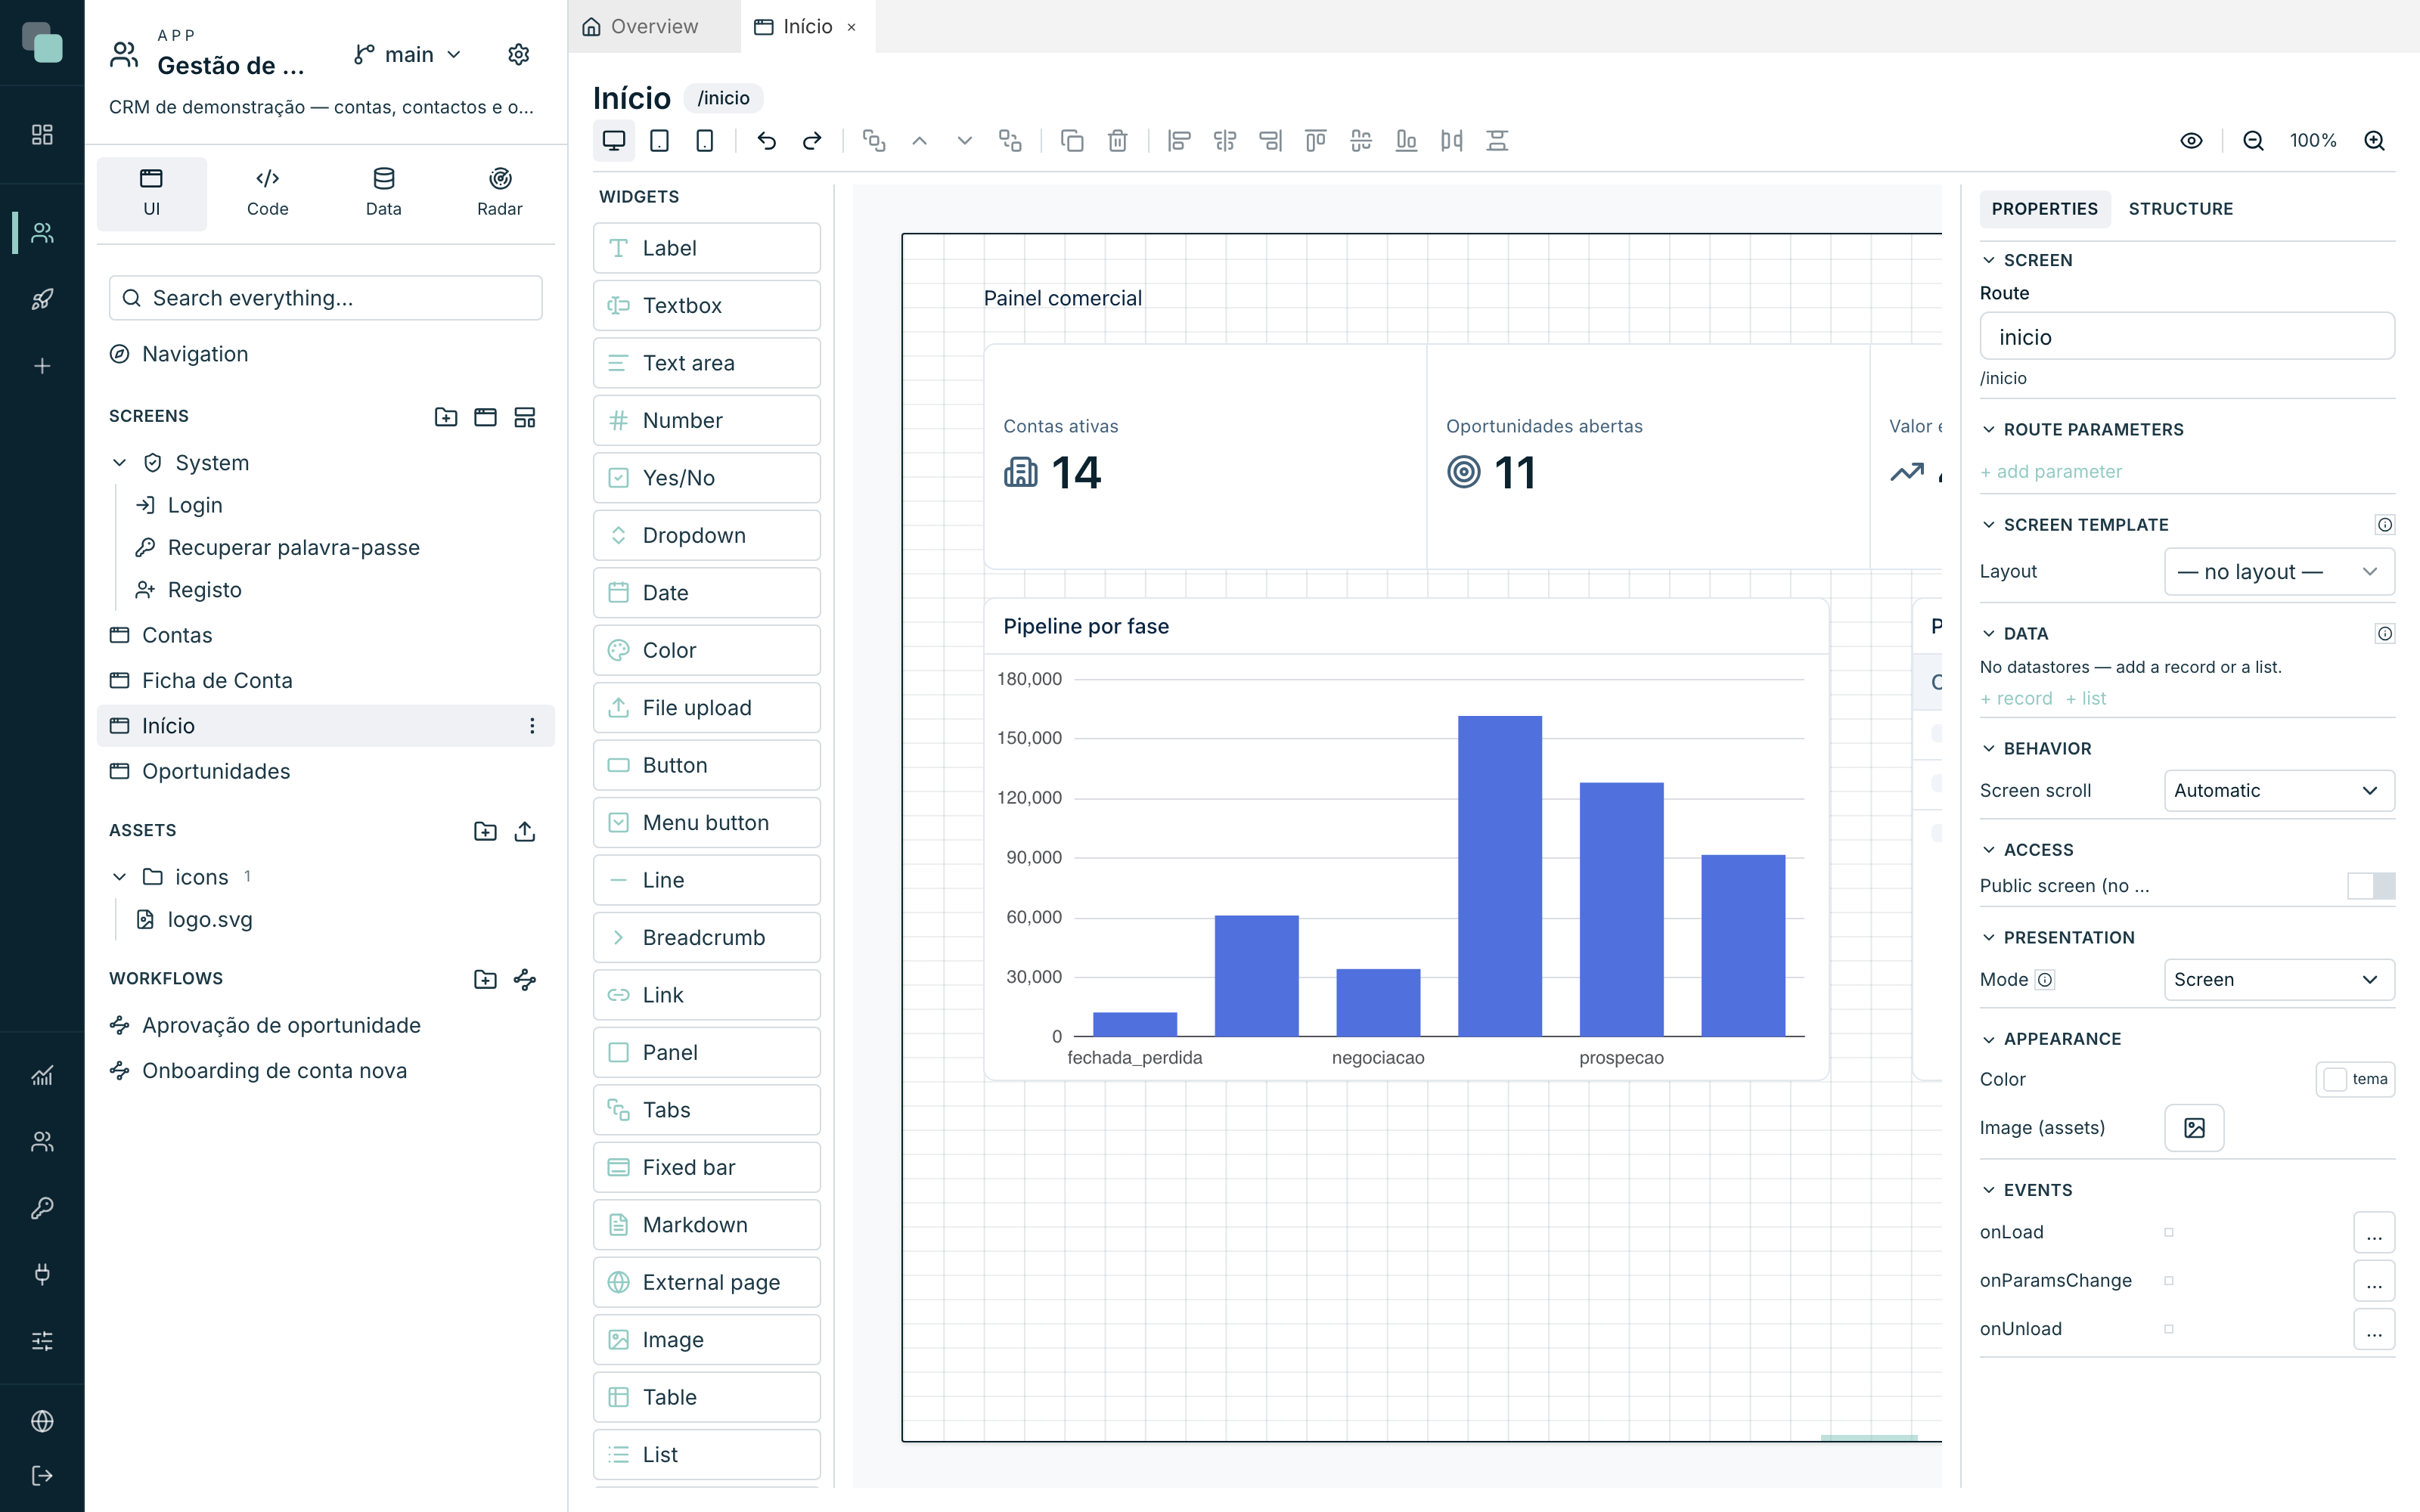
Open the Início screen. The design has four pieces: a title, a strip of indicators, a chart and a table.
The title
- Drag a Label from the palette to the top of the canvas.
- In the Content category of the inspector, type the text
Painel comercial. - In the Appearance category, raise the Size of the text — it is the page title.
The strip of indicators
Four numbers side by side are made with one KPI widget of four indicators, not with four widgets: the alignment and the spacing come guaranteed.
- Drag a KPI below the title and stretch it across the full width.
- In the Data category, the Indicators section starts with one. Use Add indicator until you have four.
- Each indicator has a Label, an icon, an Own dataset (its datastore) and a value with an Aggregation.
Configure them like this:
| Label | Datastore (table API) | Filter | Value |
|---|---|---|---|
Contas ativas |
contas |
— | Count of id |
Oportunidades abertas |
oportunidades |
fase ≠ fechada_ganha and fase ≠ fechada_perdida |
Count of id |
Valor em pipeline |
oportunidades |
the same filter | Sum of valor |
Fechado este trimestre |
oportunidades |
fase = fechada_ganha |
Sum of valor |
On the two money indicators, open the Format and choose currency EUR with zero decimals — 475,850 reads better than 475850.
The chart
- Drag a Chart to the left half, below the KPI.
- In the Data category, create the list datastore on the
oportunidadesAPI. - In Chart type, choose Bars.
- In Category field (X axis / slices), choose
fase. - In Value fields, add
valor. - In the Appearance category, turn on Show title and type
Pipeline por fase.
The upcoming closes table
- Drag a Table to the right half, next to the chart.
- In the Data category, create the list datastore on
oportunidades, with the open-stages filter (the same one as the indicators), sorted bydata_fechoascending and Per page at 8. - In the Data category, Columns section, define four columns:
| Field | Header |
|---|---|
titulo |
Oportunidade |
conta.nome |
Conta |
valor |
Valor (€) |
data_fecho |
Fecho |
- Turn on Show title and type
Próximos fechos.
The Contas screen — the list
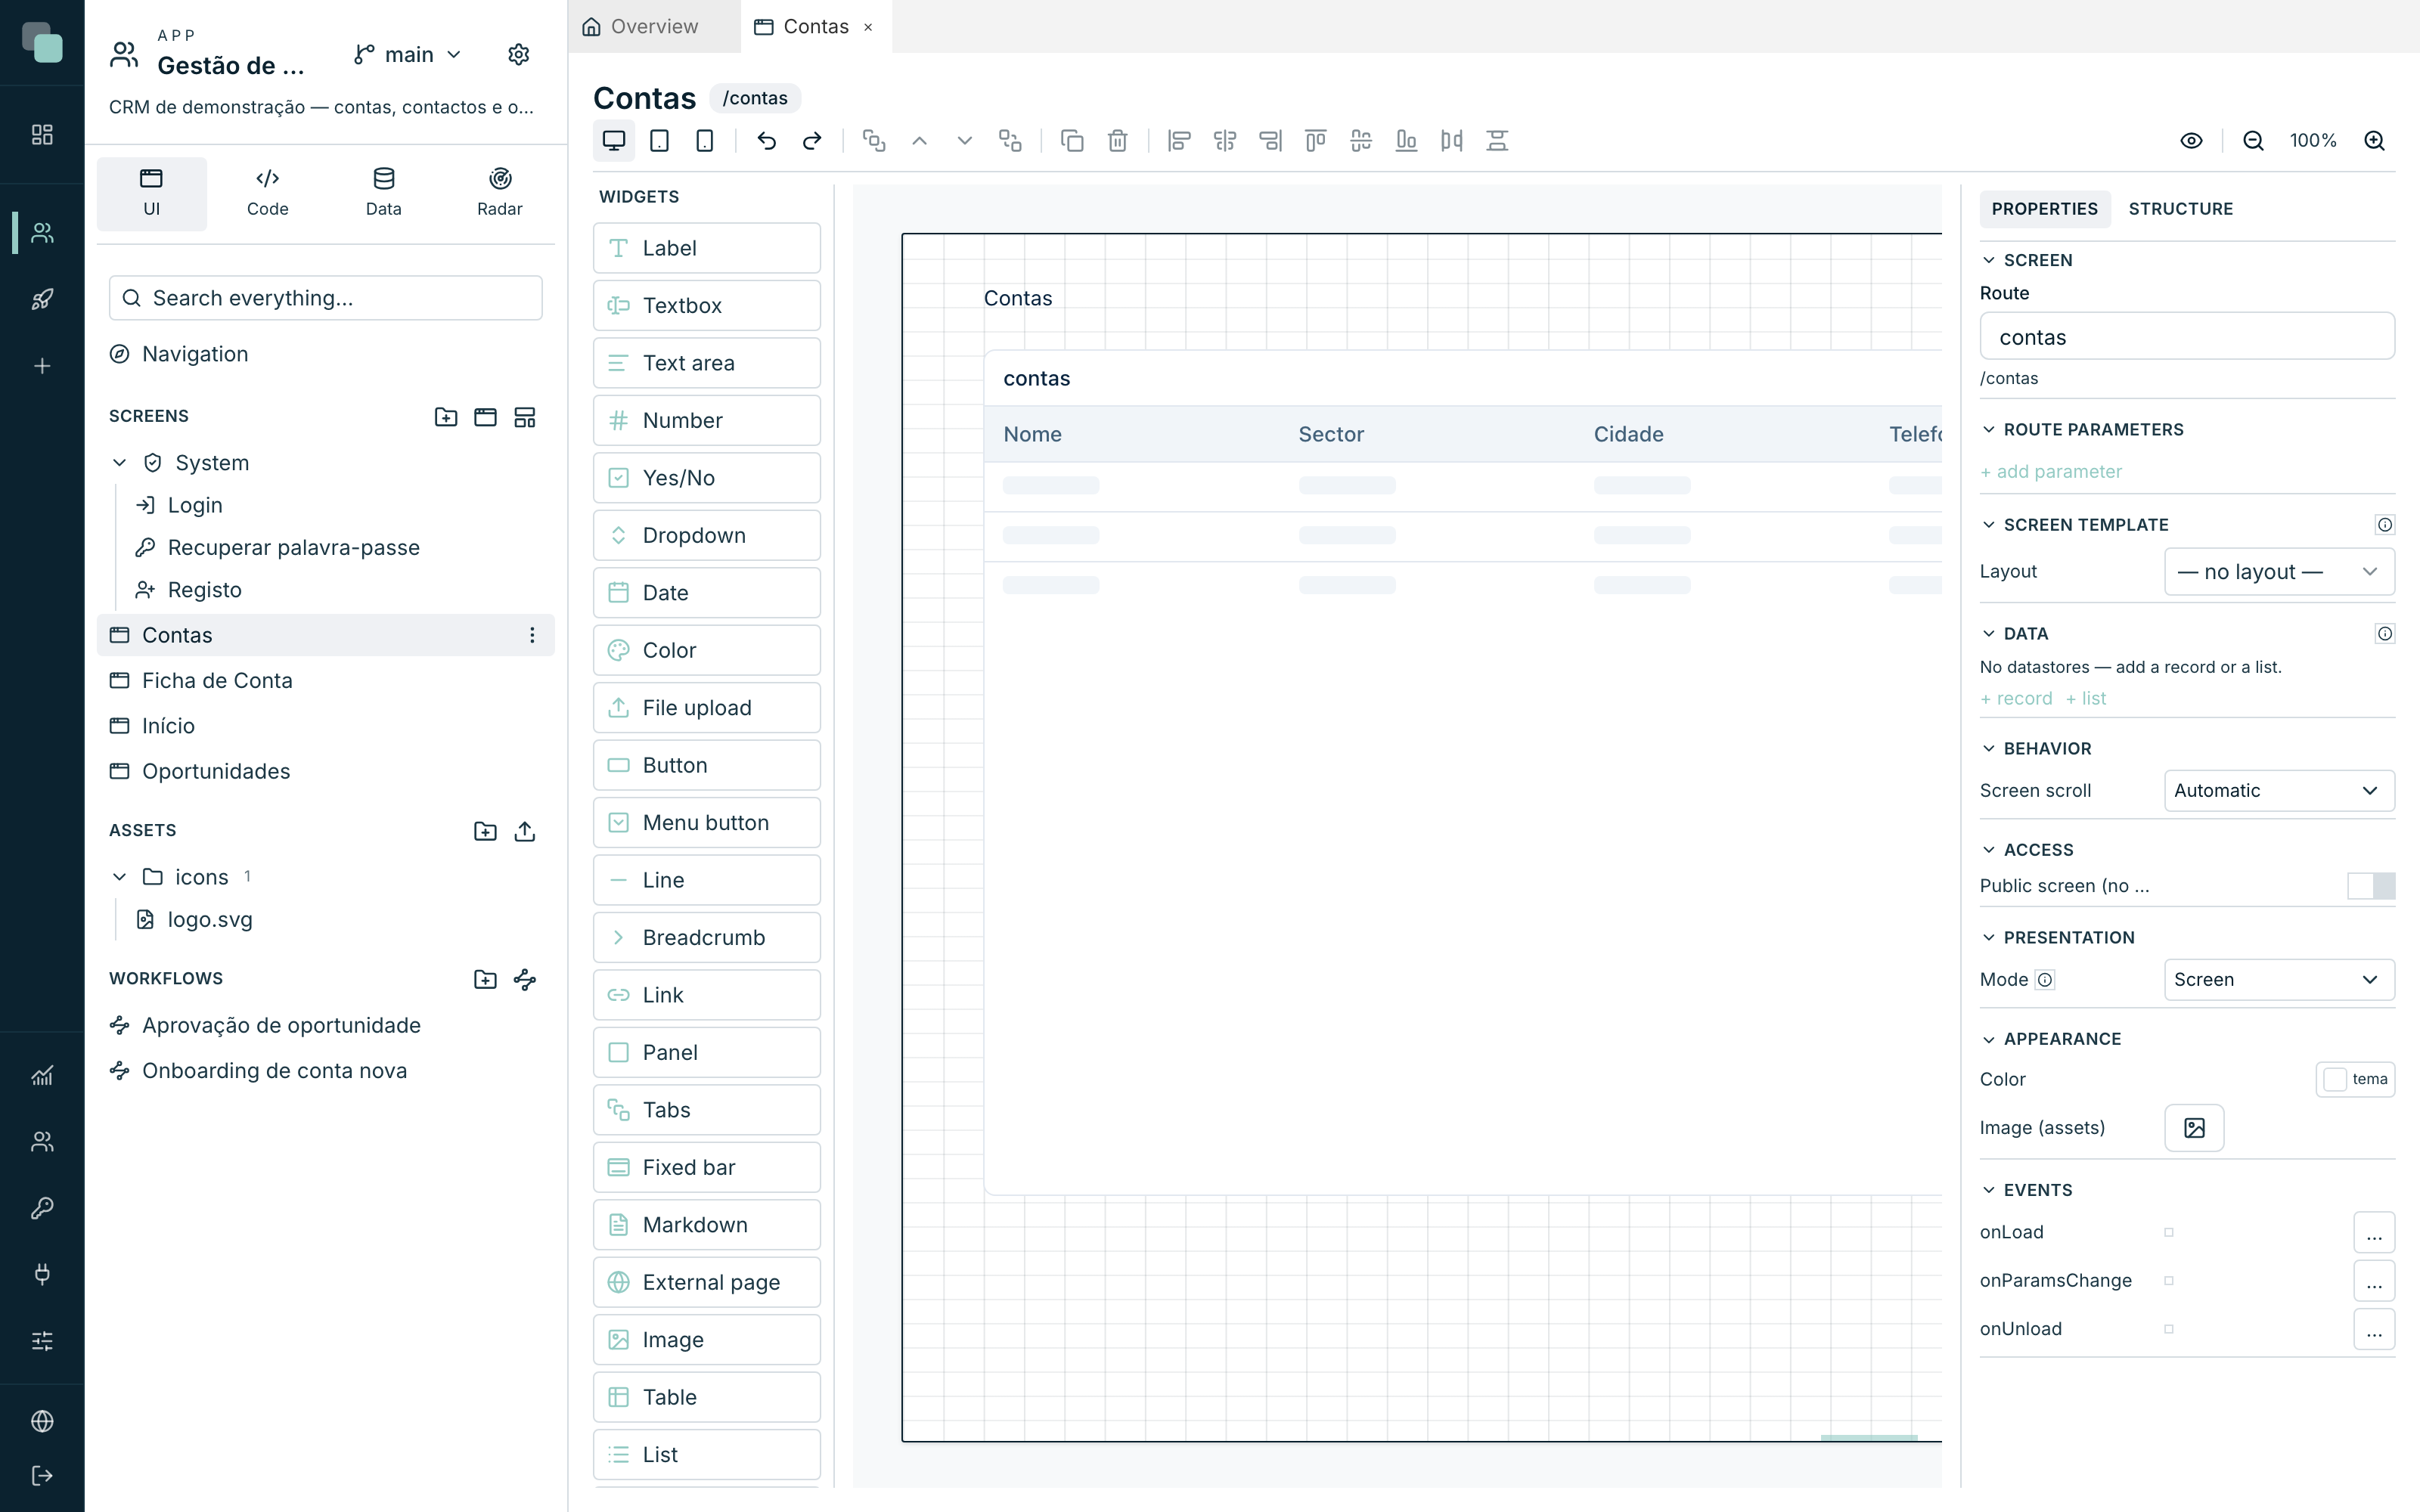
Open the Contas screen. It is three widgets.
- A Label at the top, with the text
Contas. - A Button in the top right corner: in the Content category, text
Nova contaand iconplus. - A Table taking up the rest of the screen. In the Data category,
create the list datastore on the
contasAPI, sorted bynomeascending, and define the columns:
| Field | Header |
|---|---|
nome |
Nome |
sector |
Sector |
cidade |
Cidade |
telefone |
Telefone |
email |
Email |
estado |
Estado |
What is left is wiring up the two gestures that make this list serve for something. Both are written in the Events category, in TypeScript:
On the Button, in the onClick event — open the blank form, to create:
keplin.nav.go("/ficha-de-conta");
On the Table, in the onRowClick event — open the form of the clicked
row:
keplin.nav.go("/ficha-de-conta/" + keplin.event.row.id);
Note
keplin.event.row is the row the user clicked, with all the datastore's
fields. That is why row.id is enough to build the form's address.
The Ficha de Conta screen — the form
This is the screen with the most pieces, and the one that best shows how the data works. Open the Ficha de Conta screen.
The route parameter
- Click an empty area of the canvas — the inspector switches to showing the screen.
- In the Route parameters section, click + add parameter and type
id. - Leave Required off. This is deliberate: without
idthe screen opens blank, and that is how the same form serves to create a new account.
The Route becomes /ficha-de-conta/:id.
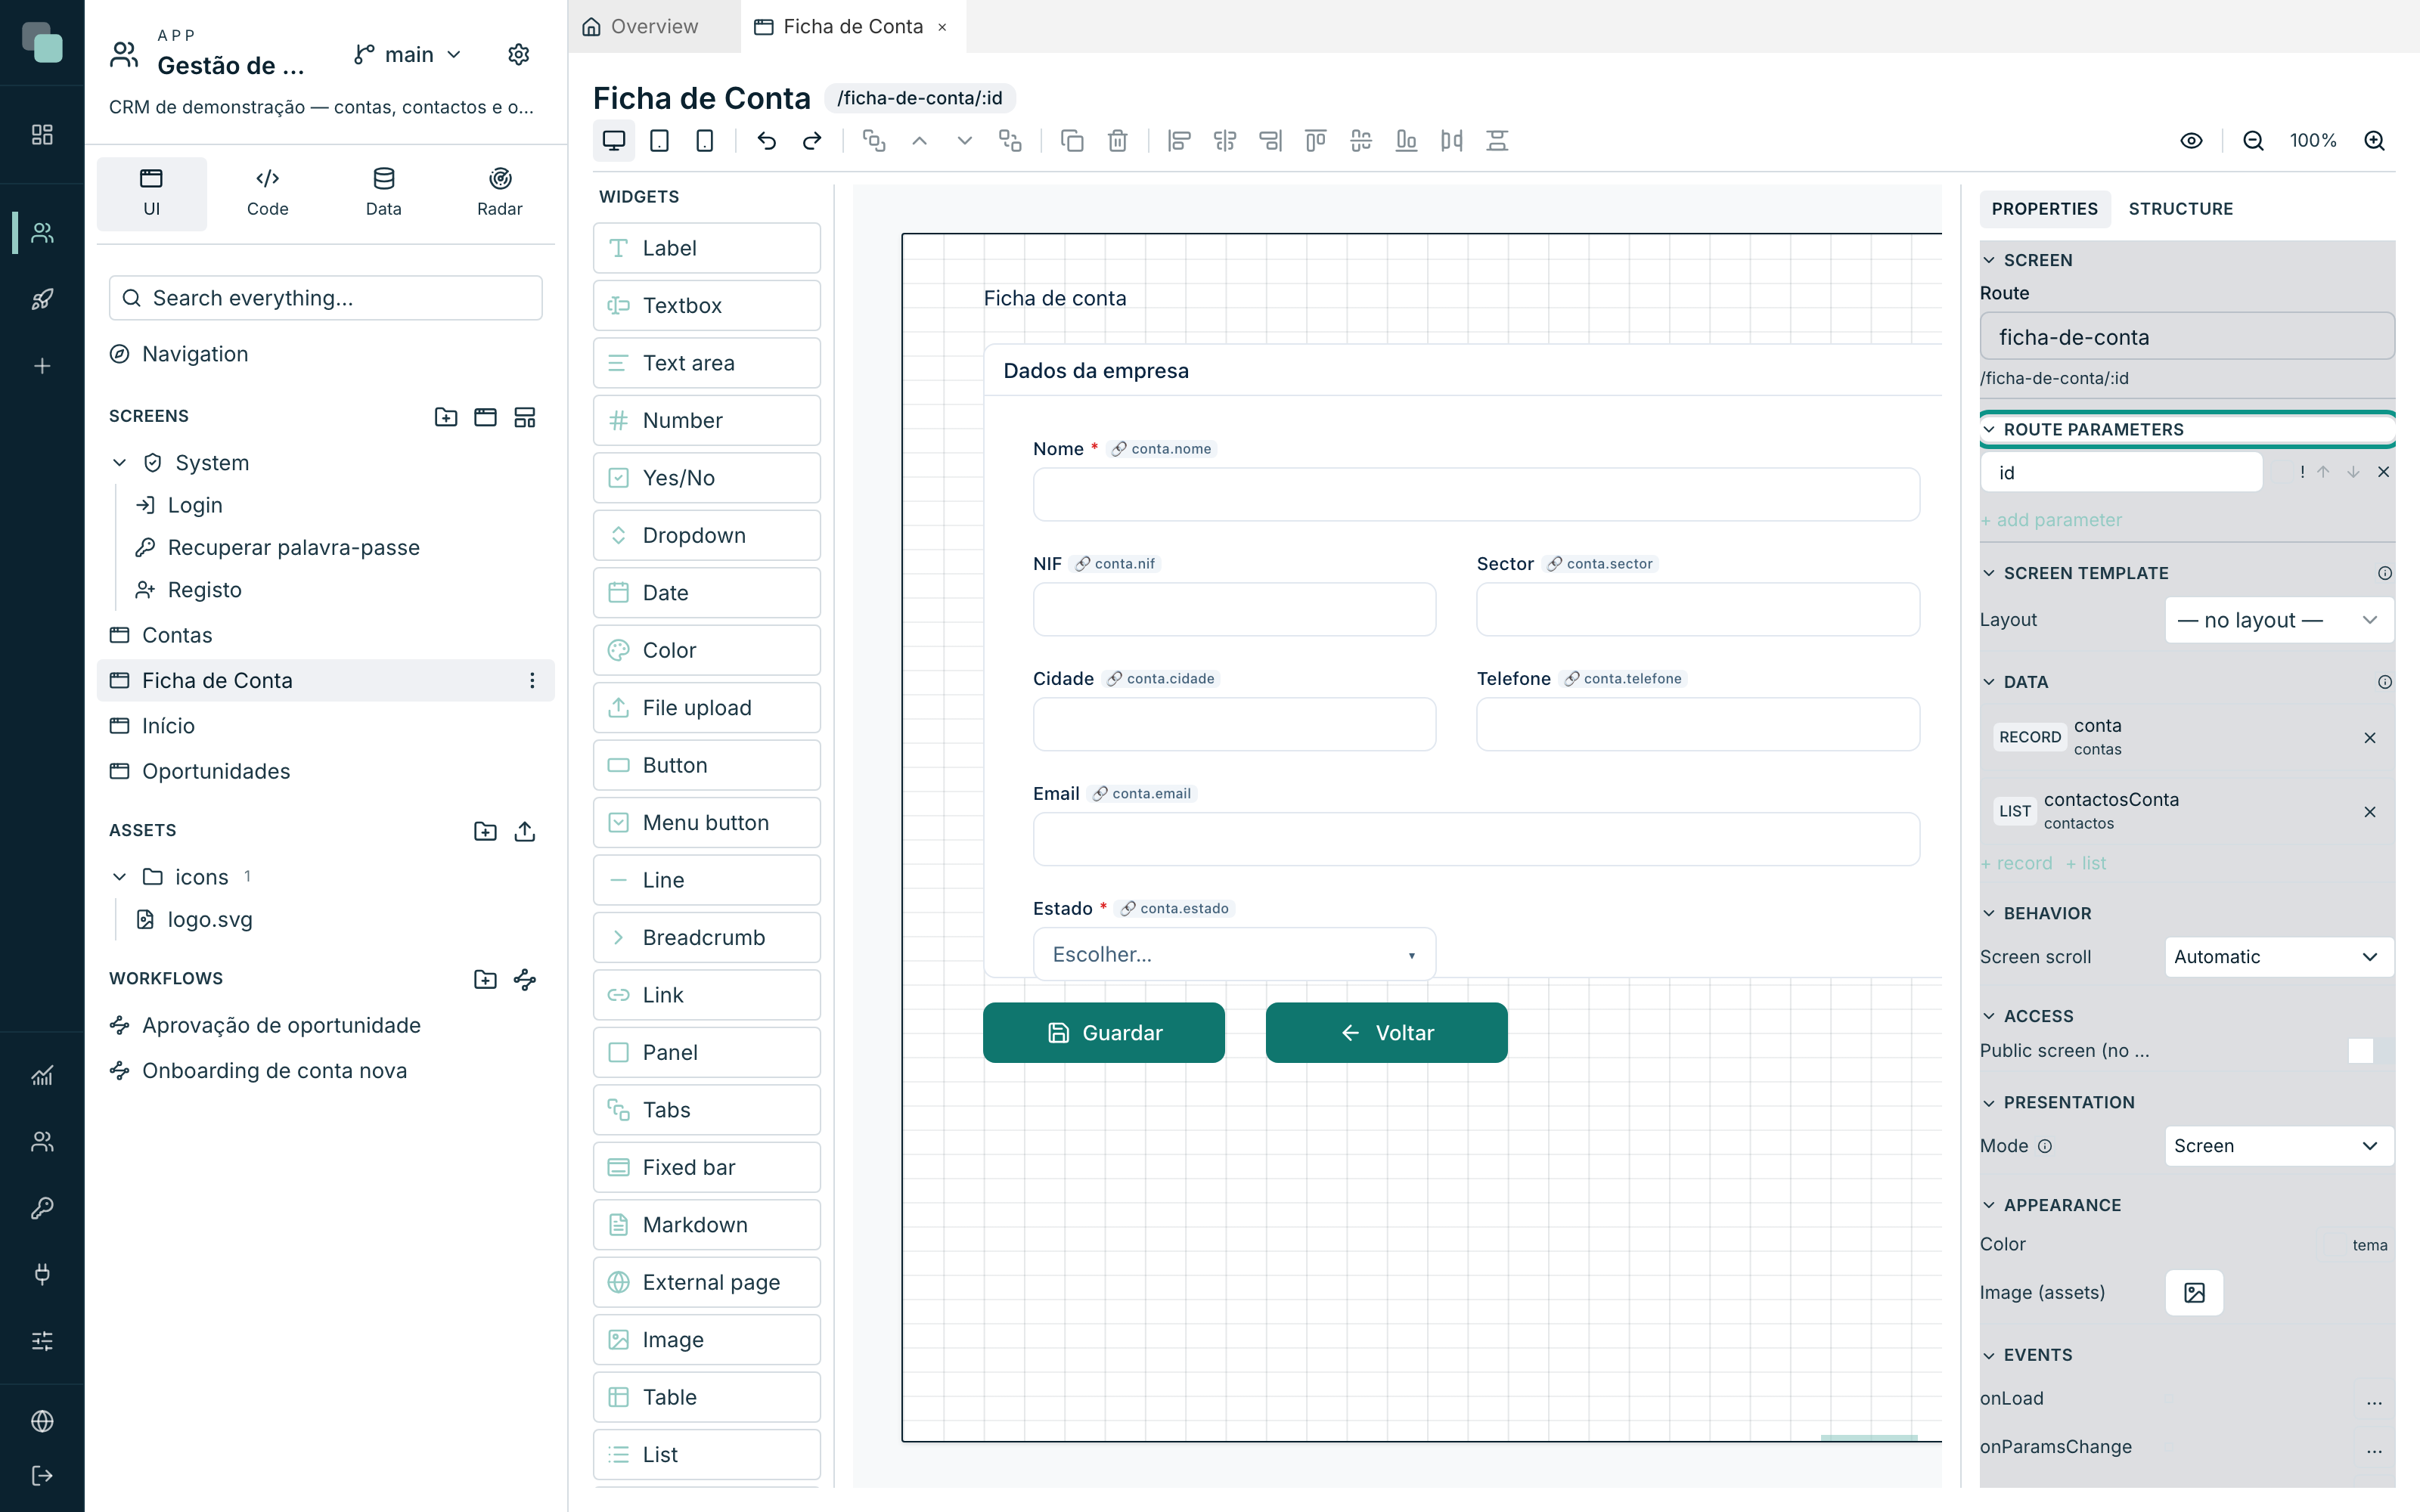
The screen's two datastores
Still with the screen selected, in the Data category:
- Click + record. Click the created datastore to open the Configure datastore modal.
- In Datastore name, type
conta. - In API, choose
contas. - In Which record to load (key), click + key field and build the
condition: field
id, operatoreq, value Param ▸id. - Leave Load automatically on and close with Done.
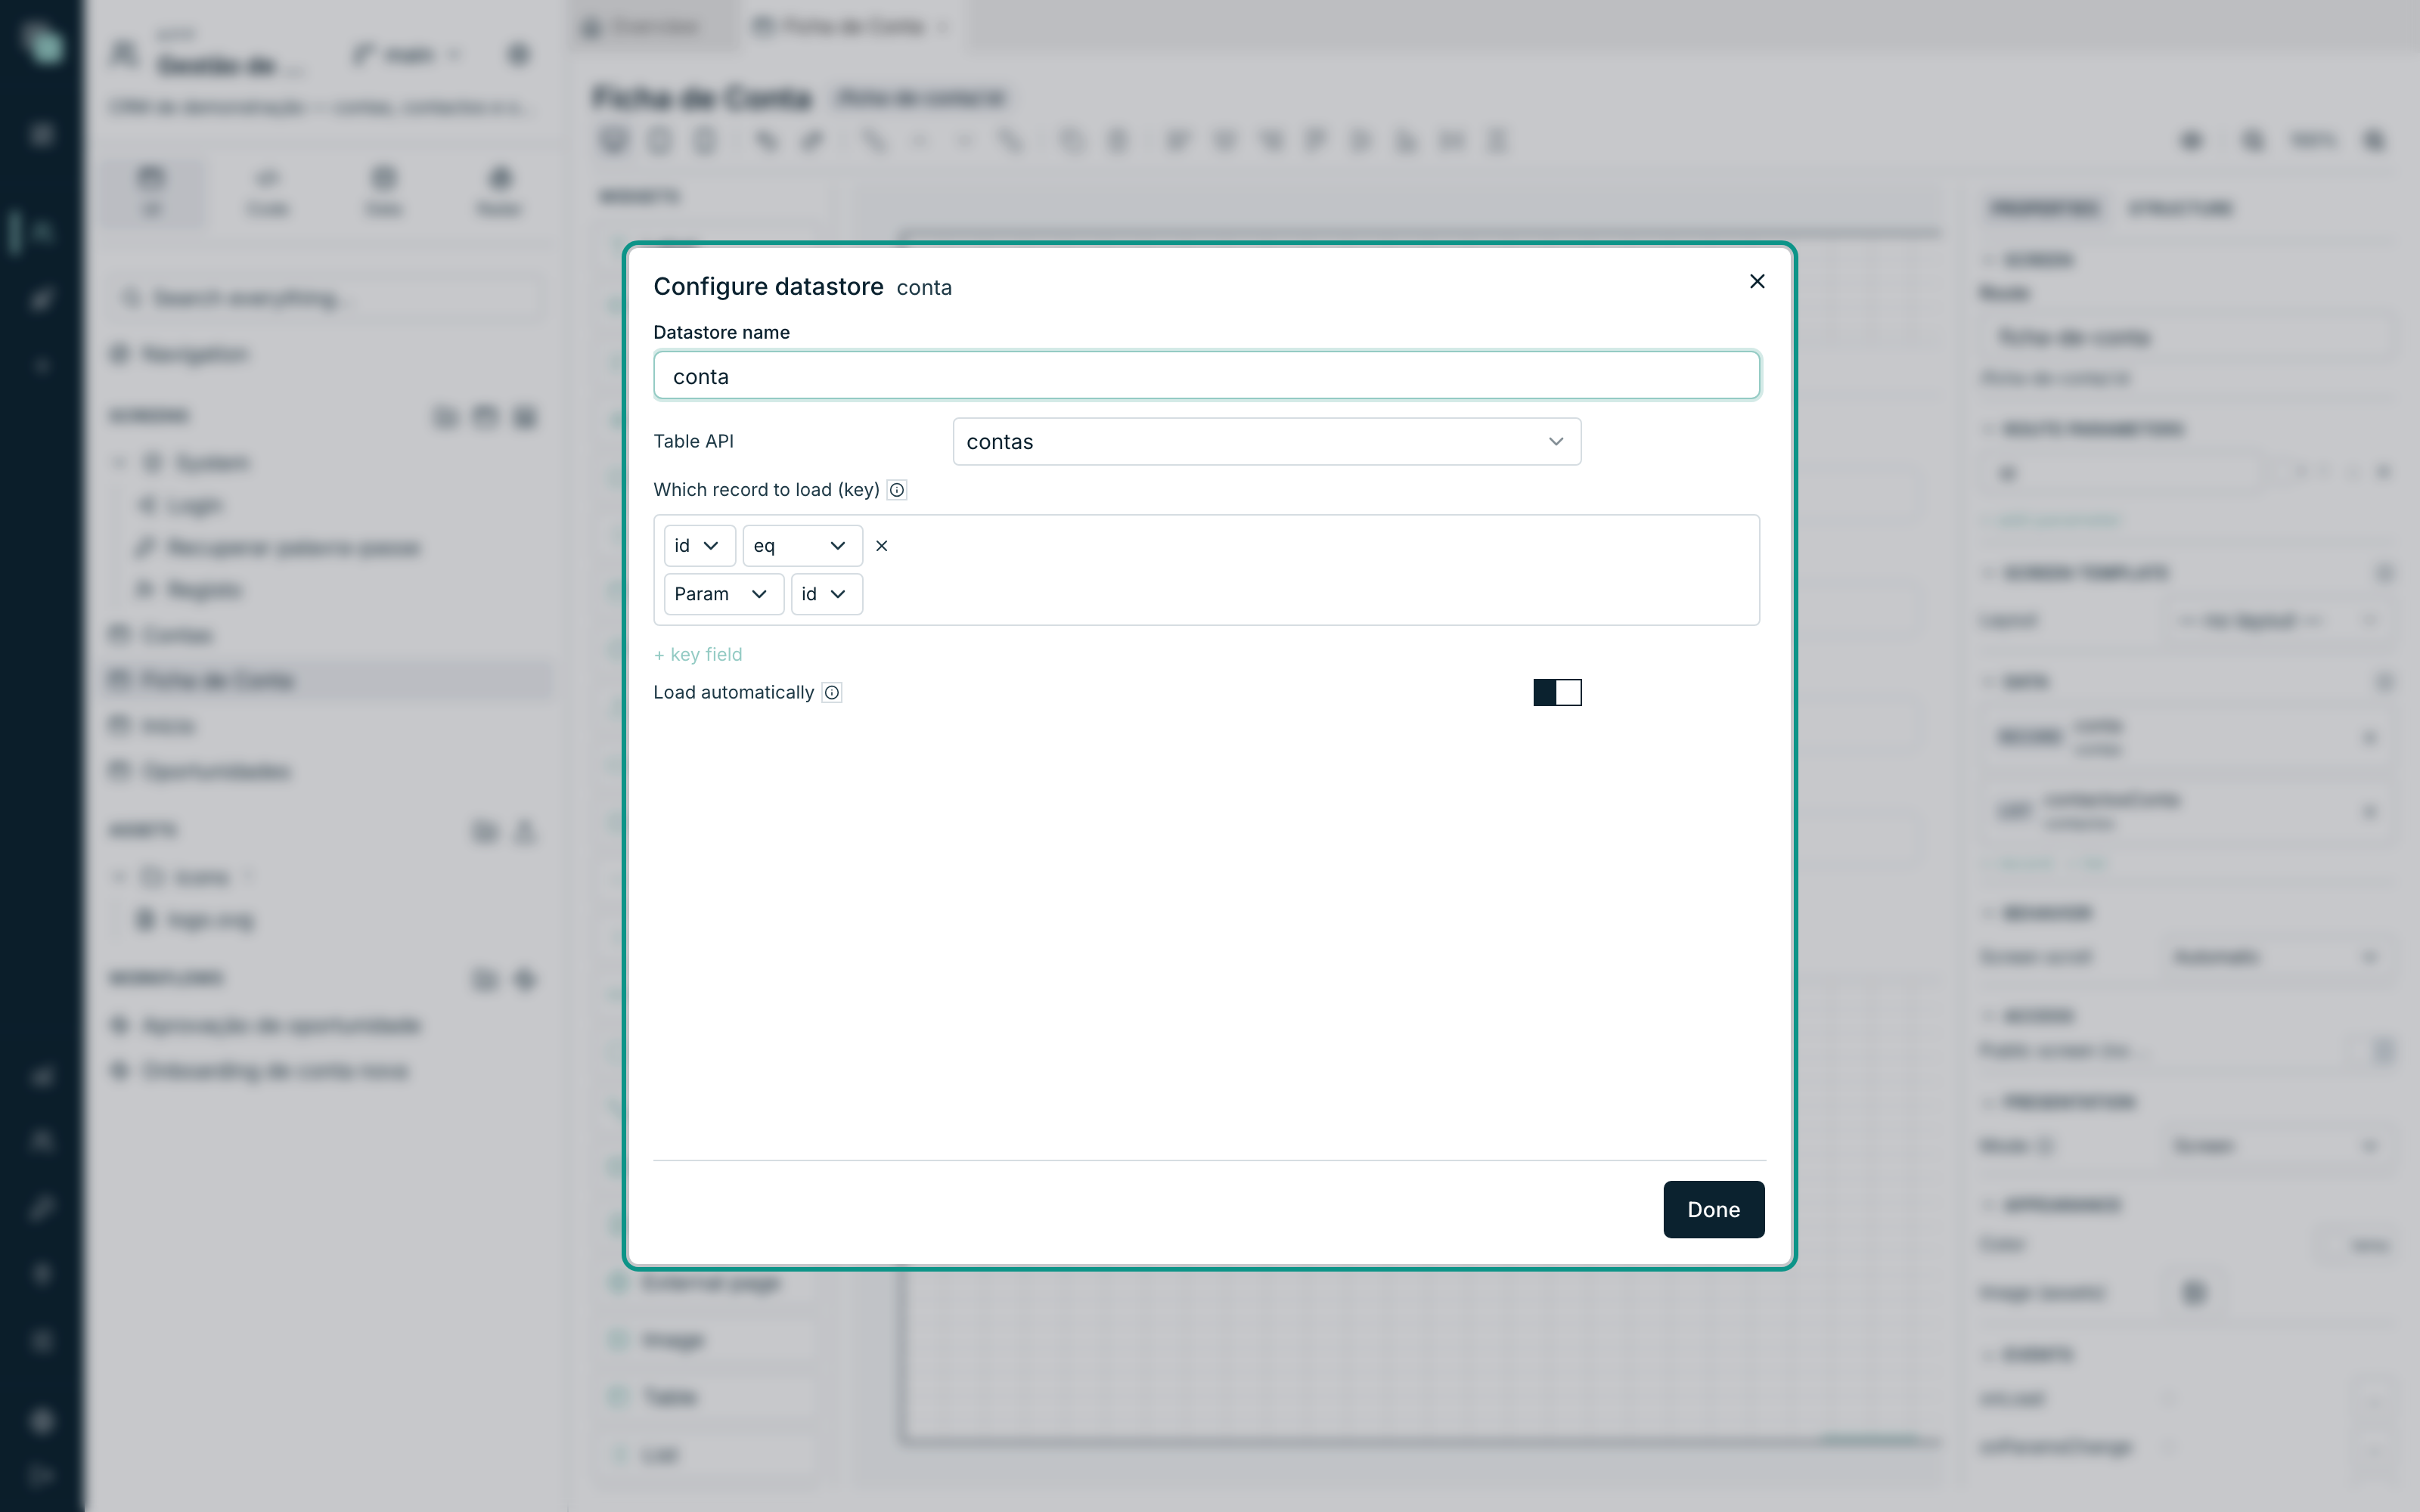
Now the second one, for the account's contacts:
- Click + list and open it.
- Name
contactosConta, APIcontactos. - In Filters (where), add: field
conta_id, operatoreq, value Param ▸id. - Sort by
nomeascending.
Tip
With no conditions on the key, a record datastore loads a new, empty
record. It is that behavior that spares you a second screen for "create
account": opened without id, the form starts blank and saving does an
insert.
The form
- Drag a Panel to the left of the canvas. In the Appearance
category, turn on Show title and type
Dados da empresa. - Drag the Textboxes into the panel — dropping a widget inside a panel
makes it its child. For each one, in the Content category type the
label and, in the Data category, Data binding section, choose the
contadatastore and the field:
| Label | Field | Required |
|---|---|---|
Nome |
nome |
yes |
NIF |
nif |
no |
Sector |
sector |
no |
Cidade |
cidade |
no |
Telefone |
telefone |
no |
Email |
email |
no |
- For the status, use a Dropdown instead of a textbox: label
Estado, bound toconta▸estado, Required on, and static options:
| Value | Label |
|---|---|
ativo |
Ativo |
prospeto |
Prospeto |
inativo |
Inativo |
- Drag a Table to the right of the panel, bound to the
contactosContadatastore, with the columnsnome(Nome),cargo(Cargo) andtelefone(Telefone), and the titleContactos desta conta.
Saving and going back
Two Buttons below the panel, each with its onClick event:
Save (icon save):
const ok = await keplin.data.store("conta").save();
if (ok) {
  keplin.ui.toast("Account saved");
  keplin.nav.go("/contas");
}
Back (icon arrow-left):
keplin.nav.go("/contas");
save() validates first — required fields and rules — and only saves if
everything passes; it returns true when it saved. That is why the notice
and the navigation live inside the if.
The Oportunidades screen — the kanban board
Open the Oportunidades screen.
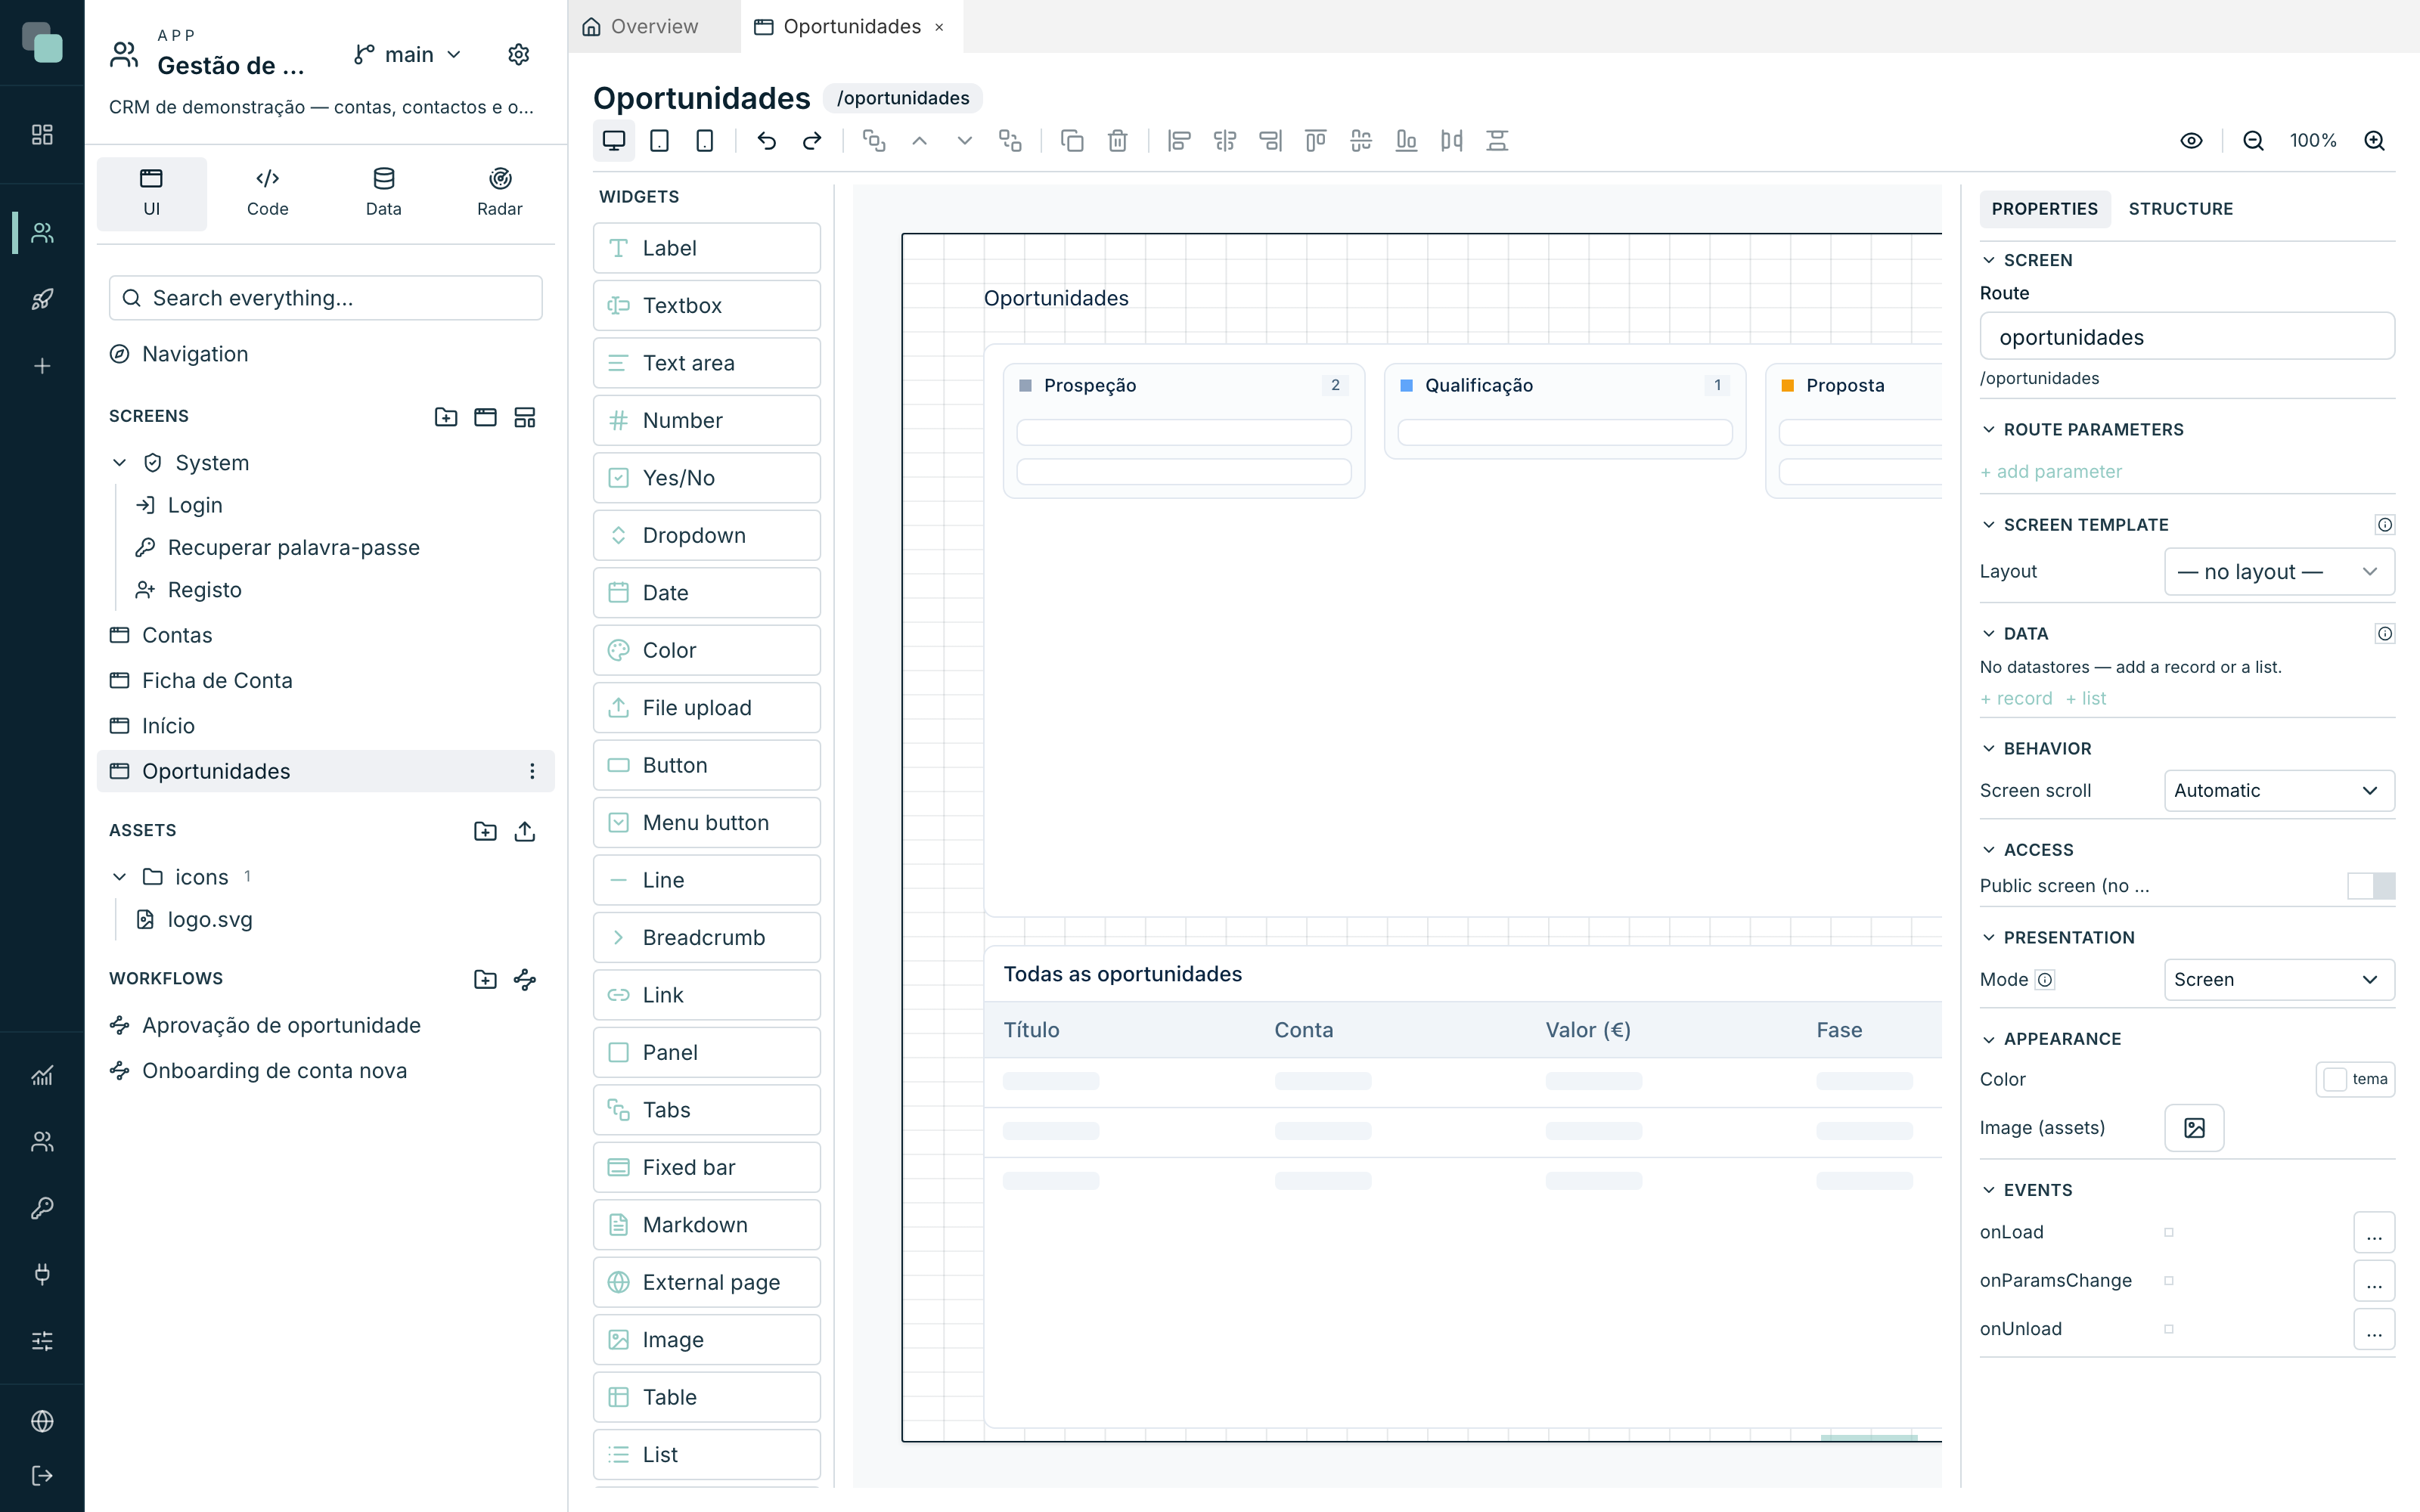
- A Label at the top, with the text
Oportunidades. - Drag a Kanban below it, across the full width.
- In the Data category, create the list datastore on the
oportunidadesAPI (no filter — the board shows everything), with Per page at 50. - In Status field (column), choose
fase. It is this field that says which column each card lives in — and it is what gets written when someone drags a card. - In Columns source, choose Static and use + add column six times:
| Value | Label | Color |
|---|---|---|
prospecao |
Prospeção |
grey |
qualificacao |
Qualificação |
blue |
proposta |
Proposta |
amber |
negociacao |
Negociação |
purple |
fechada_ganha |
Ganha |
green |
fechada_perdida |
Perdida |
red |
- Turn on Allow dragging cards and Card count; leave Uncategorized column off.
- In Card template, say what each card shows:
| Field | Role |
|---|---|
titulo |
Title |
conta.nome |
Caption |
valor |
Value |
- Below the board, add a Table with the title
Todas as oportunidades, bound to a list datastore onoportunidades, with the columnstitulo,conta.nome,valor,fase,data_fechoandresponsavel.
Note
Dragging a card between columns saves the new value of fase on the
record, through the table API — so dragging only works if the datastore
has a primary key and the API has the Update action on.
Seeing the result
There is no save button on the screens: changes save themselves, and the top right corner says where they stand (Saving…, Saved).
To see the screen for real, click Preview: the platform saves whatever is pending and opens the screen in the real app, in a new browser tab. You go through the login like any user — the accounts that sign in to the app are created in the Publish and use stage, and until then you can use whichever one already exists.
Why doesn't…?
- Why doesn't my API appear in the list of datastores? The API is a draft. Open it and turn on Published.
- Why does an empty form always open? The record datastore has no
conditions in Which record to load (key), or the
idparameter is not arriving on the route. Confirm that the route is/ficha-de-conta/:id. - Why can't I see the
conta.nomecolumn? The navigator is not among the table API's Included fields — or the datastore was configured before you checked it. Reopen Configure datastore and pick the API again to refresh the portrait of the fields. - Why won't the kanban let me drag? The datastore is missing the primary key, or the table API the Update action.
- Why is the chart empty? The Category field or the Value fields are not chosen — or the datastore's filter lets no row through.
The screens exist, but there is still no way to jump between them. Next stage: navigation and theme.