Writing a test
Create a test, drag steps from the palette, choose targets by dragging widgets, check API responses, and use variables.
A test is written in its own tab: the step palette on the left, the list of steps in the middle, and on the right what you drag onto the steps (the screen's widgets, the screens and the response of the last API call).
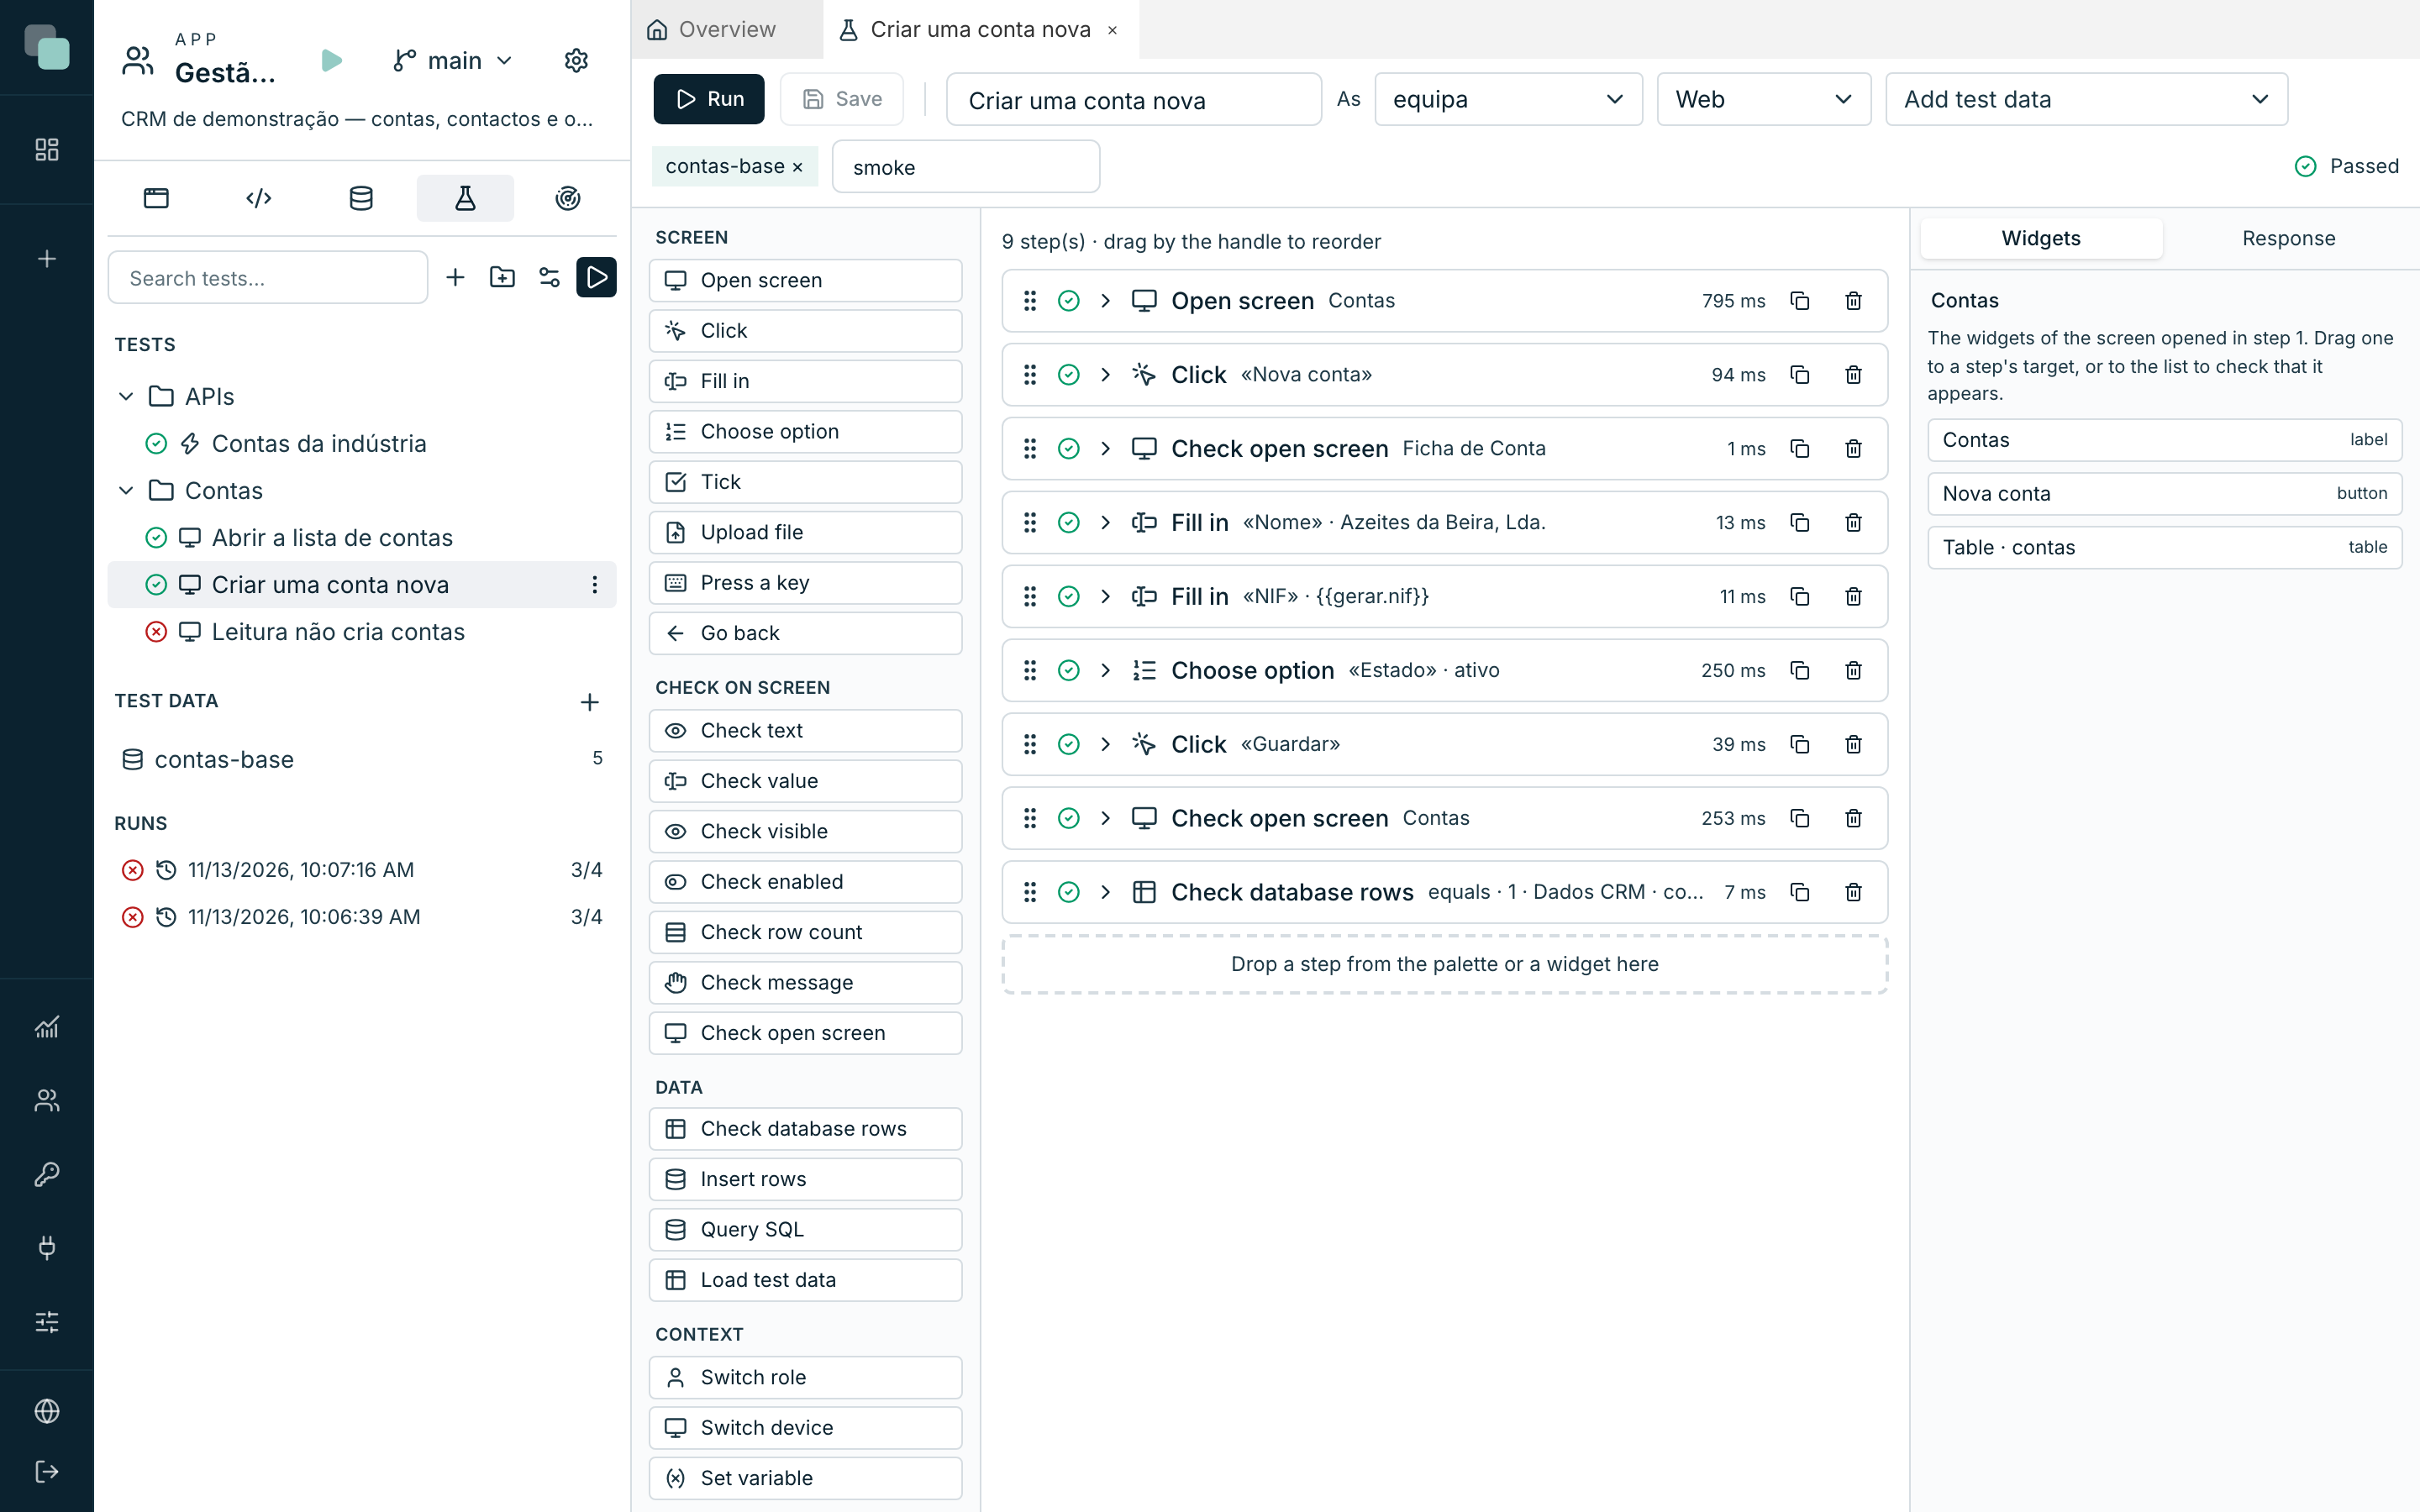
Create a test
- In the Tests minitab, click New test.
- Choose the Type: Screen (open, click, fill in, check), API (call and check the response), Script (run and check the result) or Workflow (start, decide tasks, follow).
- Choose what to test, in a tree list with search: the screen, the API and the Operation, the script or the workflow.
- The Name comes from what you chose. Change it, if you want.
- The proposed Folder is the one of the tests of the same type. Choose another, if you want.
- Click Create. The test starts with the steps and the check, and a test can then mix steps of any type.
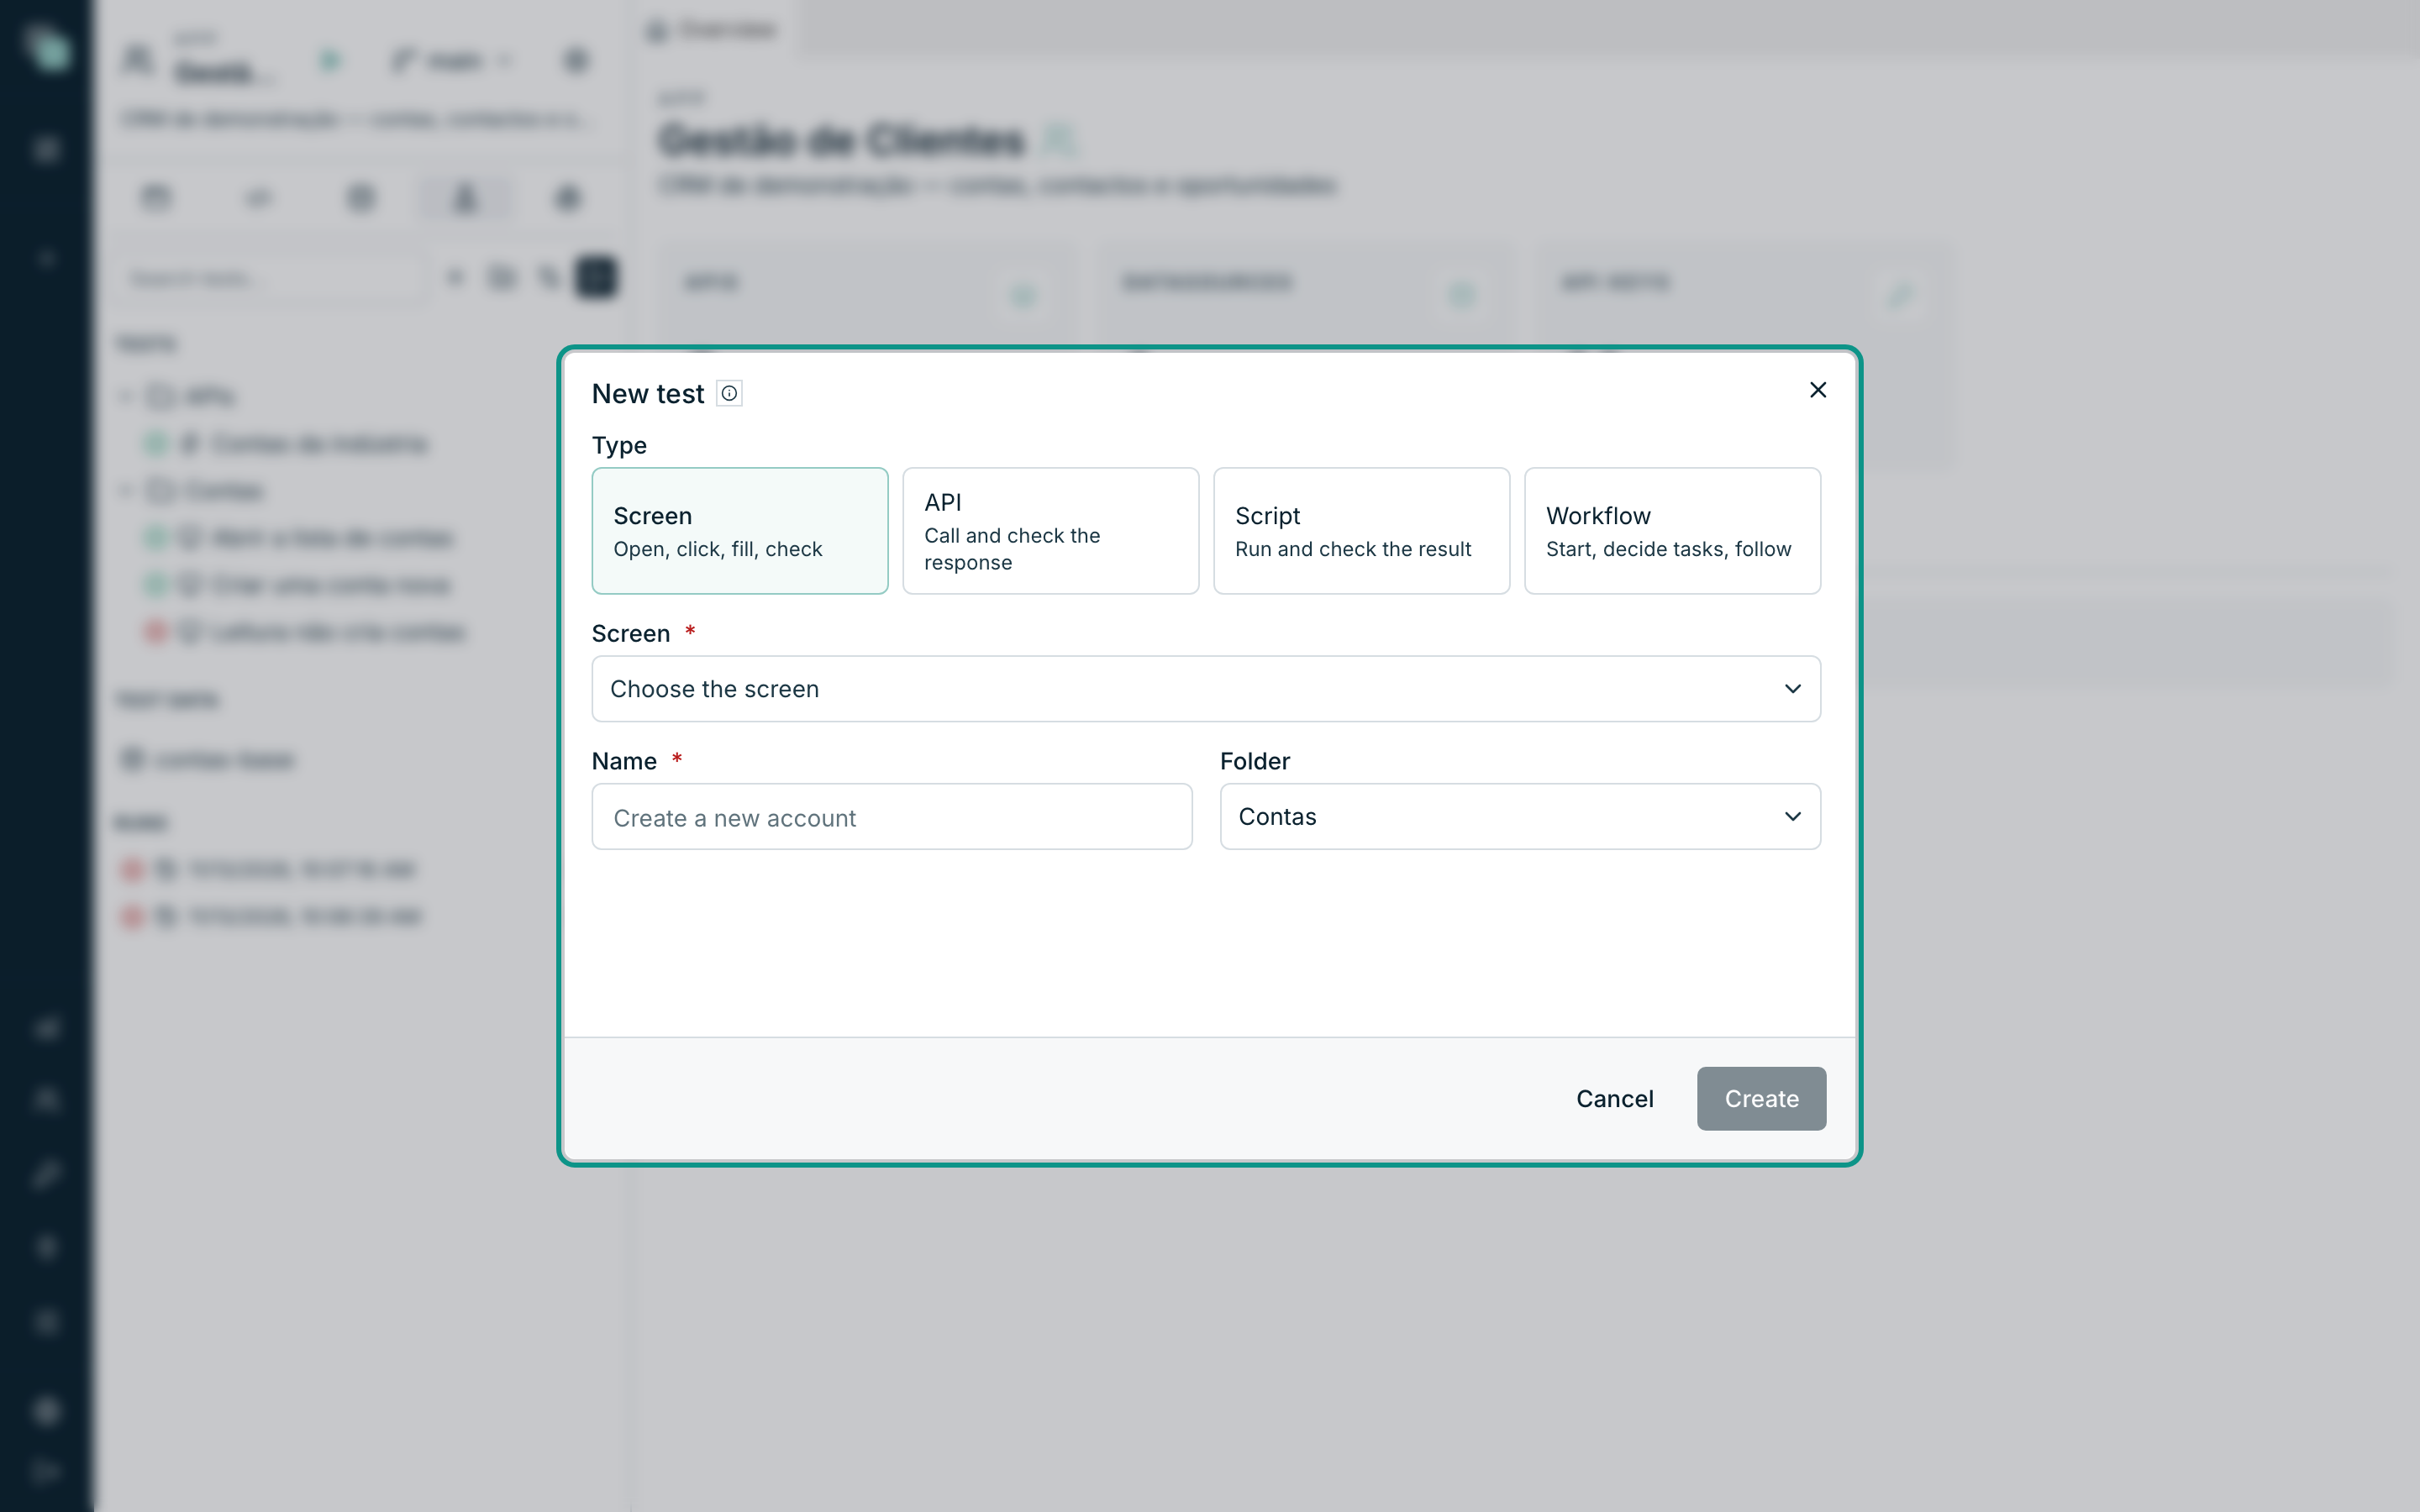
Add steps
- Drag a step from the palette to the exact place in the list where you want it. A line shows where it will go.
- Or click a step in the palette: it goes to the end of the list.
- To reorder, drag a step by its handle (the six dots on the left).
- To edit, click the step: its fields open.
- Duplicate step and Remove are on the right of each step.
- A Group gathers steps; steps can be dragged into it.
The test bar also has:
- As: the role the test starts with. The test signs in to the app with the account selected for that role in the test environment. Visitor (no session) only sees what is public.
- The device: Web, Tablet or Mobile.
- Add test data: the sets the test loads before the first step.
- Tags (commas), used by the merge gate.
Choose the target of a screen step
Screen steps (Click, Fill in, Check text…) act on a widget. The target is the widget by its identifier, so the test does not break when the widget moves or changes colour.
There are two ways to choose the target:
- in the step's Target field, pick the widget from the list;
- or, in the right panel, Widgets tab, drag the widget onto the step's Target field.
Dragging a widget onto the step list (outside a step) creates a Check visible step for it.
In a table, the target can be a row: choose the column and type the
value that identifies it, for example the nome column and the value
«Lusitânia Vinhos, Lda.». In Text inside the widget, an element is chosen
by the text it shows.
The other fields of the steps are also chosen from what exists: the screens, the APIs, the scripts, the workflows and the tests, the variable and the response path, the table and the columns, the process step, the decision, the file and the key. The rows to insert are filled in a grid, and the conditions are built with the condition builder.
The steps
| Group | Steps |
|---|---|
| Screen | Open screen, Click, Fill in, Choose option, Tick, Upload file, Press a key, Go back |
| Check on screen | Check text, Check value, Check visible, Check enabled, Check row count, Check message, Check open screen |
| APIs and scripts | Call API, Run script |
| Check the result | Check response, Check error, Check duration, Check log |
| Data | Check database rows, Insert rows, Query SQL, Load test data |
| Workflows | Start workflow, Check task, Complete task, Advance time, Check step, Check notification |
| Context | Switch role, Switch device, Set variable |
| Control | Group, Use another test |
Screen checks wait up to the step's time limit for the screen to be as expected: screens load data bit by bit, and there are no pause steps.
The check operators are those of the condition builder: equals, differs from, contains, does not contain, greater than, at least, less than, at most, is empty, is not empty, is one of and matches.
Test an API
- Add the Call API step.
- Choose the API and the Operation. Depending on the operation, choose the Fields to return, the Filter (with the condition builder), the Values to save or the record's Key. The GraphQL operation is built at run time, as the runtime calls it.
- In Save as, give the response a name, for example
resposta. - Run the test once. In the right panel, Response tab, the response appears as a tree.
- Drag a field from the response onto the list: a Check response step is created with that path and the value it had.
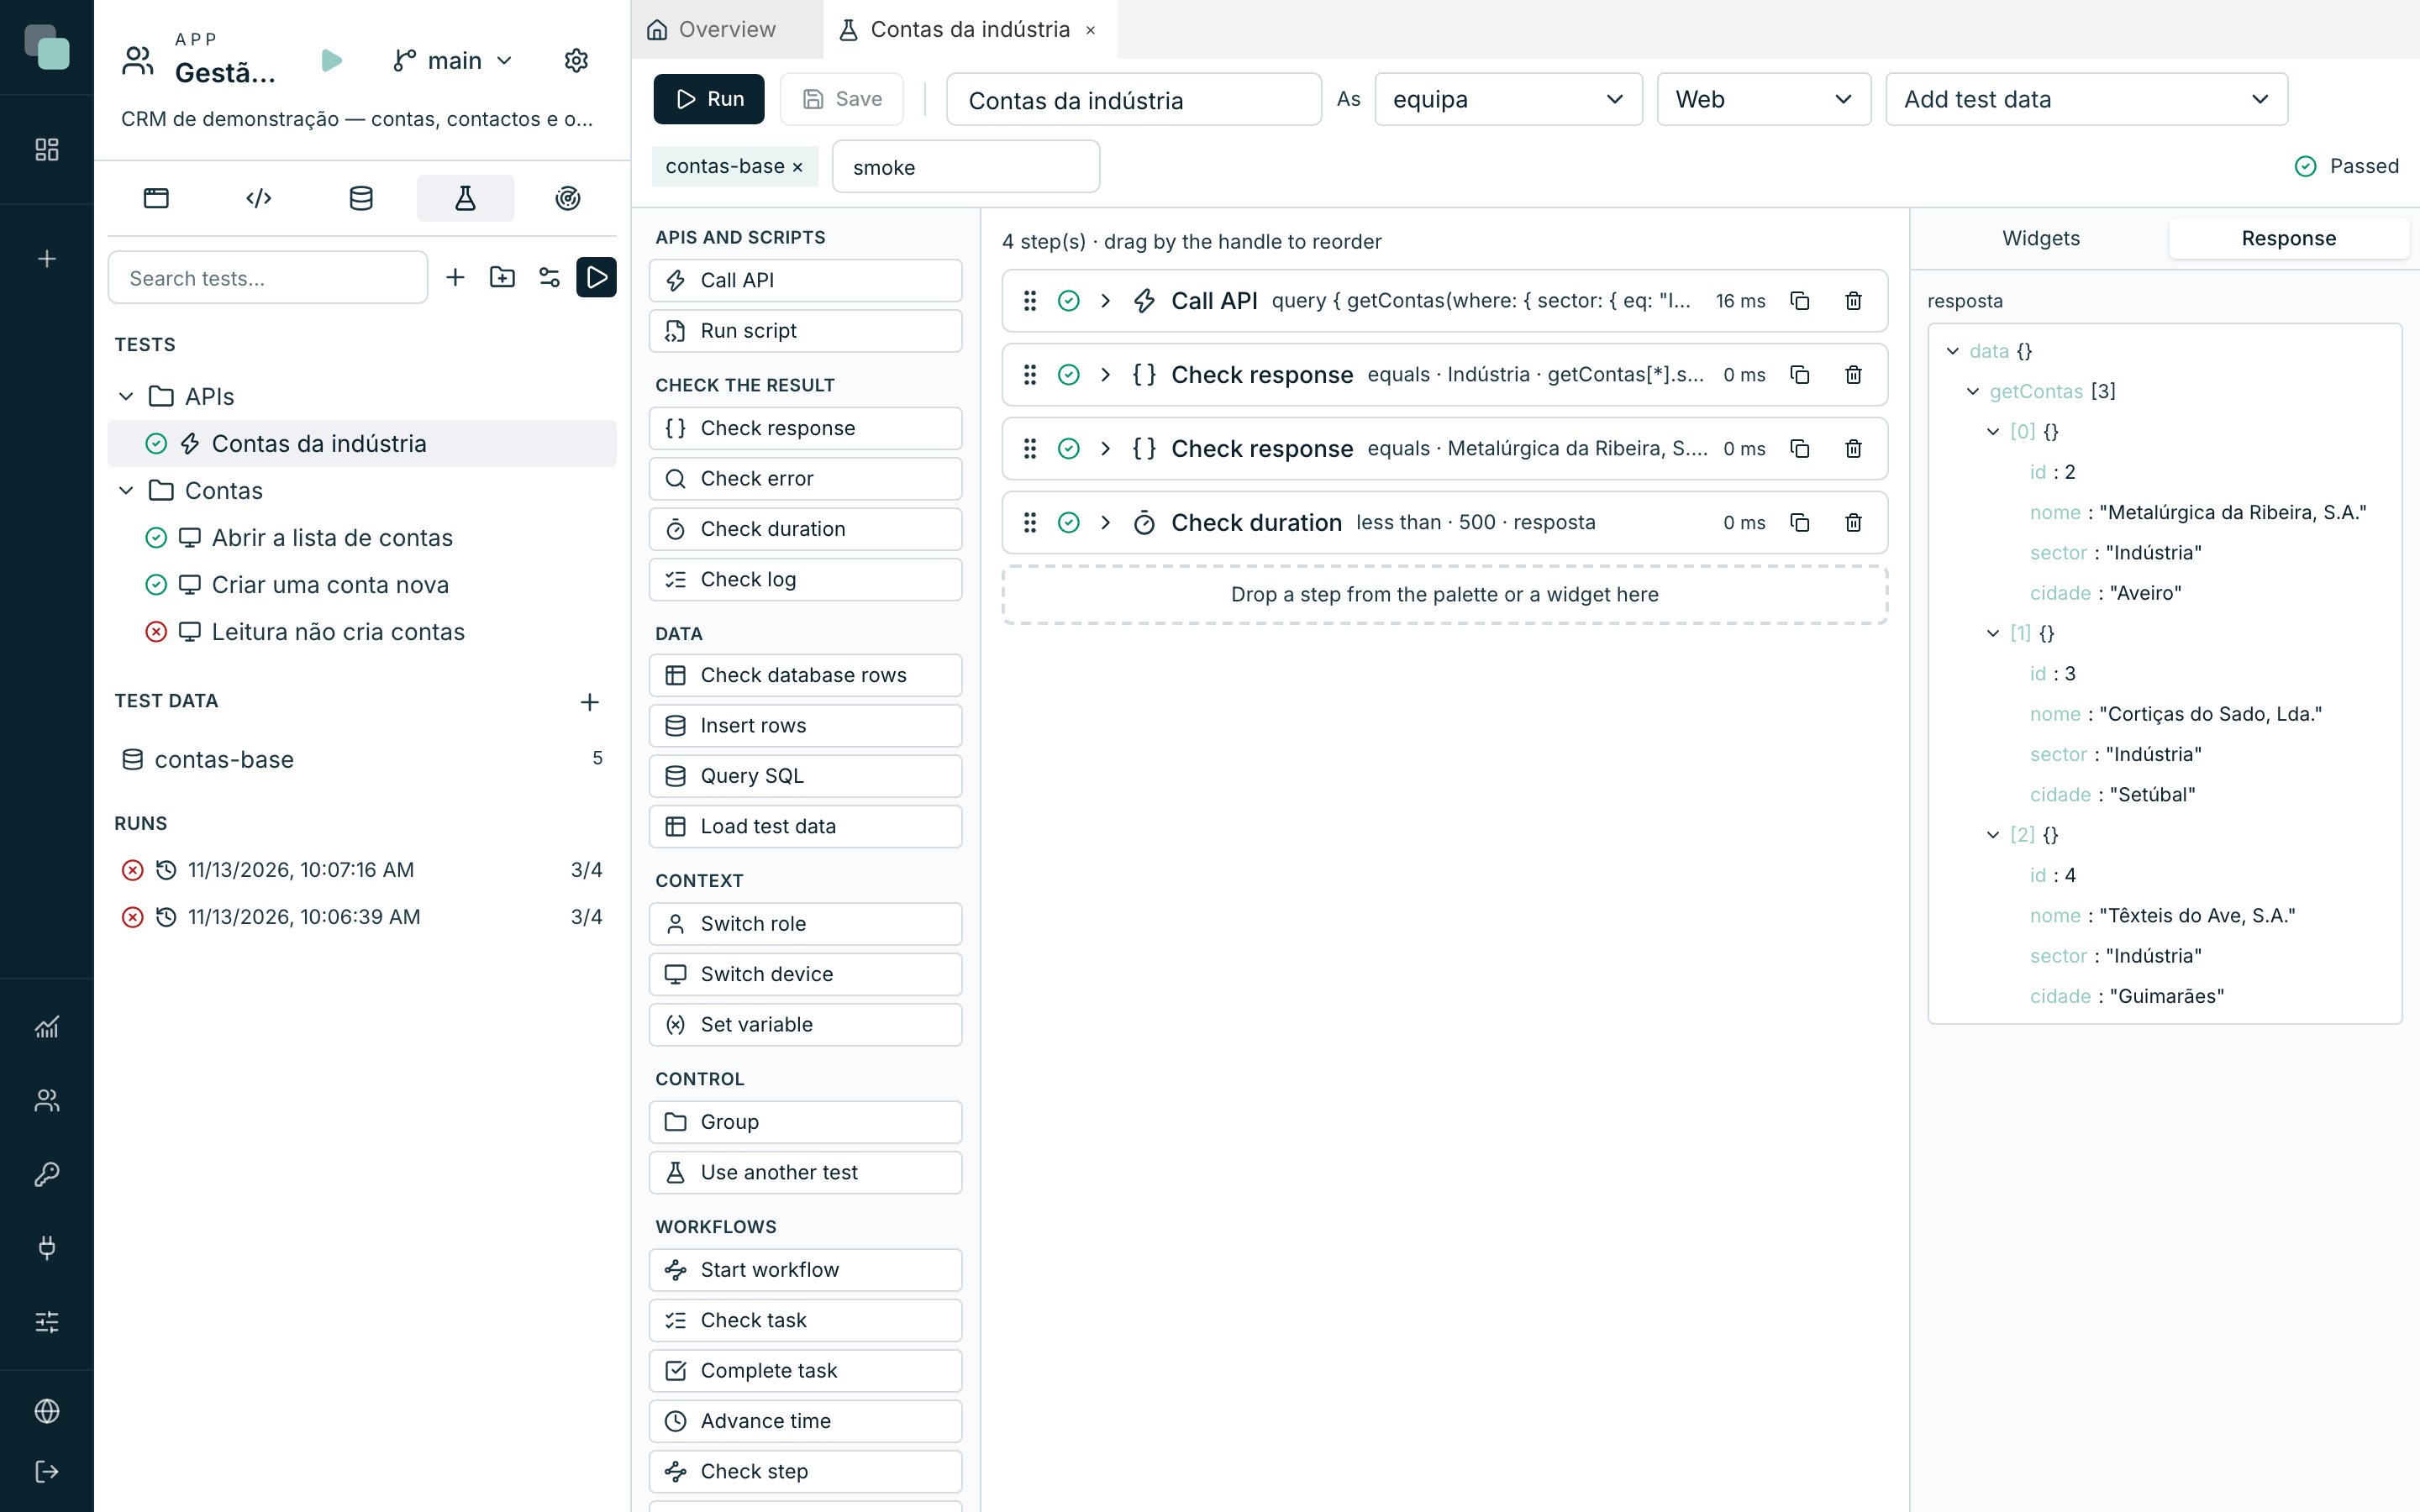
Paths are written like data.getContas[0].nome. With [*], the check
applies to every row: data.getContas[*].sector equals "Indústria" only
passes if every account is in Industry.
Variables
Step values accept variables between double braces:
| Variable | Value |
|---|---|
{{nome}} |
What an earlier step saved in Save as under that name. |
{{resposta.data.getContas[0].id}} |
A path inside what was saved. |
{{run.short}} |
A code unique to each run, for values that cannot repeat. |
{{hoje}} and {{agora}} |
Today's date and the current moment. |
{{gerar.nif}}, {{gerar.email}}, {{gerar.numero}}, {{gerar.texto}} |
Valid made-up values, with no personal data. |
Save and run
Save stores the test. Run saves the changes and runs the test: each step shows how it went, and the one that failed shows the Expected and Actual values. See Running and reading results.
Frequently asked questions
The test passed, but the check step was empty. A contains check with an empty value always passes. Confirm the Value field of each check.
Can I reuse steps in another test? Yes: the Use another test step runs another test's steps at that point, for example a "Sign in as management" test.